


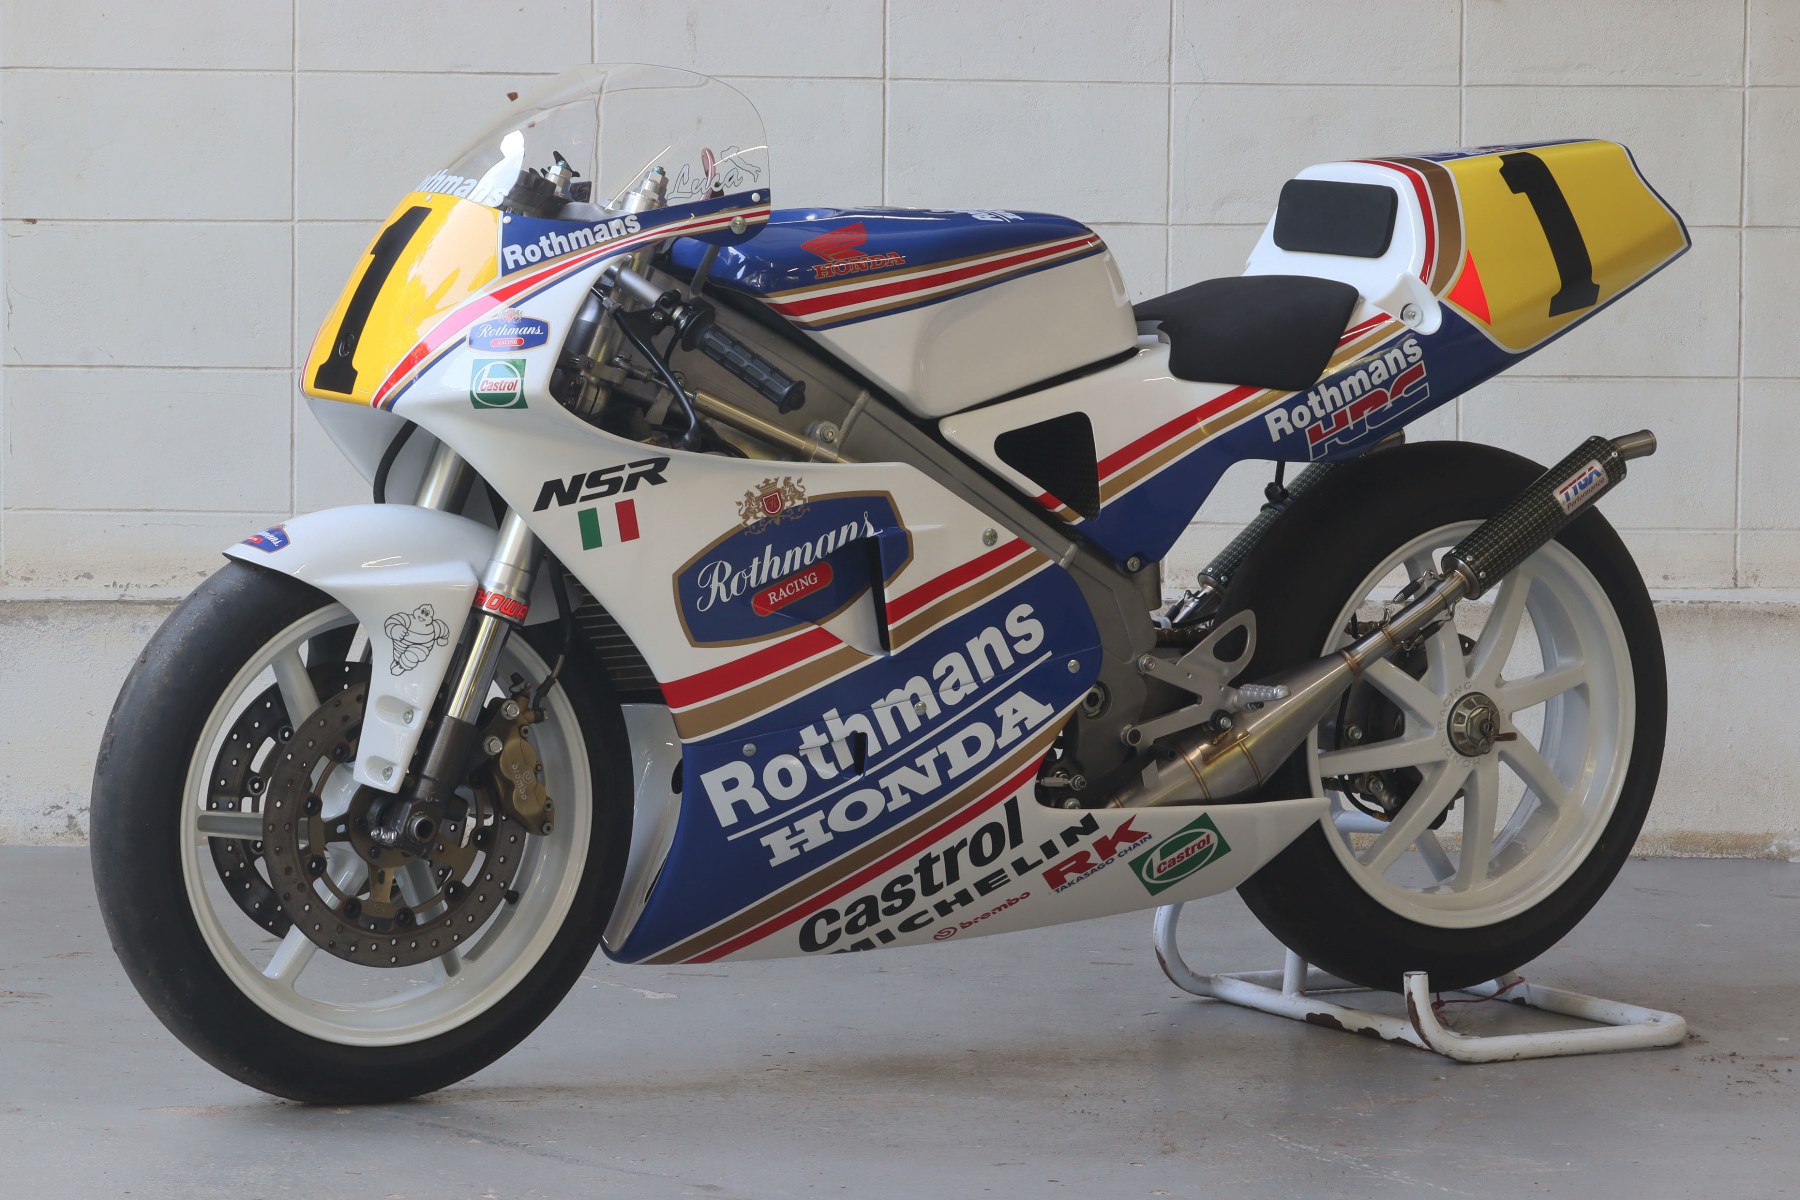
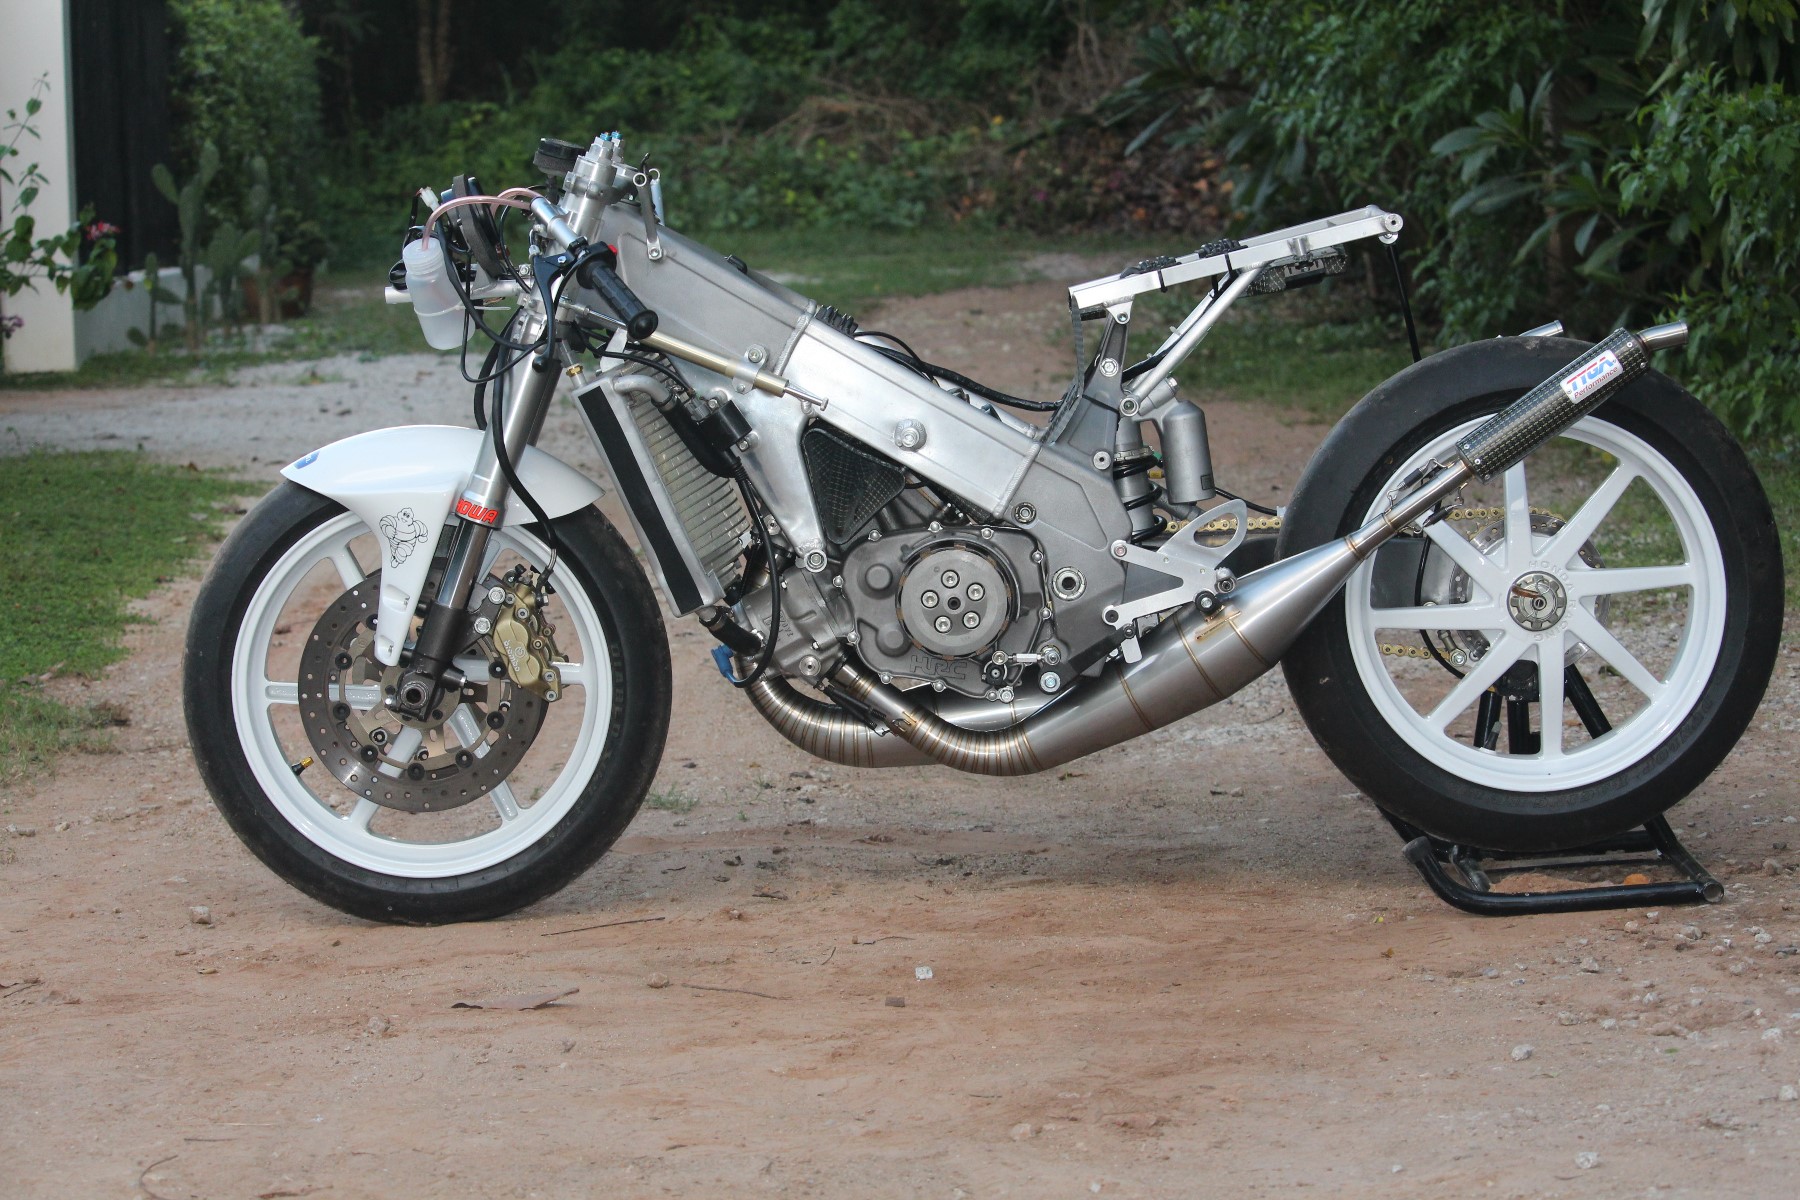
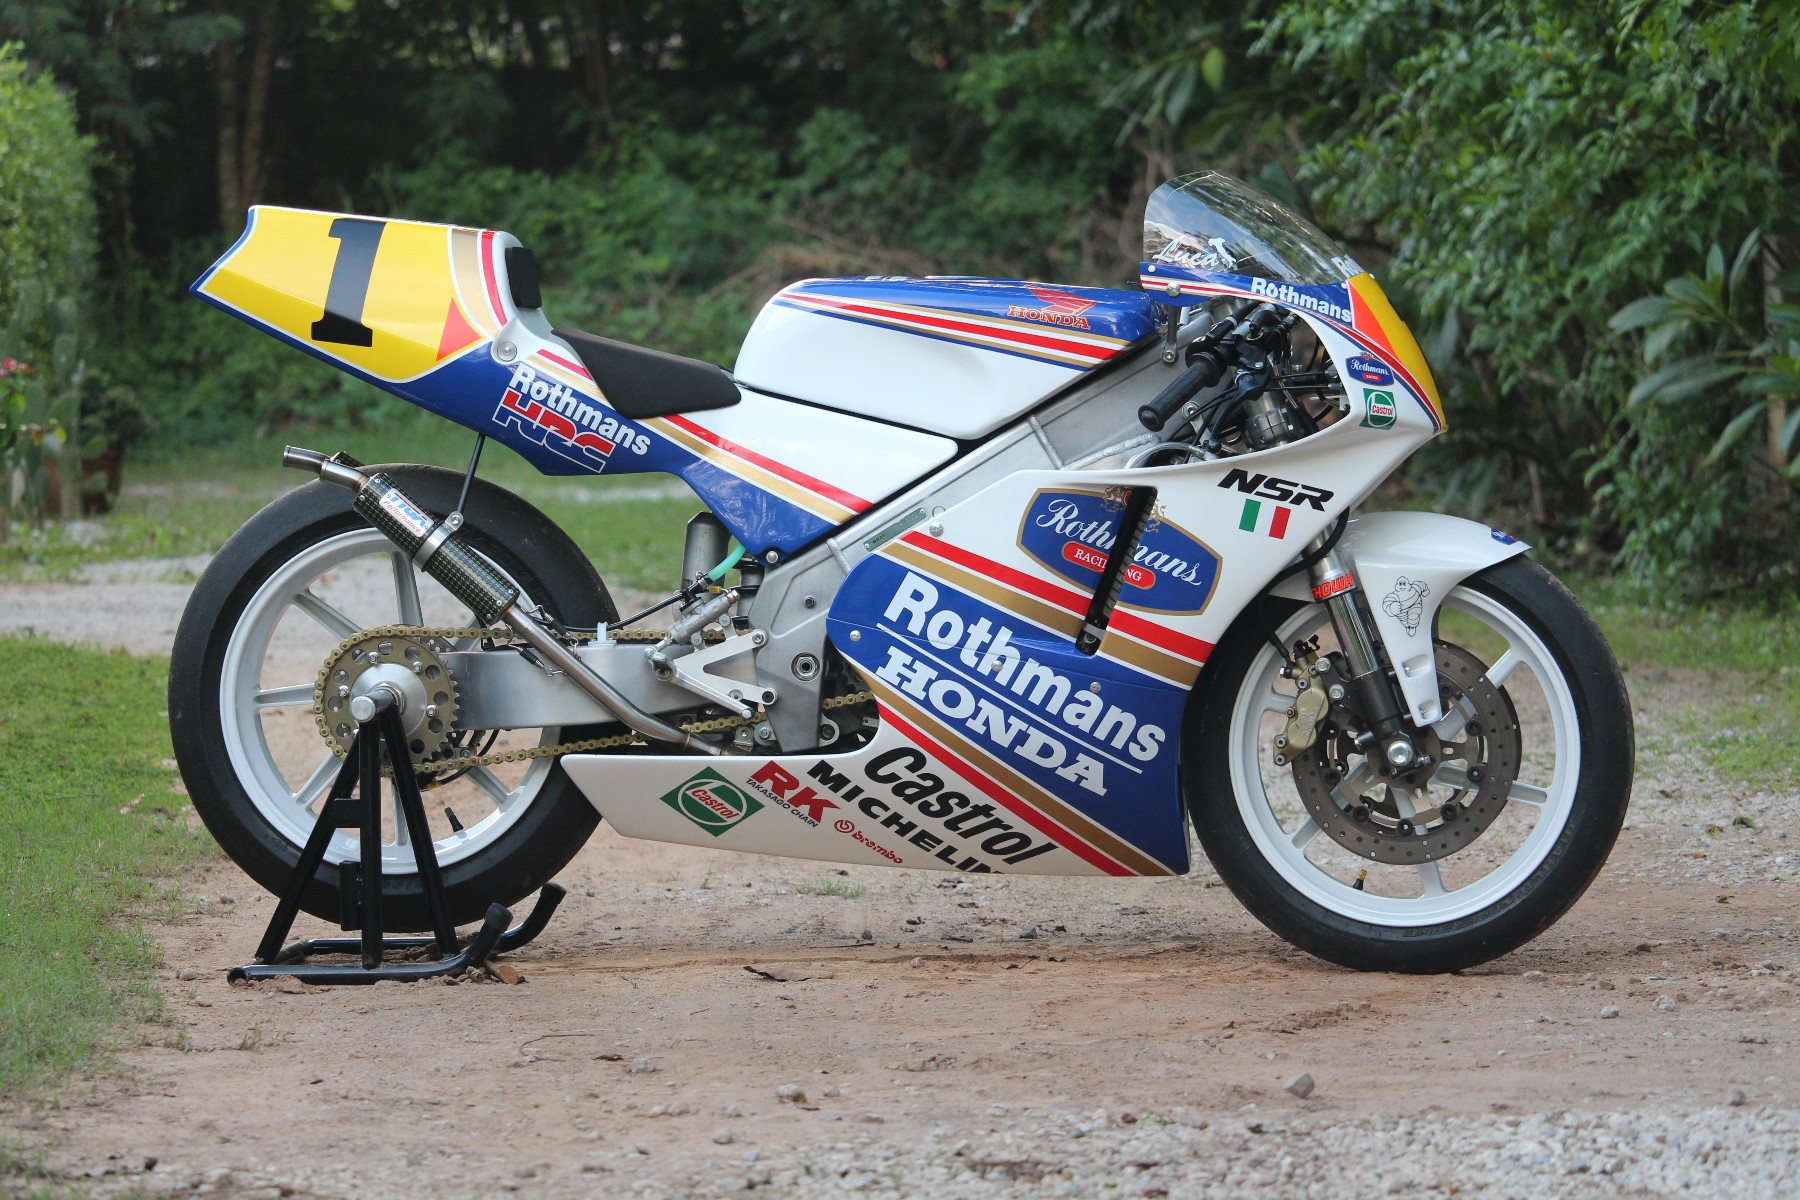
Honda RS250 NX5 Cadalora Tribute
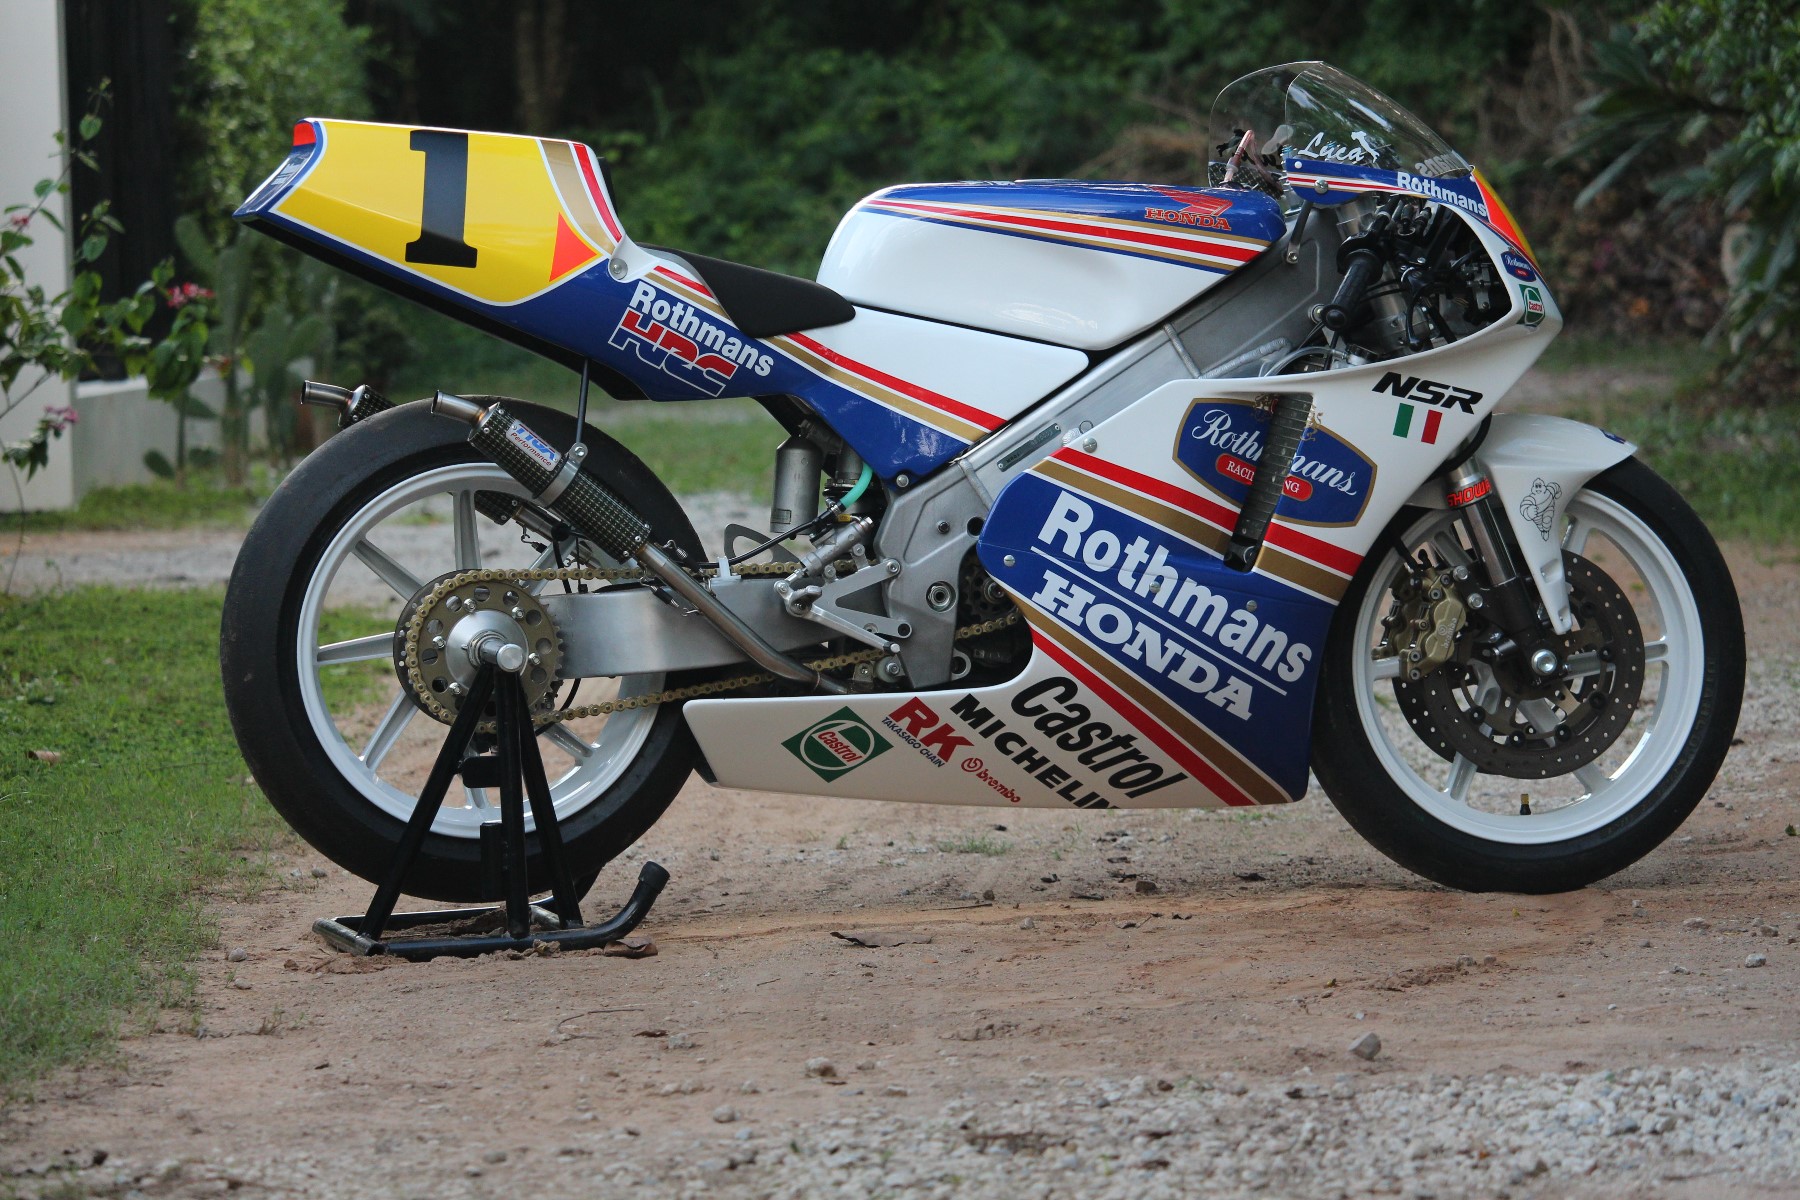
Honda RS250 NX5 Luca Cadalora Tribute
October 2024
Text and Photos by © TYGA-Performance
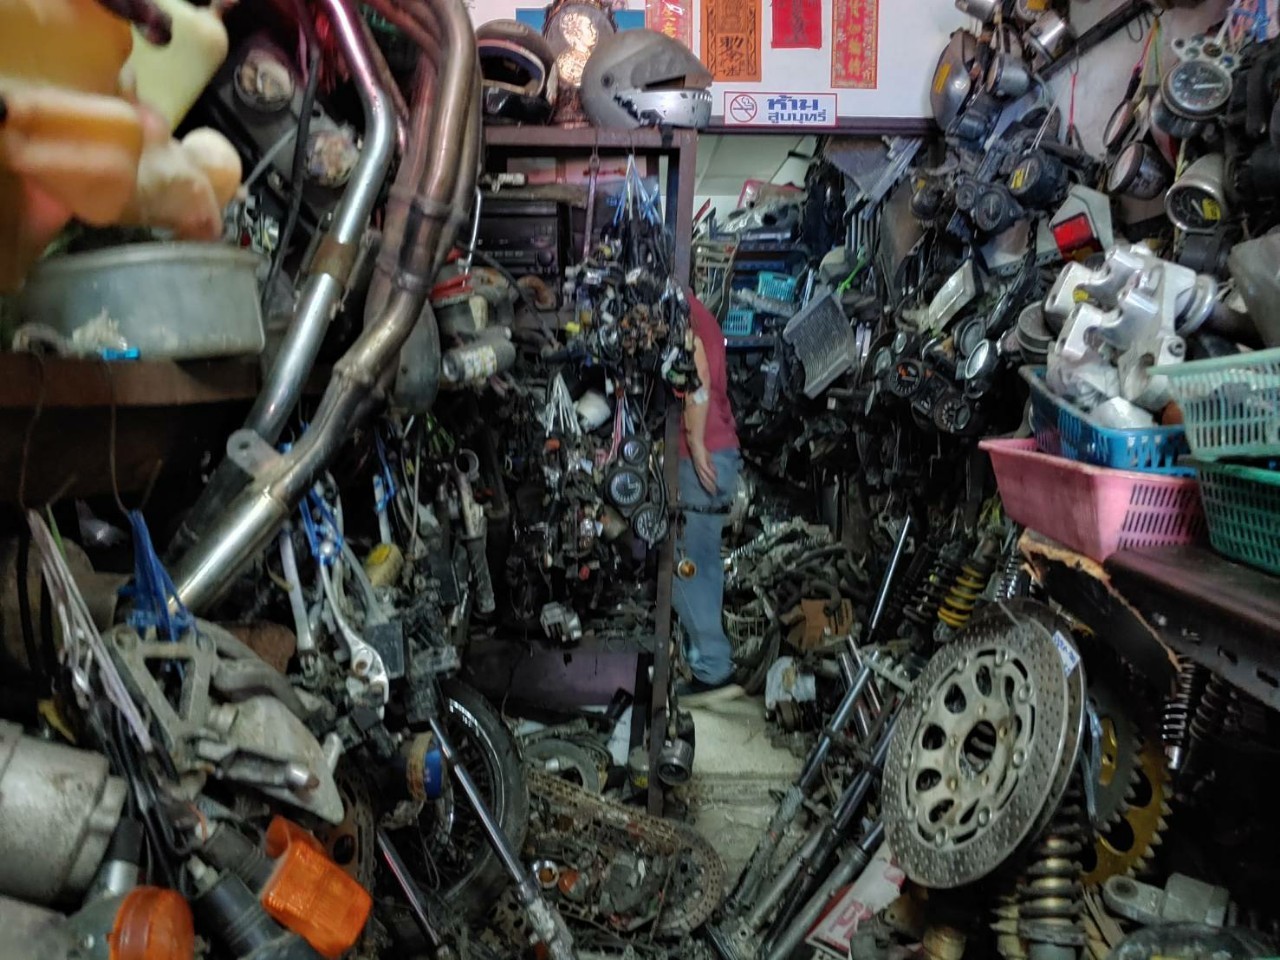
This GP bike was literally exhumed from the dead; let me explain more. It was around 16 years ago and I was on one of my foraging missions in Bangkok. I was specifically looking for some CBR600RR master cylinders for another project and I knew just the place to look. There was an old Chinese Thai guy who has a single shop house jammed to the rafters with bike parts. He used to live upstairs in this premises until eventually his bike part hoarding got too much even for him. Eventually, he was forced to evacuate and turn the whole place over to his spares. I mean, it just took over; fairings, forks, brakes, instruments, harnesses cables and wheels were all up the banisters, balcony, bedrooms, bathroom, everywhere. Tidy it wasn't but if you are into old 1990s bikes, it's a secret treasure trove.
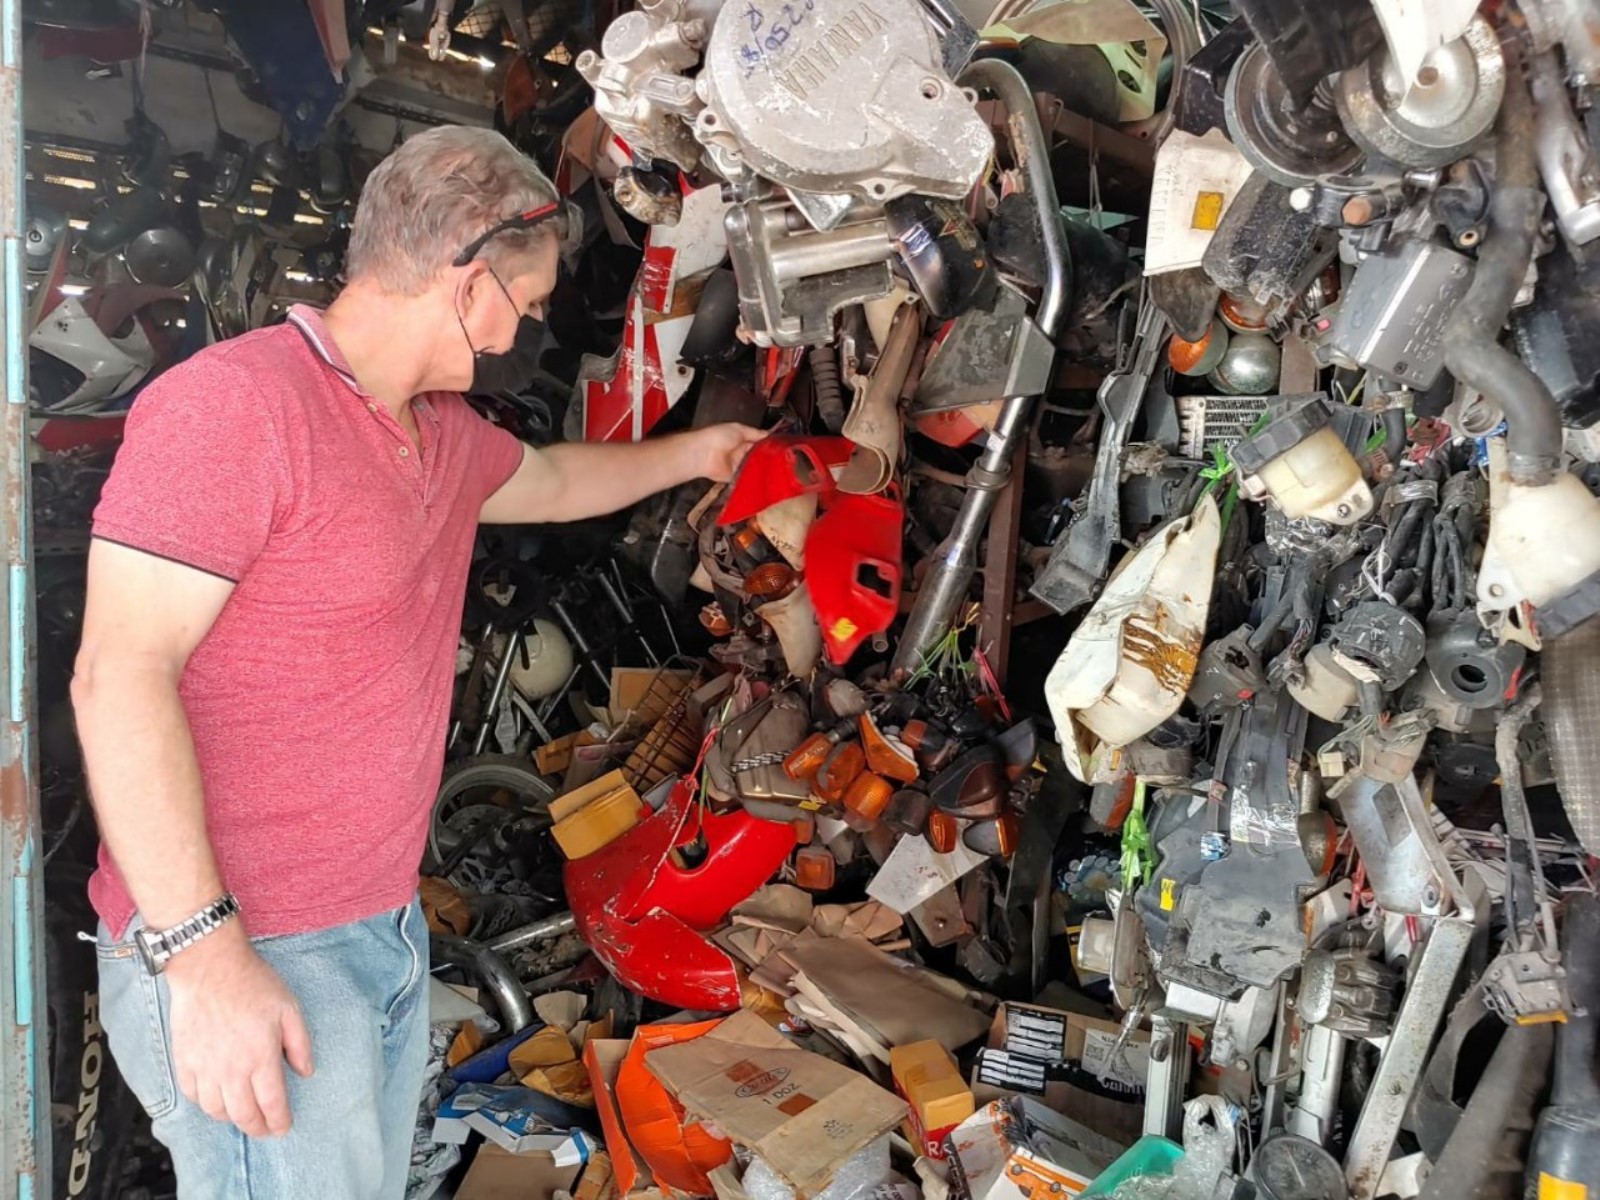
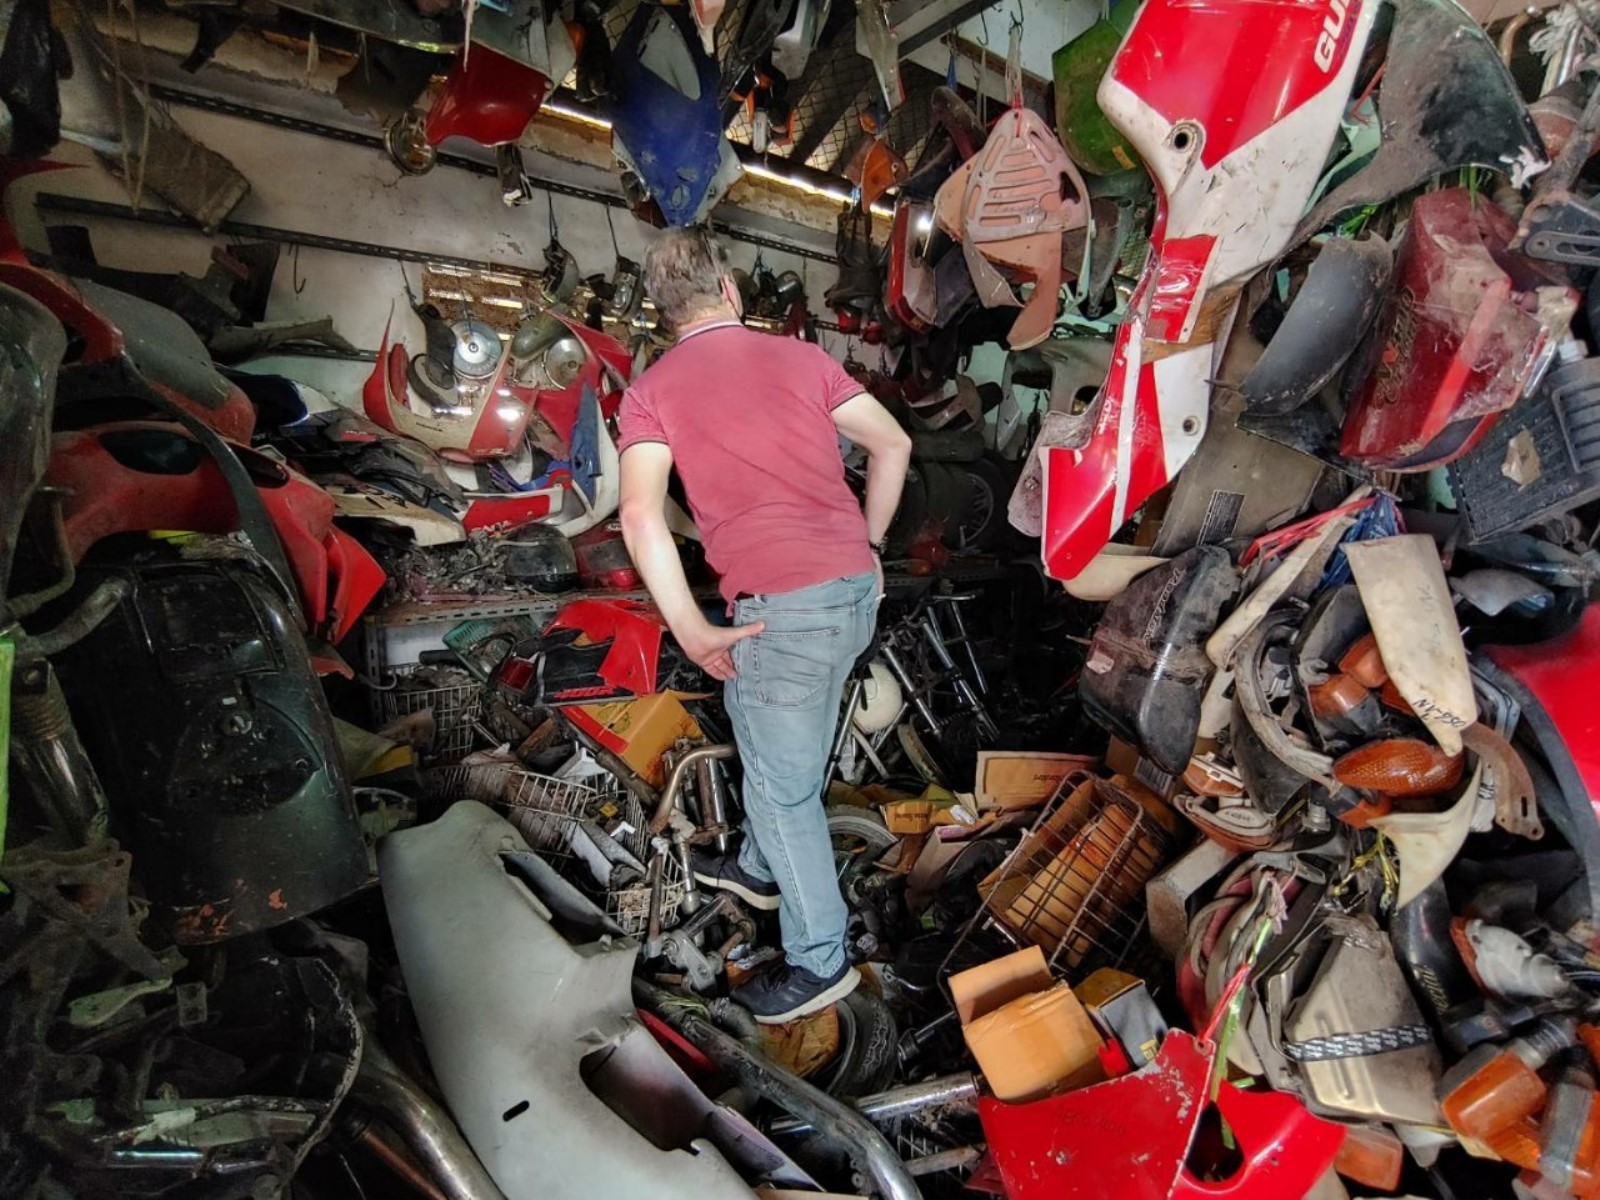
In case you are wondering where this Aladdin’s cave is, it is located right down the end of an alley, which is half way down another alley, which is off another alley, which is connected to a major road in BKK along with hundreds of others. Not surprisingly, not that many people know about this shop and that's the way I like it for obvious reasons. So, having completing the deal and walking away with two CBR600RR master cylinders in my hand, and a few thousand Baht lighter, I start reminiscing about the good old days. I remembered that many years previously, this place had an old seized RS250 engine thrown in one corner. It was all that was left of a GP bike that the vultures had not stripped to be bolted onto some chicken chaser drag bike or other. Anyway, this got me thinking and it was a bit of a long shot but no harm in asking. I turned back and tentatively said "Do you have any RS bits at all?" He in turn asked me"RS125 or 250?" Now, I wasn't going to get all picky, so I said parts for either model would do just nicely. He muttered something to his helper boy which I didn't quite catch, but it certainly wasn't dismissive so it did at least sound promising. Then this event happened; something I really wished I had got on video. You see, the shop had this covering of dead motorcycles and motorcycle parts to a depth of about half a metre all over the concrete floor. You had to walk over it to get to anything else hanging up. Over time, these parts on the ground had kind of compacted down into a new floor level so it wasn't obvious exactly how much depth of detritus there was beneath your feet as you picked your way through his shop. Anyway, as I watched anxiously to see what they might have for me, the lad literally dug down into this 'floor' that I had just been walking over.
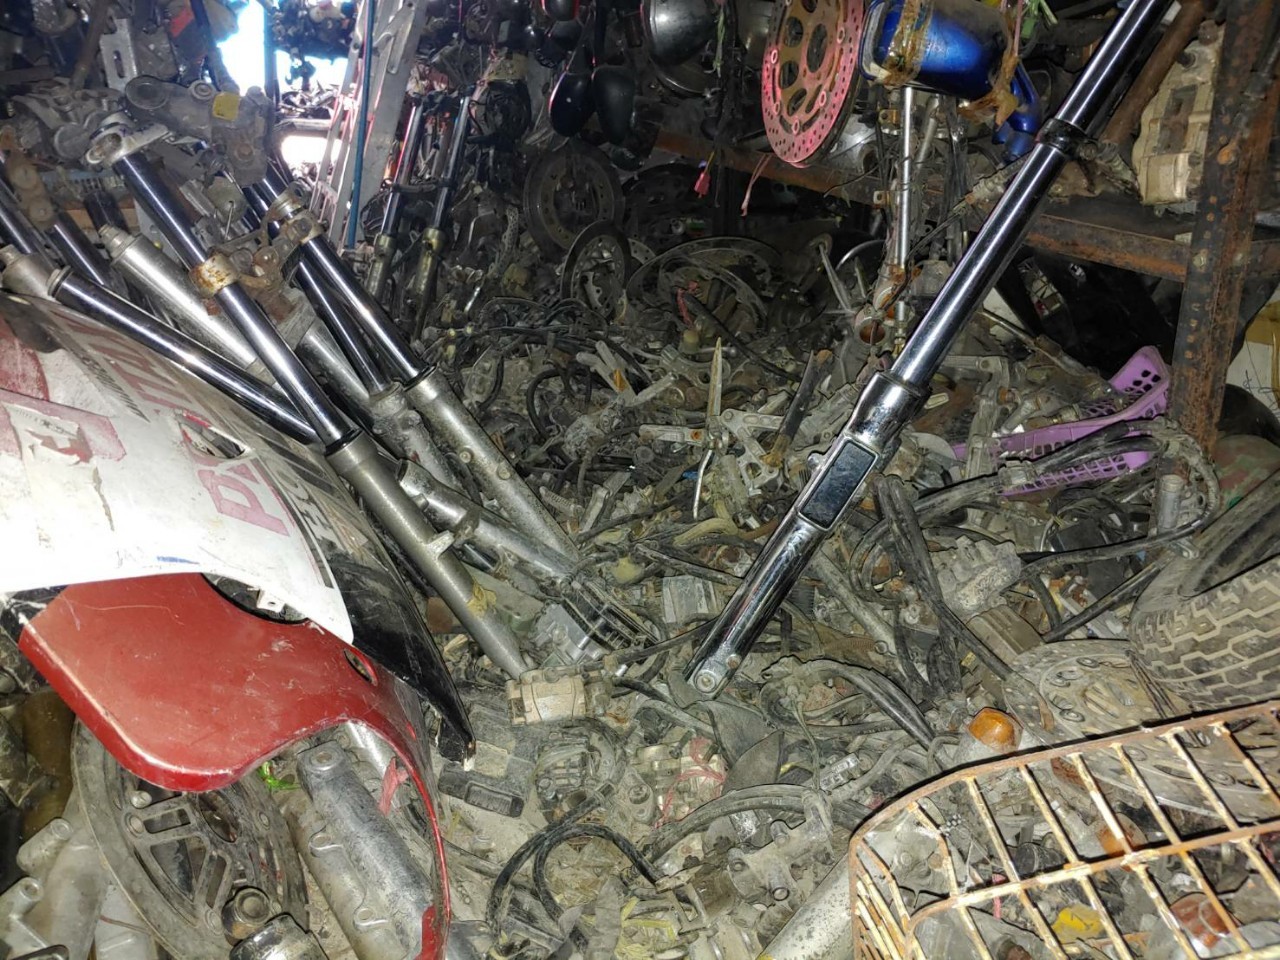
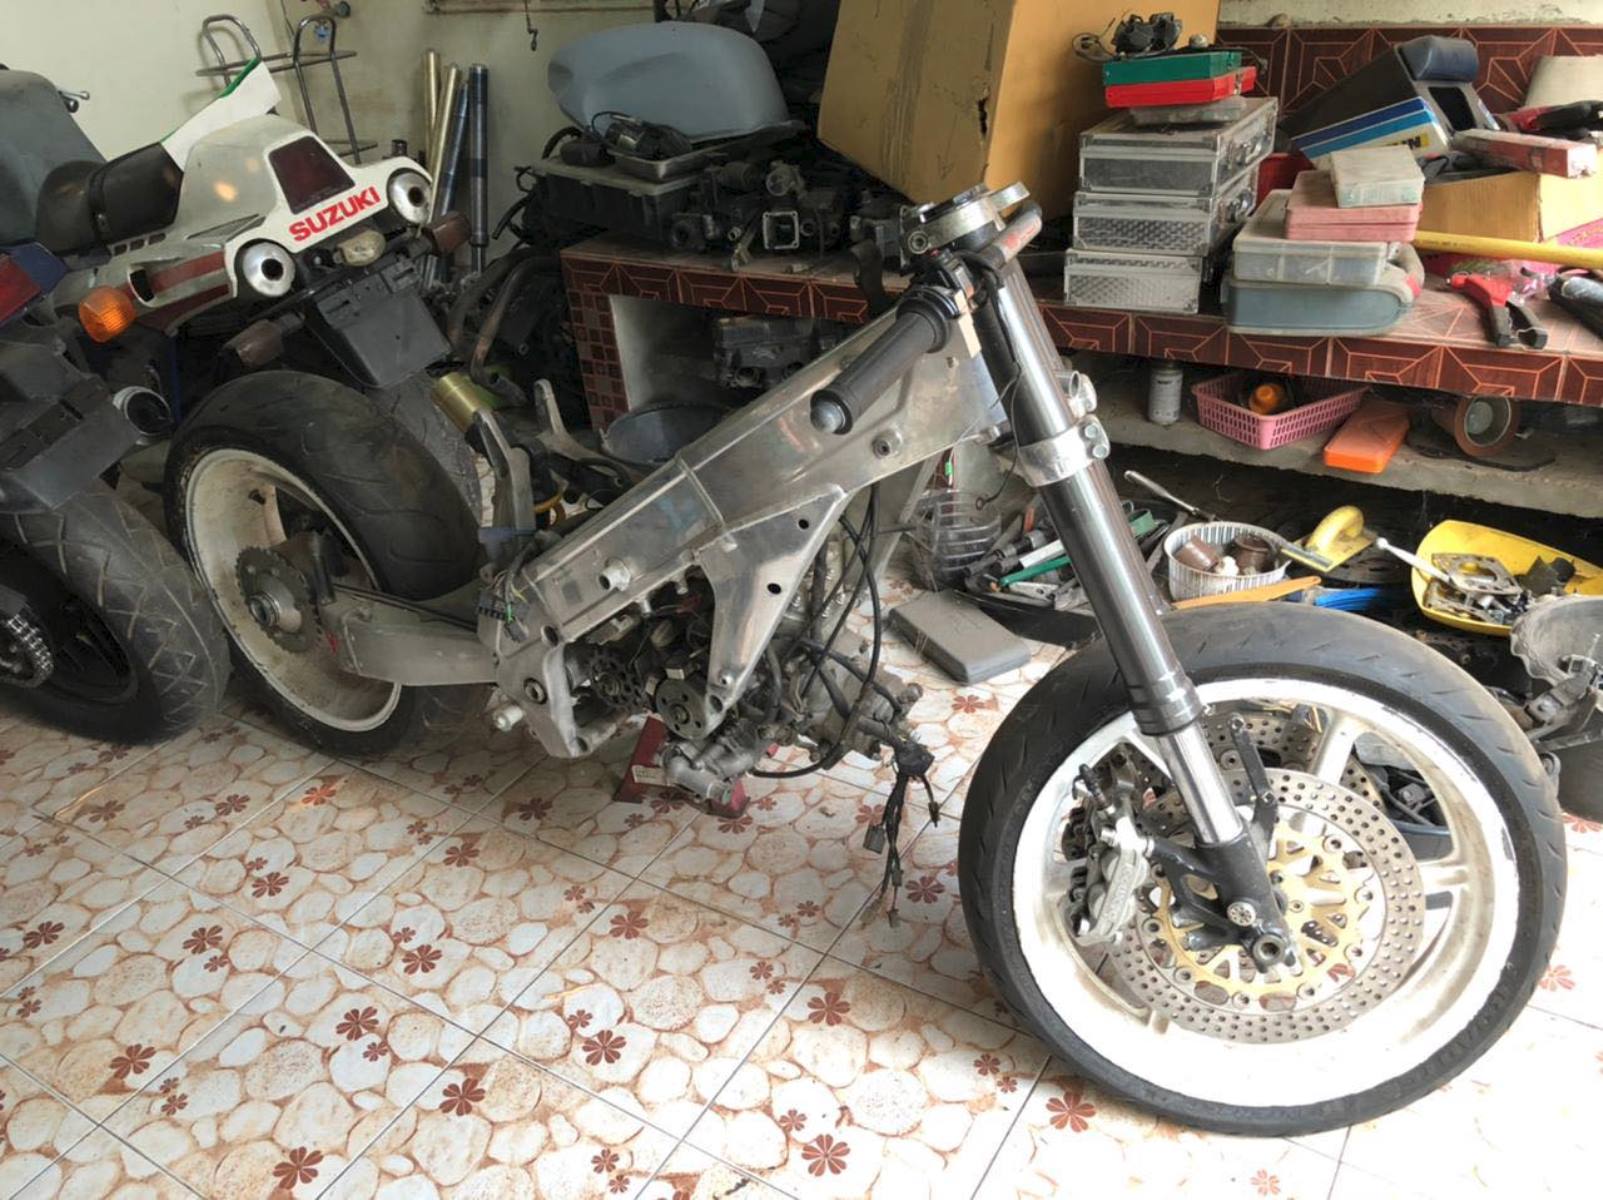
He grabbed in with his hands and pulled out from the rest of the junk a resplendent NX5 frame complete with engine bolted in and RC valve motor hanging off it. Before I had a chance to say anything, the shop owner told me that he had a wiring harness, fuel tank, fairing and PGM upstairs too. This, the boy dutifully brought to the front of the shop in the alley where the engine and frame had also been dragged out to. Well, GP bikes are pretty minimal, and that pile in front of us constituted the basis of a project bike as far I was concerned. I pushed my luck and asked if he had a subframe, forks, wheels or swing arm but there was nothing else to add but hey, not a bad harvest all things considered! So we started negotiating and I let him open with his asking price. I can't tell you the amount he wanted but it took a great deal of composure to keep a poker face and for me to knock him down a couple of thousand Baht lower still. It is kind of compulsory to do this every time or he will inflate the price next visit. Needless to say, I had enough cash in my pocket to cover the NX5, even after purchasing said master cylinders and if I remember correctly, I sang loudly to myself in the van all the way home. It was a good day at the office!
I'd like to say work progressed smoothly and in no time we had ourselves the beautiful bike you see here on this page. Anybody who has read any of our other project builds, will know this wouldn't be the case. At the time, without wishing to sound too blasé, we had another RS250 or two which were a lot nearer to completion so this one just got put into deep storage for later. I wouldn't say it was forgotten but it definitely didn't keep me up at night dreaming about its potential or fretting about where we were going to source parts to complete it. Years went by and two stroke bikes values increased. Step into the story, the next character. I have this Laotian friend who is particularly persuasive when it comes to getting us to part with our collection. He had already prised a very original and Thai registered RZ500V from us. Not sure how he managed that one but he has a knack of offering things in exchange and by offering swaps and barters it makes us lower our guard. He tried this tactic previously with an NF5 but I was prepared and foiled his attempts, explaining we couldn't possibly pass with an RS250 as they were so hard to find and this was our only one etc. Stupid me; months later, he was visiting us looking for bargains, (the time when I sold him an RC30 rear fender for 25 dollars I think!) when he spotted the pile of NX5 parts. He caught me off guard and frankly, I was feeling a bit selfish because he longed for an RS250 so bad. The best thing I could do was to come in with a high price to put him off. So I took our buying price, doubled it and then added half again just for good measure. That should do it I thought and even if it doesn't, well 250% profit is not too bad for doing nothing more than storing it for a few years. Of course I failed to factor in the market price to my calculations and he jumped at the chance. So the pile went to its new owner. After a few months, he asked me about sourcing parts and if we have them. I explained several times that we only have parts which TYGA makes and so eventually he went his own creative way. At one time, around 2015 I think, he had a Bros swing arm which was installed upside down due to the chain being on the other side to the NX5. He also had some RVF400 front forks destined for the front. He still wanted TYGA pipes, rear sets and bodywork from TYGA but was not quite ready to order yet. The years went by and we continued to keep in touch. He bought a proper swing arm from Yahoo. To his credit this was some sort of factory prototype that nobody I have asked knows what it is exactly but it did fit. He also sourced a Marchesini 5 spoke rear but then he got stuck sourcing the rest. It was a challenge for him being a none English speaker in an isolated place to find rare HRC items and the project ground to a halt.
More months and years went by and the discussion went more towards trading it back to us for something. This eventually last year turned to a straight buy and yes, you guessed right, the price had gone up again. I suppose he took his buying price off me, doubled it and added half again for good measure. Well, the market had moved again and so of course I bought it! I learned long ago to swallow one's pride in such circumstances, just make a rational decision based on the market value and not worry about the fact I had just wasted a bunch of money and a bunch of years trading back and forth.
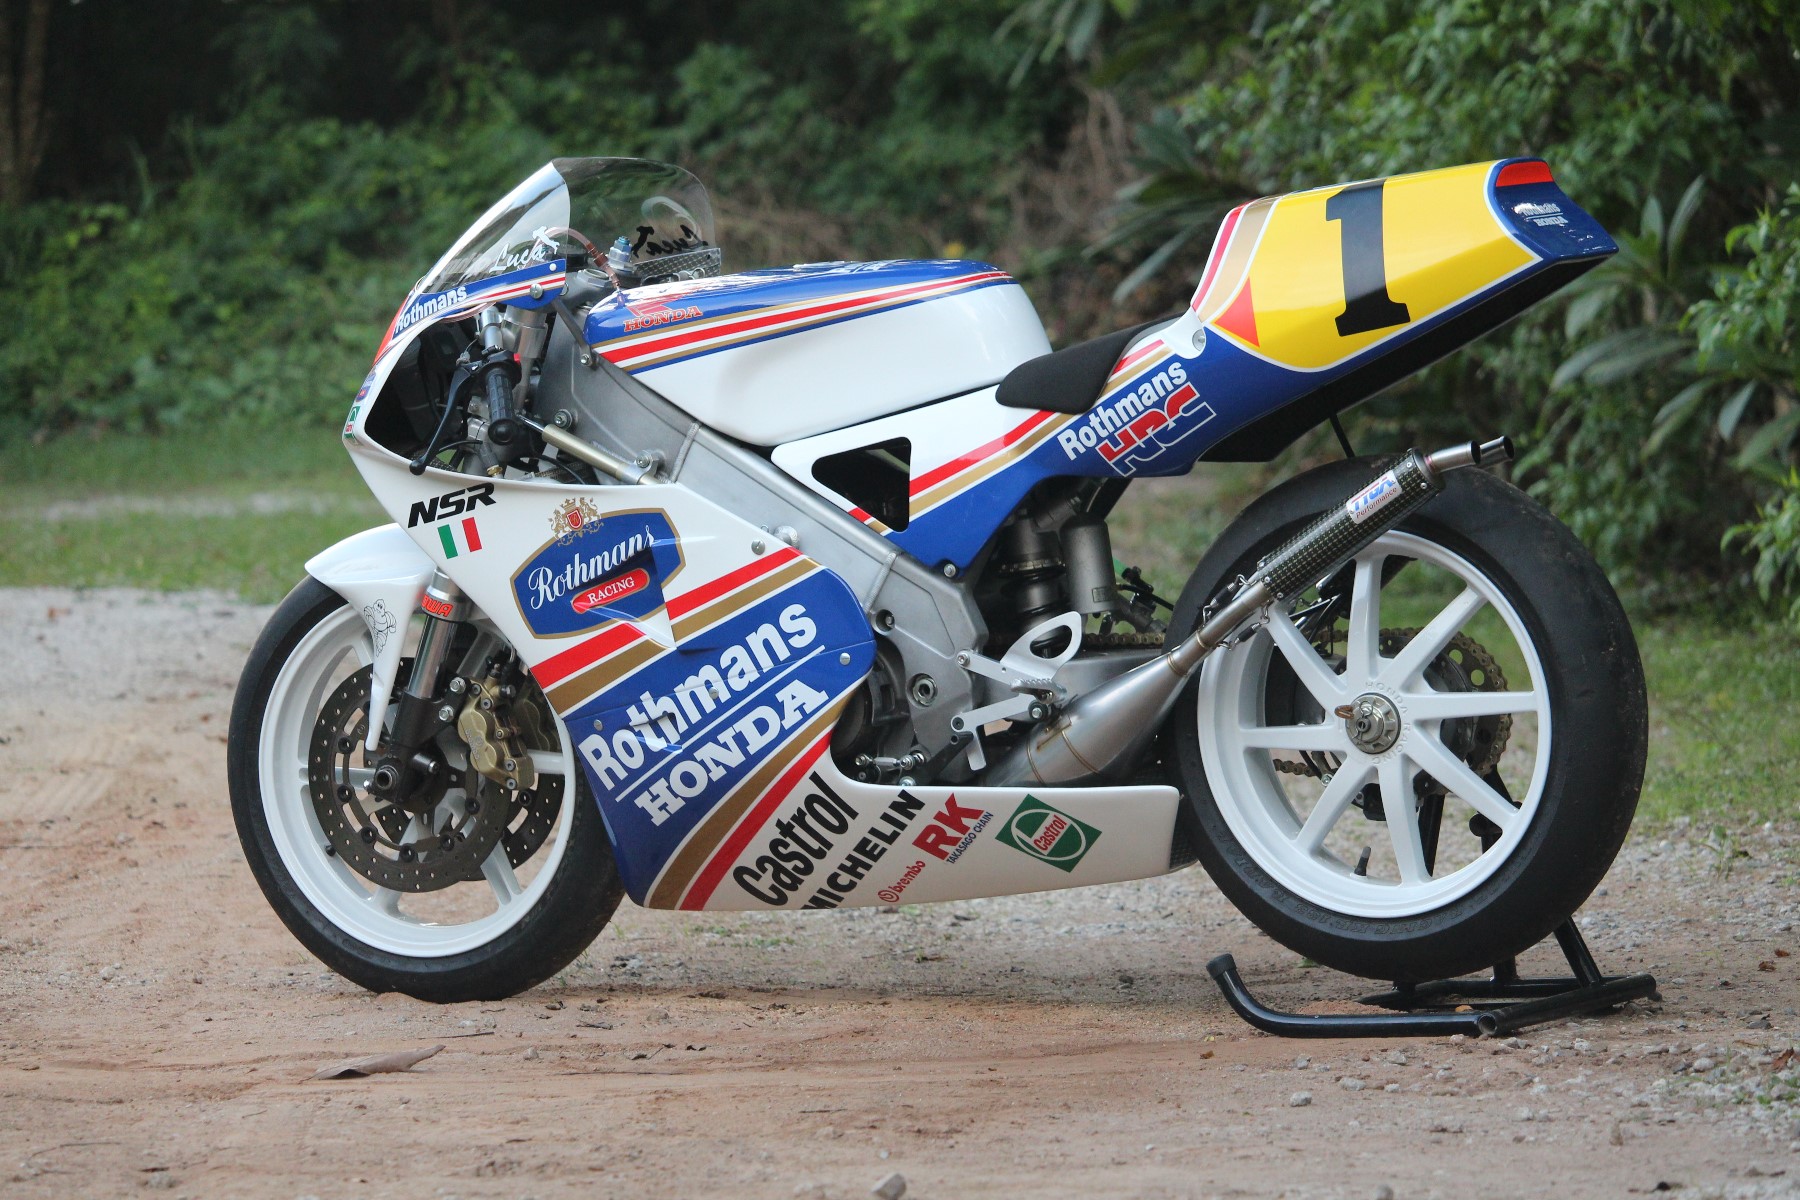
To be fair, the time was not really wasted. During the intervening years, TYGA had acquired a nice stash of HRC parts, we had also increased our circle of friends and made more and more of our own TYGA Performance products. A case in point is that we had kept back and used the upper fairing off the original 'pile' to make the mold for the early type TYGA Performance fairings which were installed on this and many other NX5s around the World. So, taken together we were in a much better position in 2023 than 2008 to undertake this project. The first step to sourcing was to make an excel spreadsheet from the 1993 NX5 parts book. From this, I entered columns for each source; the pile, ordering new from Honda/HRC, ordering from TYGA, taking used parts from our stash/other projects, and elsewhere etc. By doing this, it was possible to methodically 'build' the bike on paper without actually needing to get off my office chair. (My favorite and default position around here). It was also encouraging because we had a great deal of the bike on site already and we hoped to make up the balance with Honda/HRC. However, I was disappointed to learn that even parts such as gauges which had been available only a couple of years earlier were now NLA. This is the downside of delaying the start of such a project. You really have to start collecting as soon as possible. When an HRC part goes NLA, not only does it mean you have to resort to bashed around ex racer's bins for parts, you end up paying a premium due to 'I know what I've got' attitude etc. Actually to be fair, many people on the various fb groups are very generous and helpful. It is just the laws of supply and demand start kicking in. Luckily, our budget was not too restrictive. Firstly, this was not a commercial exercise, but a pet project and it does help to raise the TYGA Performance profile. Secondly, we were fortunate that 'the pile' was, even after everybody's mark ups, still a reasonable price. Tracking down hard to find parts was really the bigger issue than the price.
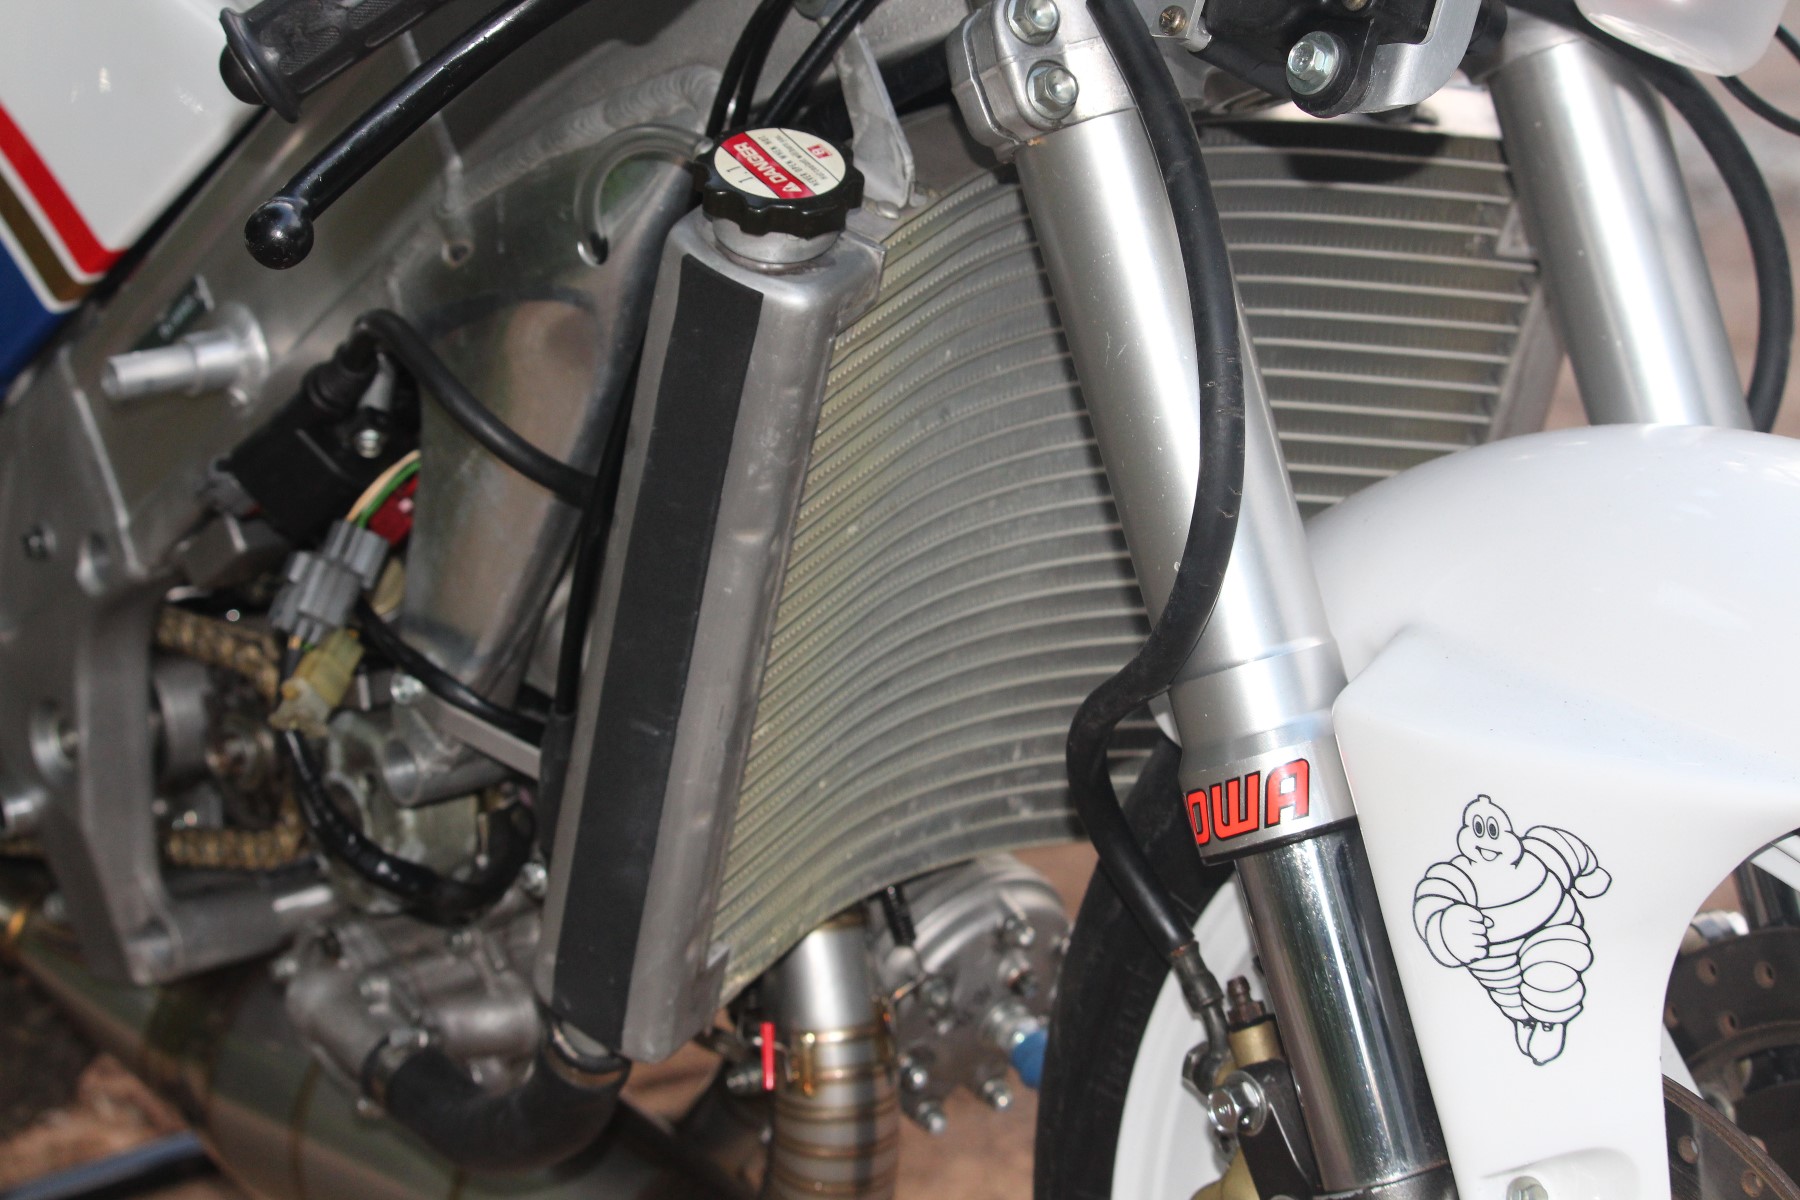
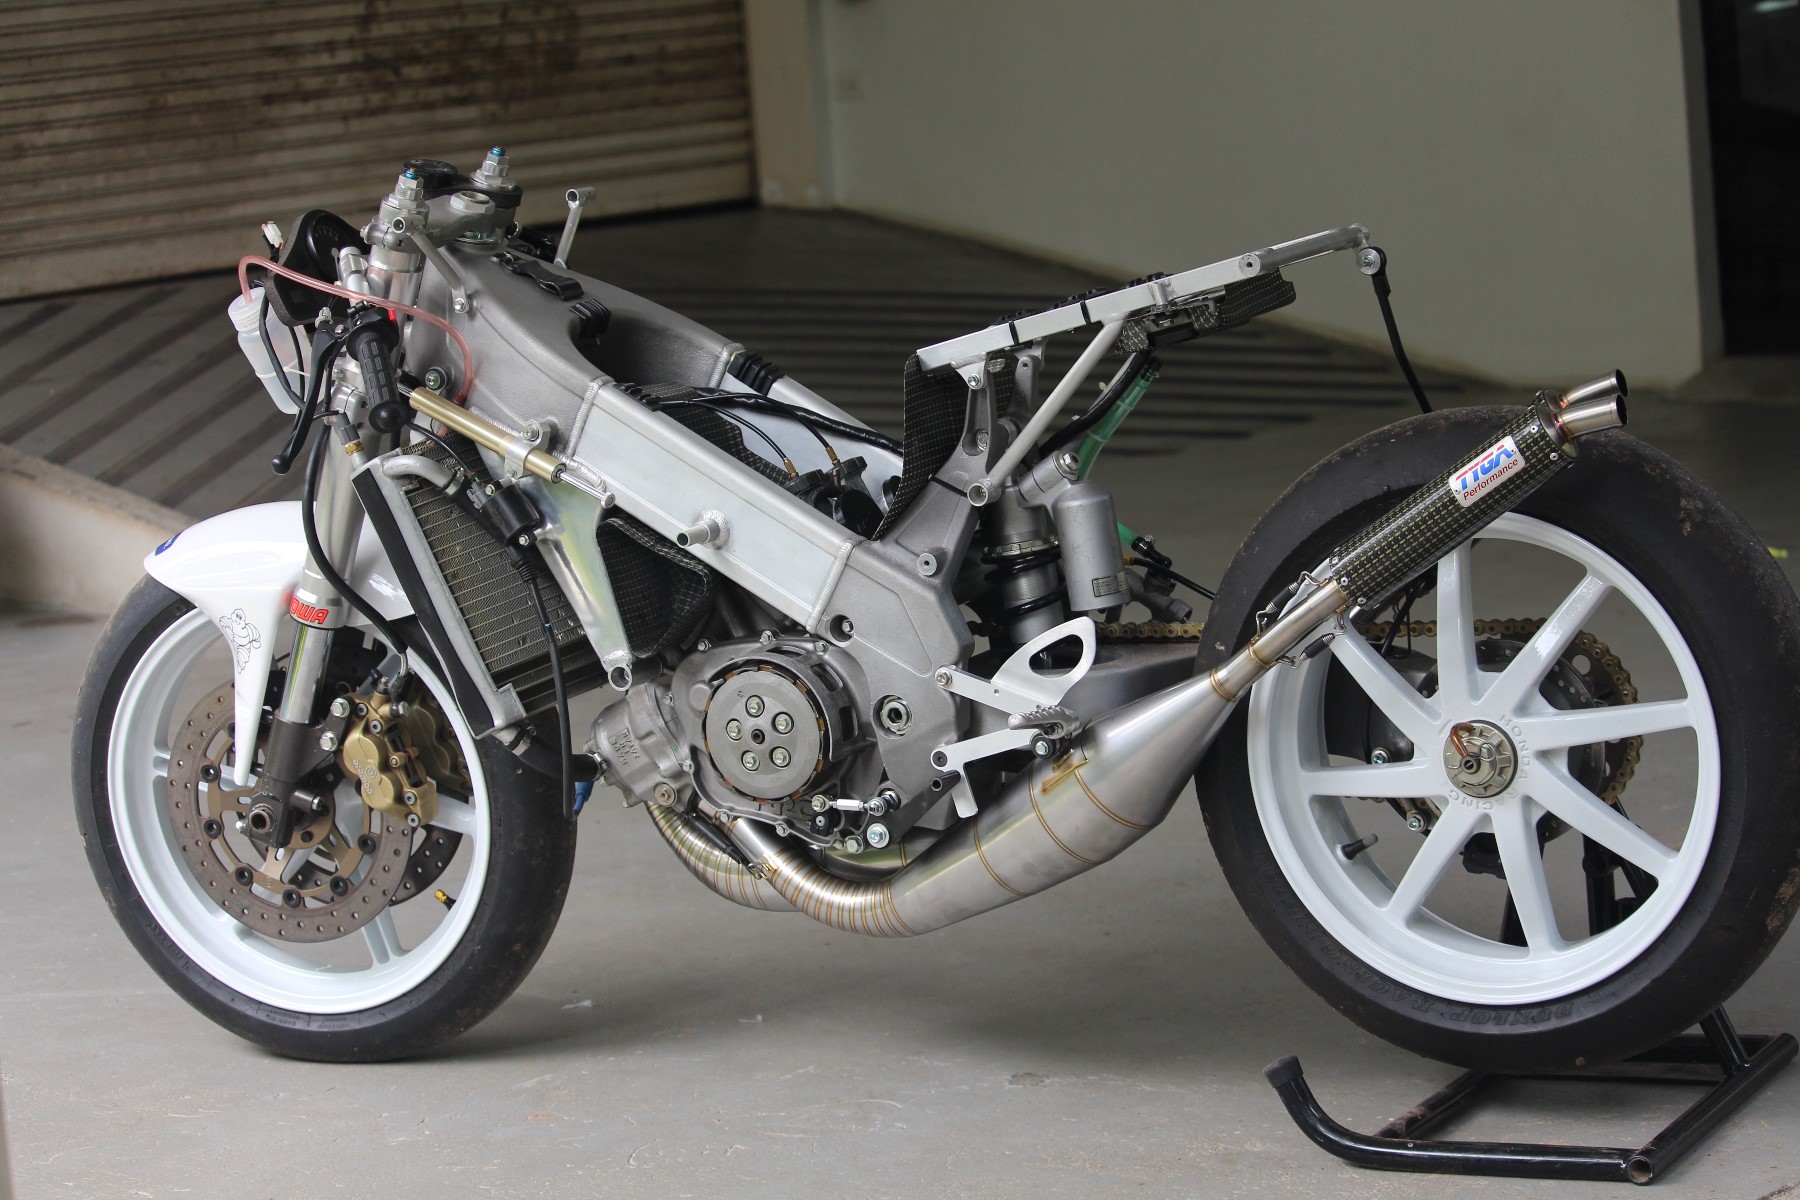
Eventually, it was time to get off my backside and gets things done. The engine/frame lump condition was much the same state as when I first saw it after being exhumed. So it was pulled apart and the engine and frame thoroughly cleaned up. Matt, inspected the engine and the top end looked brand new. We took a chance and 'cleaned it up' but didn't strip it. This turned out to be a bit of mistake but more on that later. Regarding the front end, we had triples which was a start but for the rest, I had my beady eyes on the NSR250V sitting in my office. Don't worry, I wasn't going to put the MC21 front end back on that project, I had another plan. A few years ago, I had picked up a pair of NSR500V forks which I had squirreled away for safe keeping. I had toyed with the idea of installing them on the 250V before but it doesn't really go very far sitting on the podium and the forks are worth more than the rest of the bike. To add to this was a practical challenge; the 500 forks are 51.5mm on the top so it would require bespoke top triple and a different lower one (different pitch to the NX5). Brake discs are smaller too and now out production. Anyway, the NX5 project gave me the perfect excuse to do the switcharoo on the NSR250V and with a few dramas sourcing everything to fit, the 250V now looks even more convincing than it already did. All that, just to source the NX5 forks! To be fair, it was more than that because we could also use the discs and shaft from the 250V too.
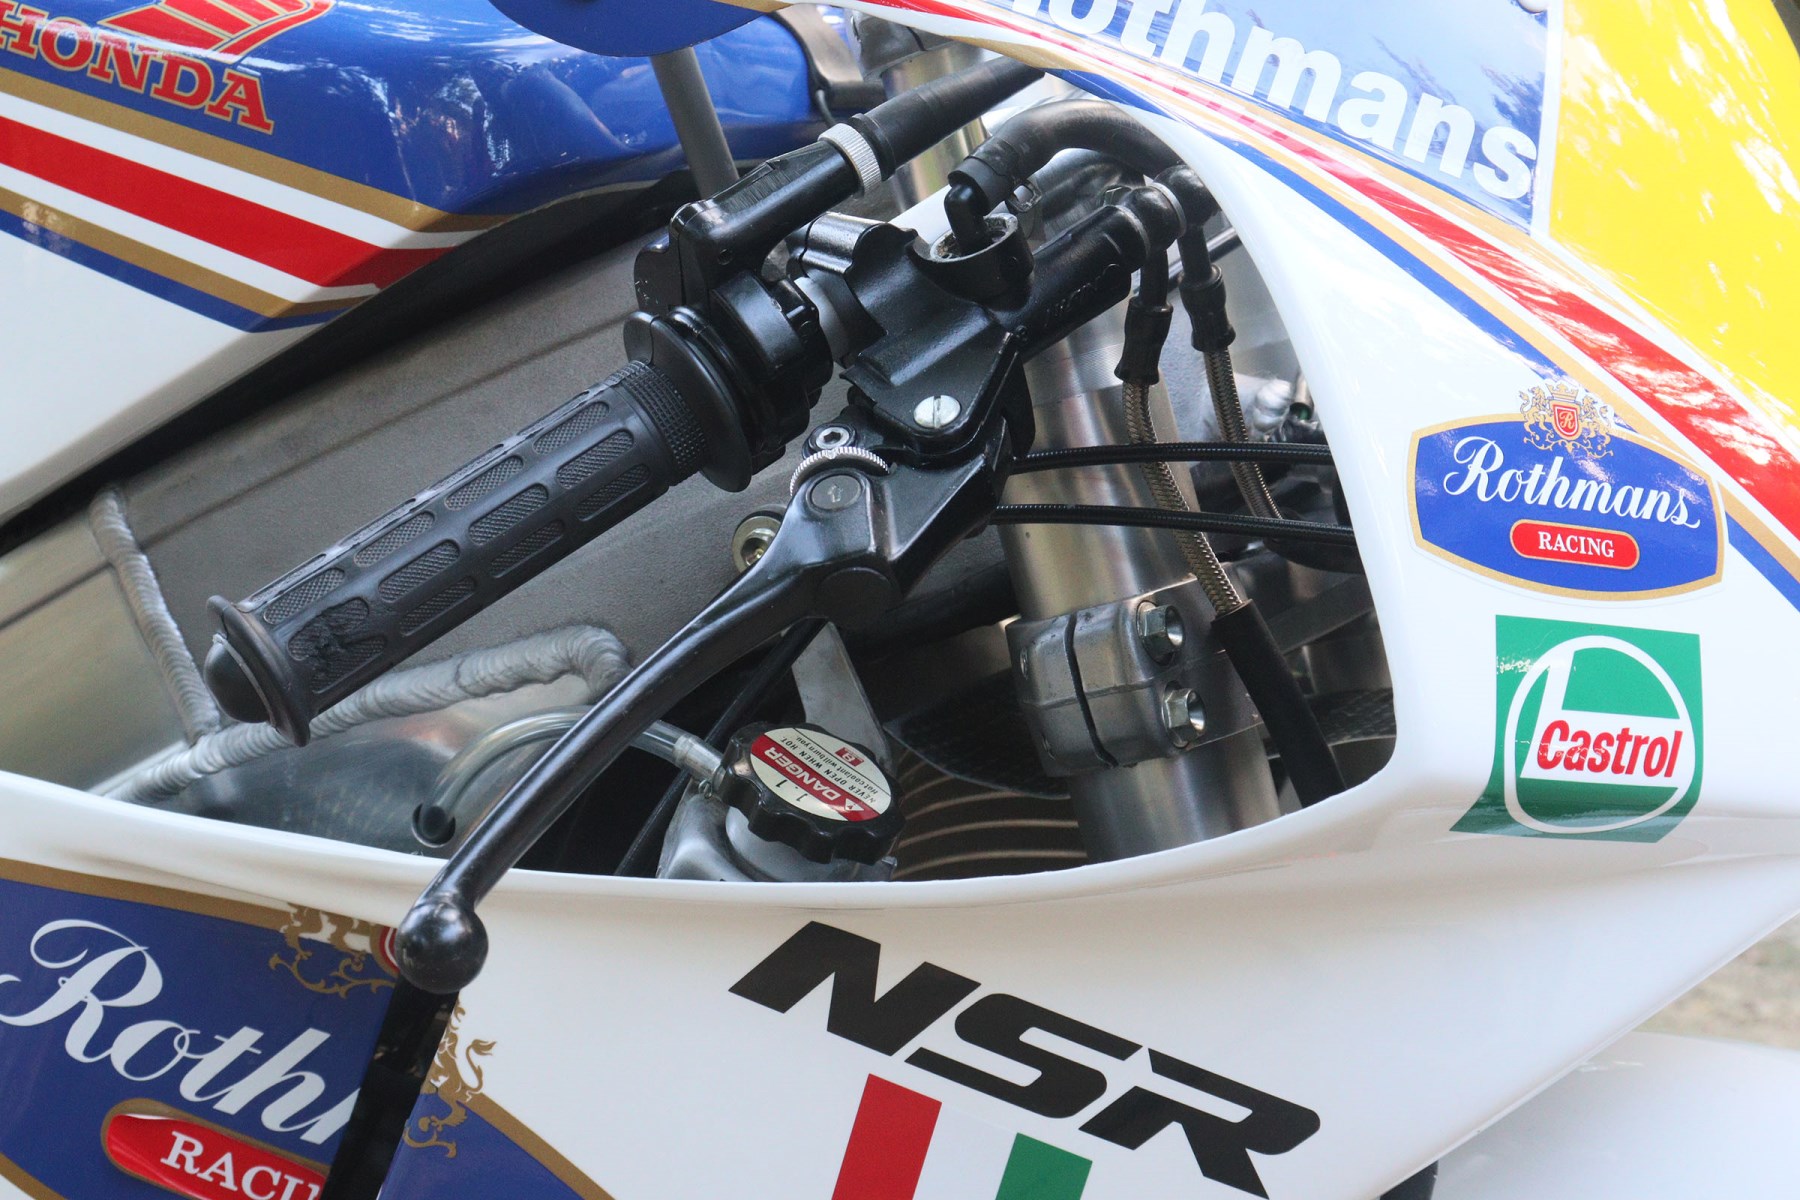
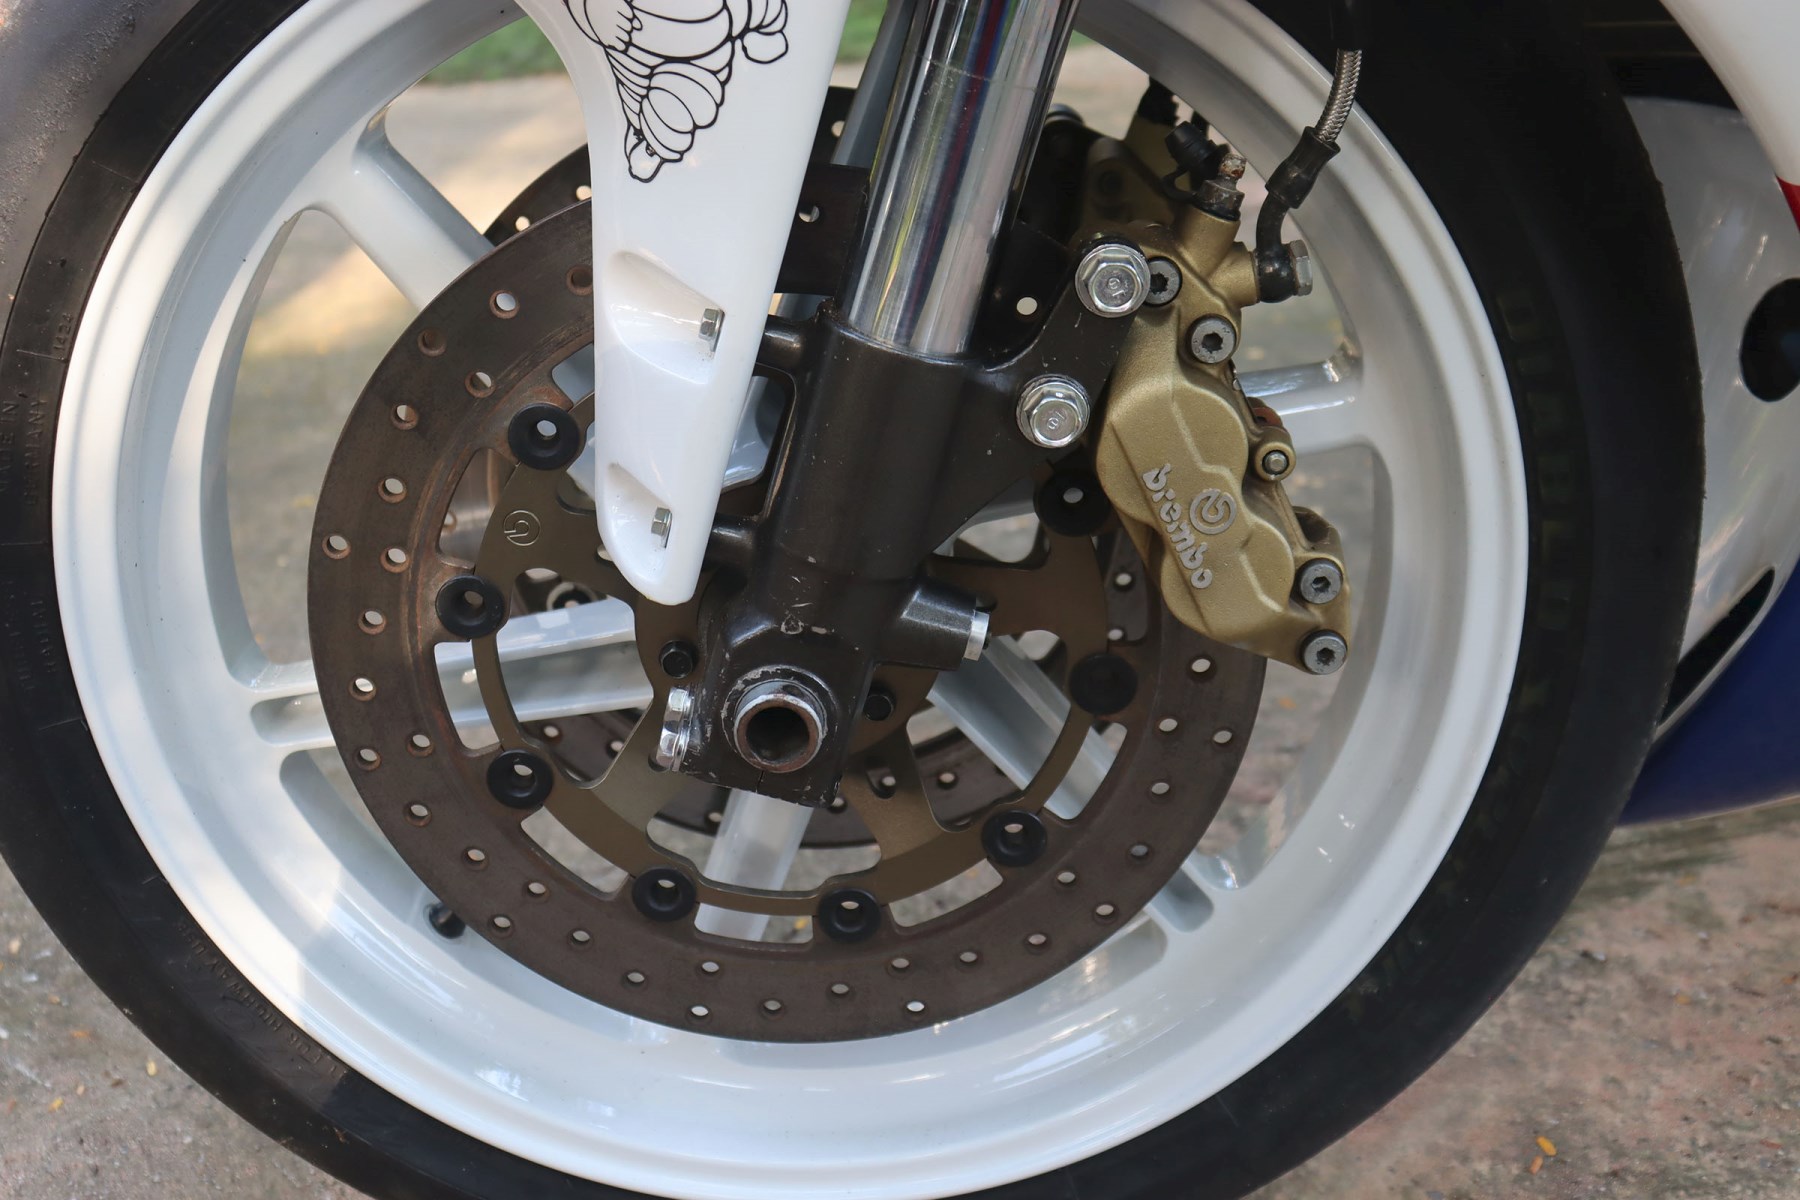
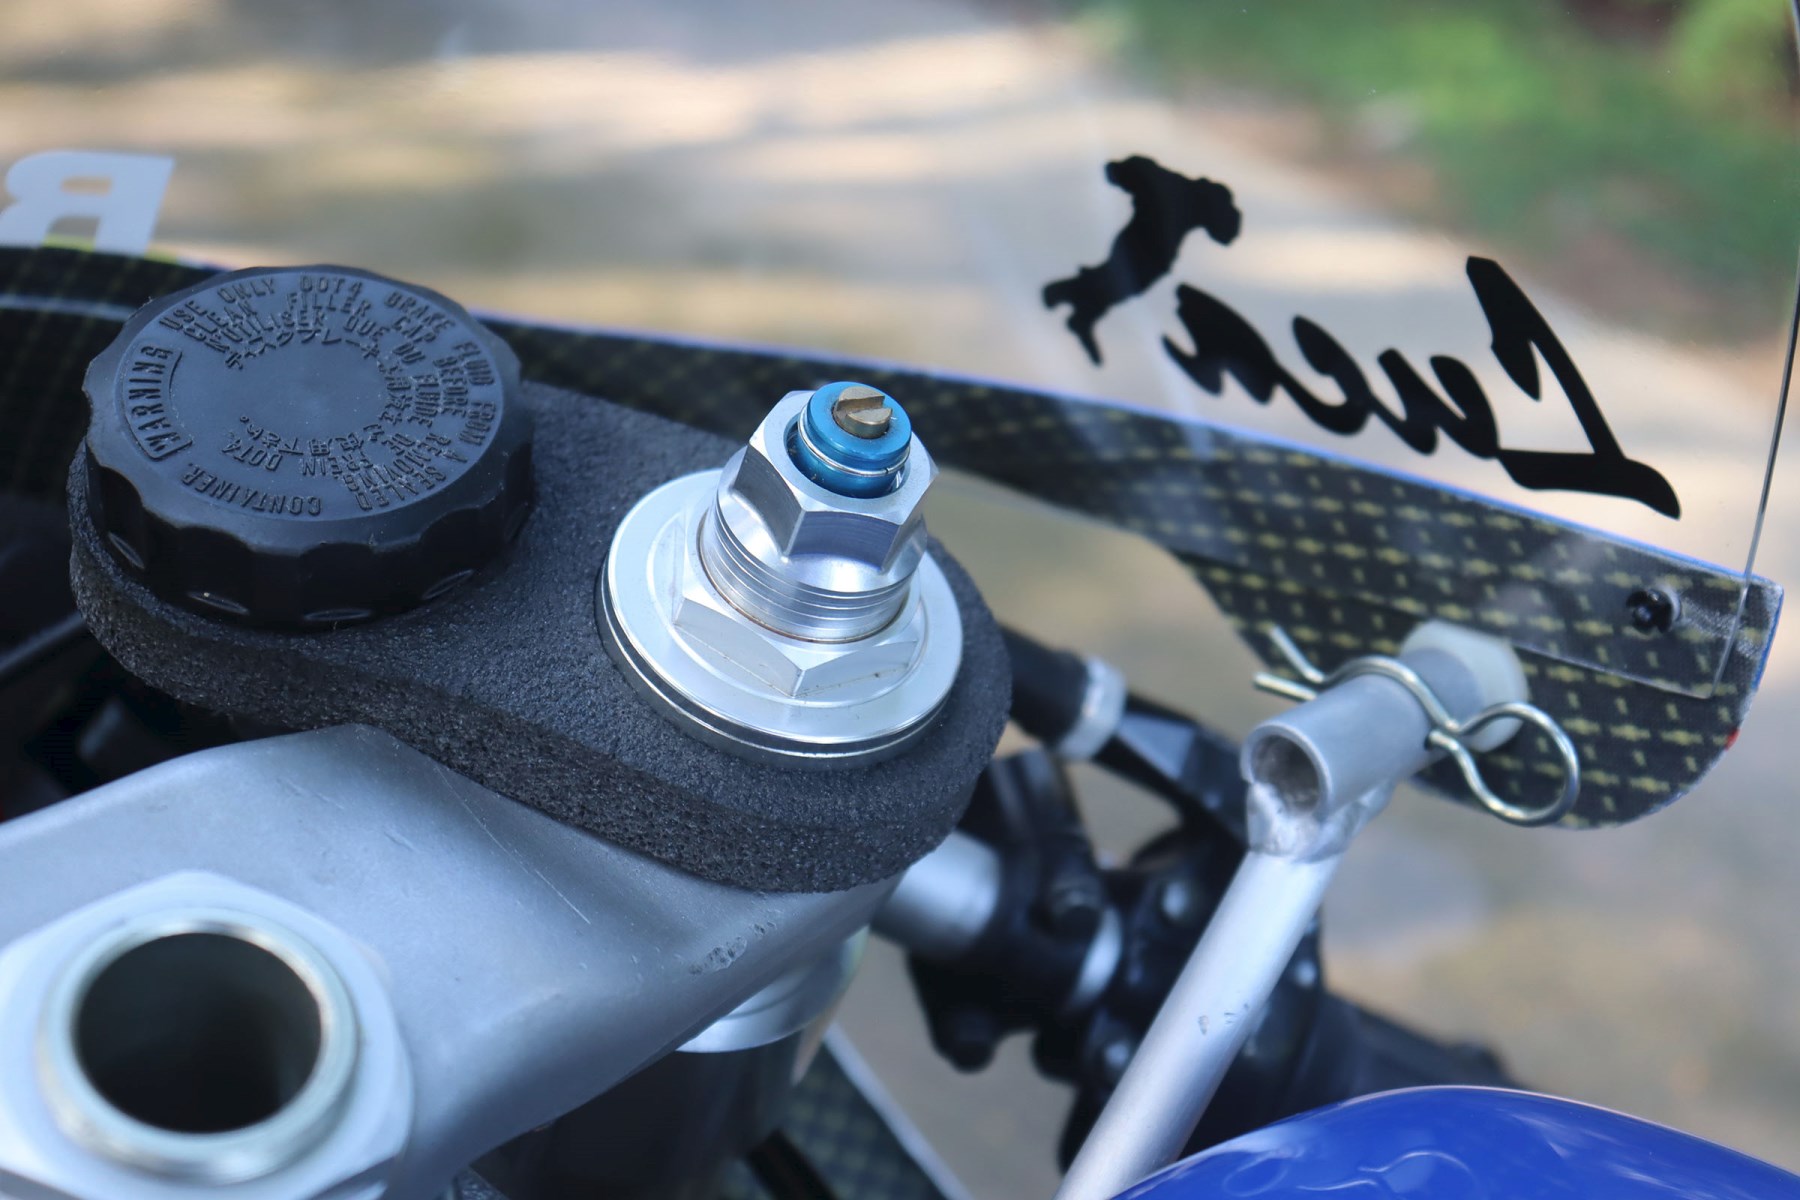
Luckily, we had a spare NX5 wheel and fender painted white and ready to go. We also had a pair of Brembo calipers. The only thing which had us stumped was a genuine Nissin front master cylinder. We had plenty of old NSR250 type ones and even a couple of lovely radial Brembos. Eventually, while looking for something completely different, as is often the case, I was delighted to stumble across a nice Nissin NX5 master at the bottom of a cardboard box. For brake lines, we'd normally install HEL but we were going for an 'HRC' look and had a pair of genuine HRC braided lines complete with the rubber covering so we opted for them. The forks were rebuilt and TYGA fork tops installed which eliminated the usual adjustment scratches and chewed up adjusters so common on these race bike components. So that was the front end taken care of.
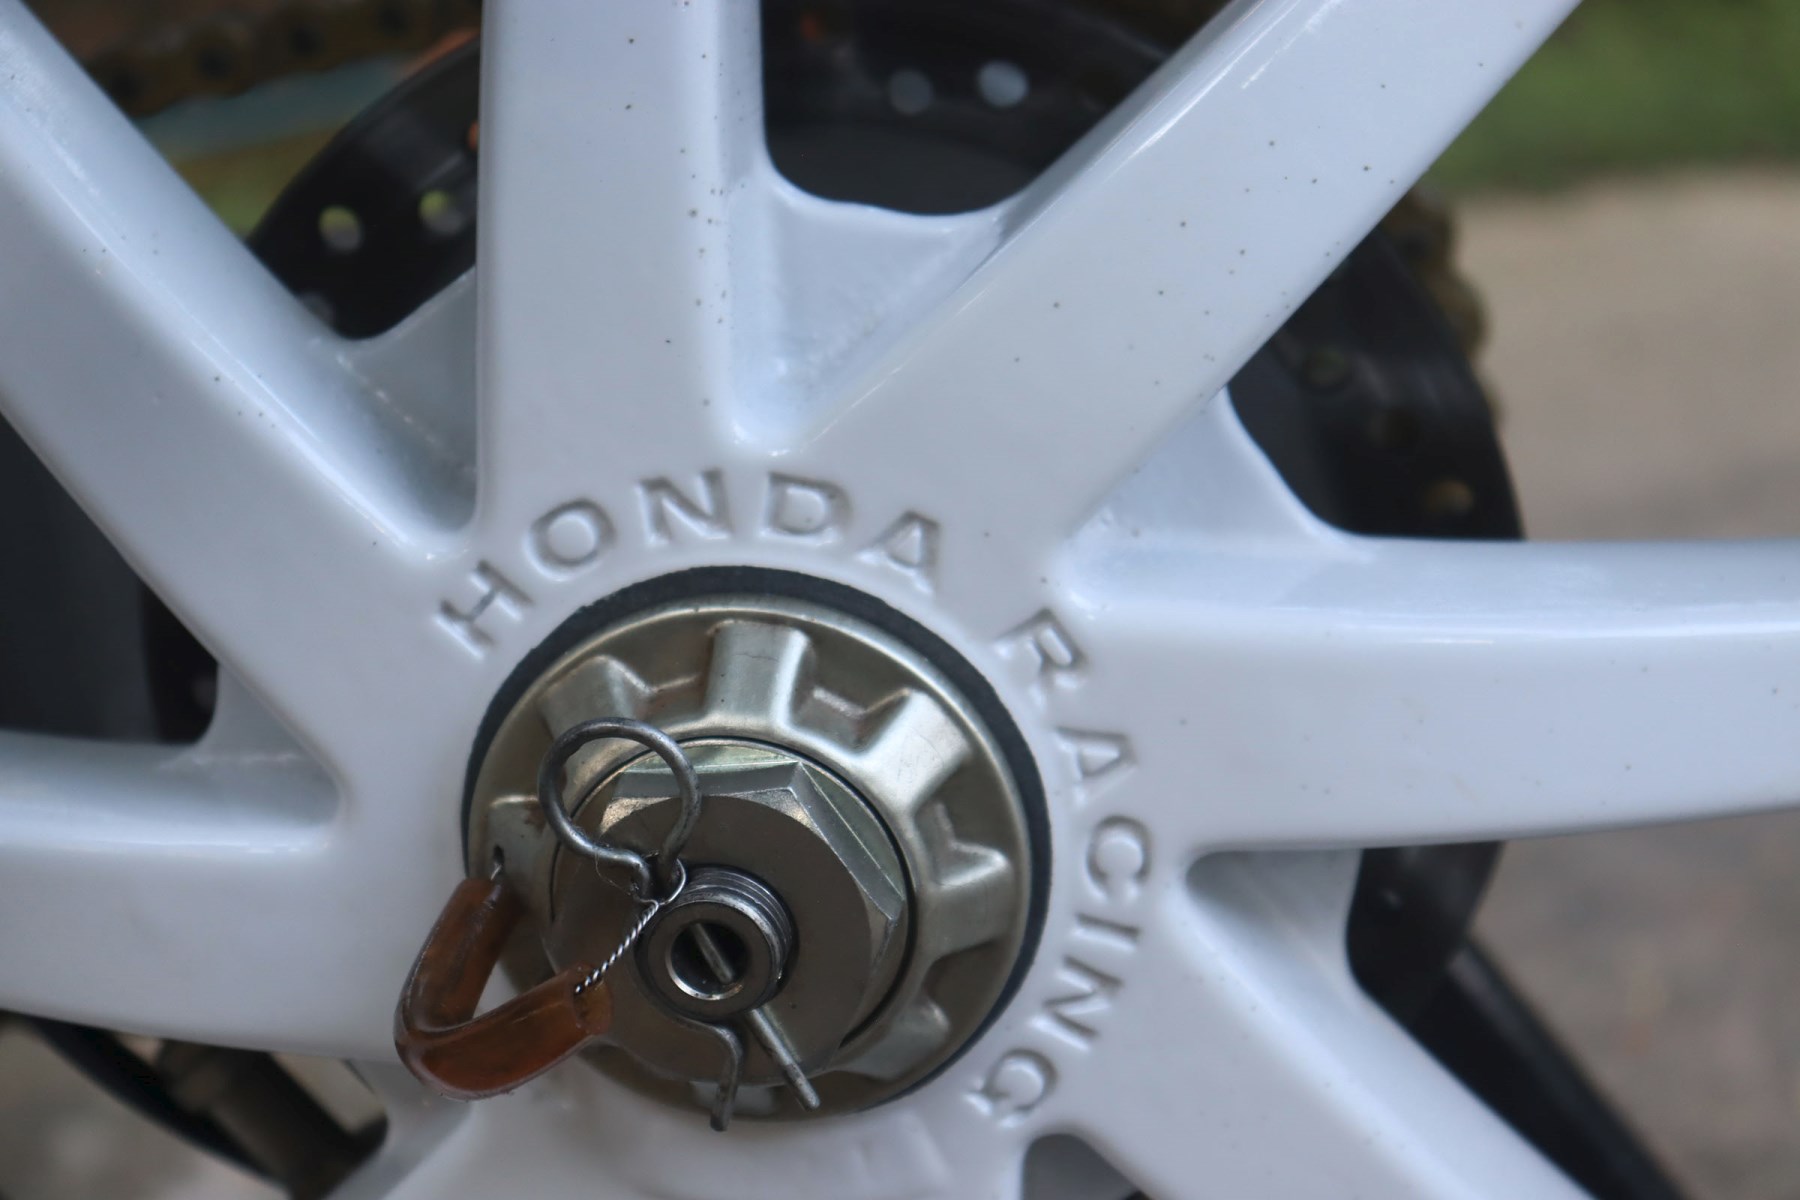
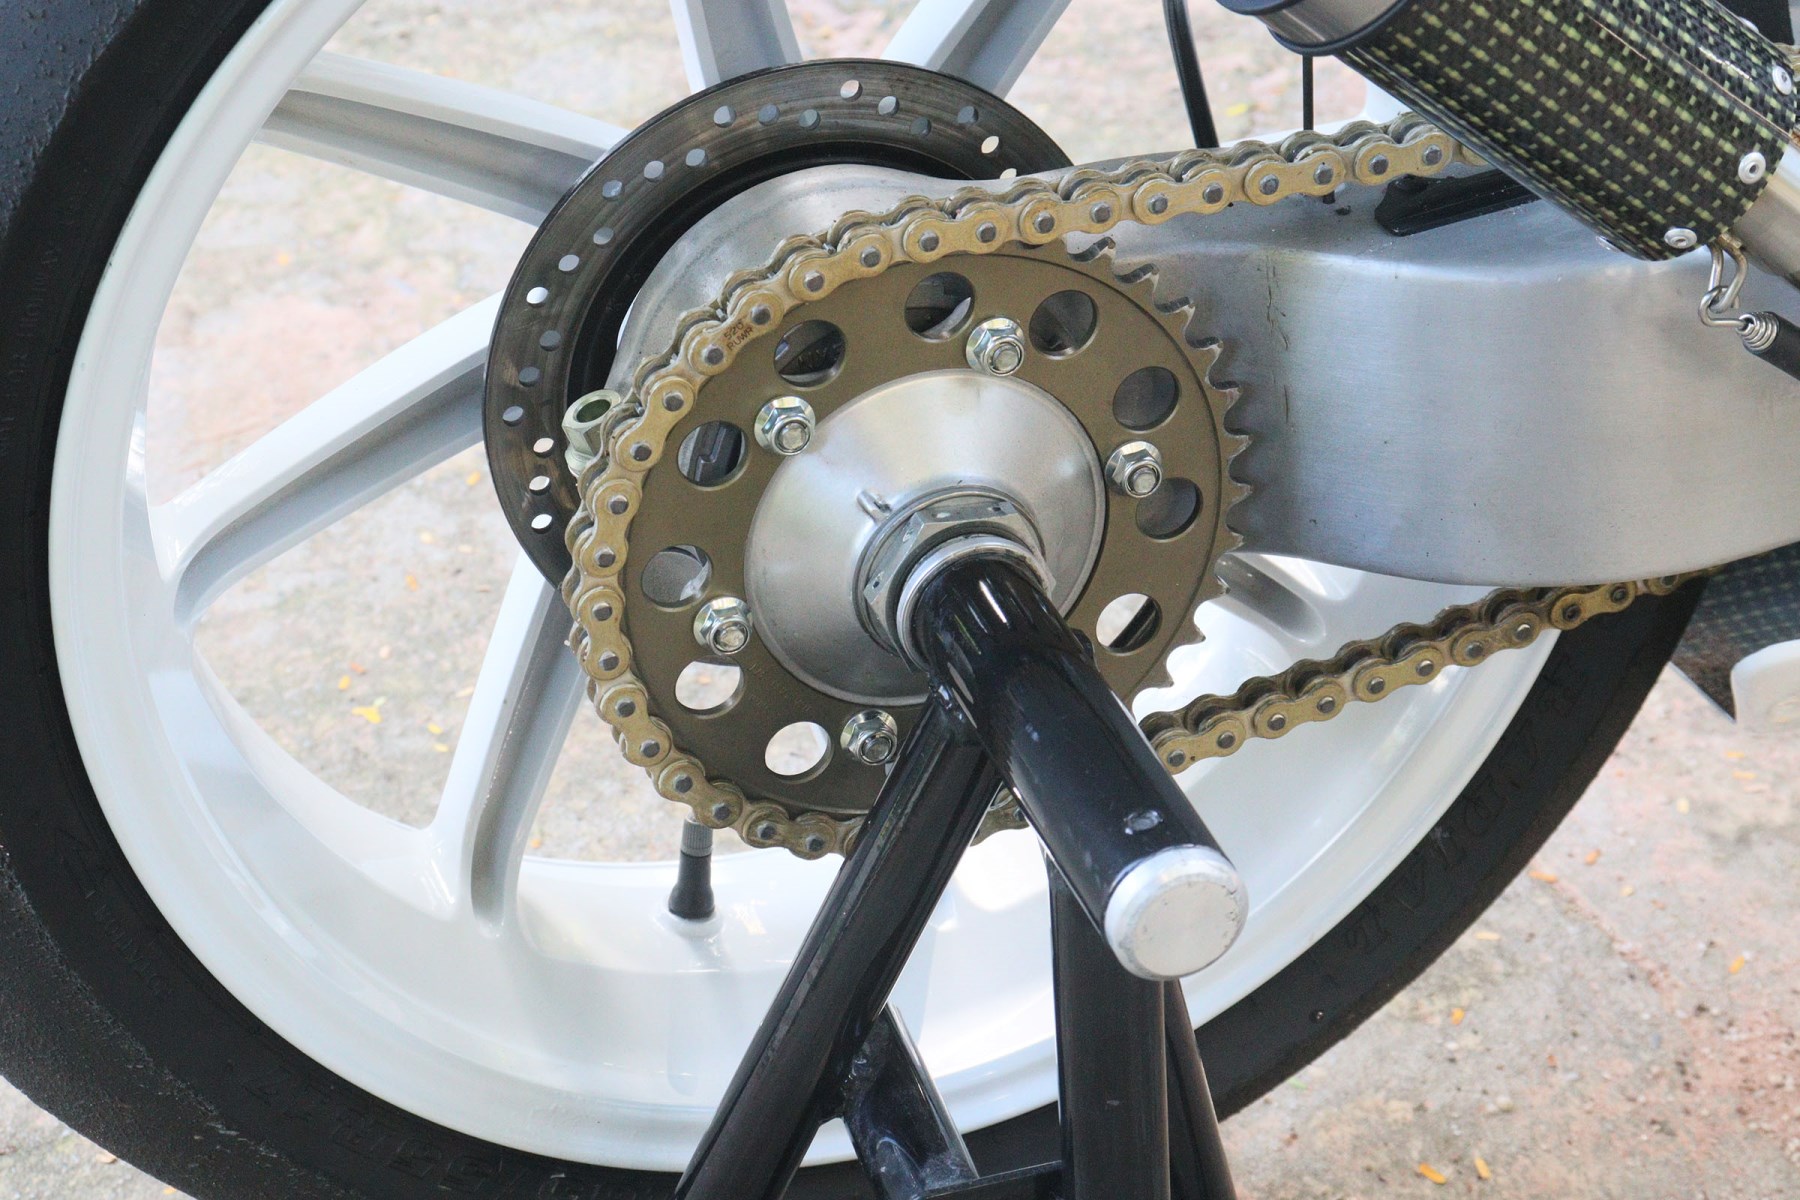
Still on the chassis and moving to the back, we were in two minds to keep the 'special' swing arm. In the end, we swapped it out of a stock one and installed a proper HRC rear 8 spoke. This is one of the wheels that have the 'Honda Racing' cast into the hub area and perfect for the project.
We also had a stock rear shock which had been taken out of Matt's bike when an Ohlins was installed. I'd kept an eye out for, and found a subframe on an auction site so that turned up just in time, hand carried by our friend Glenn.

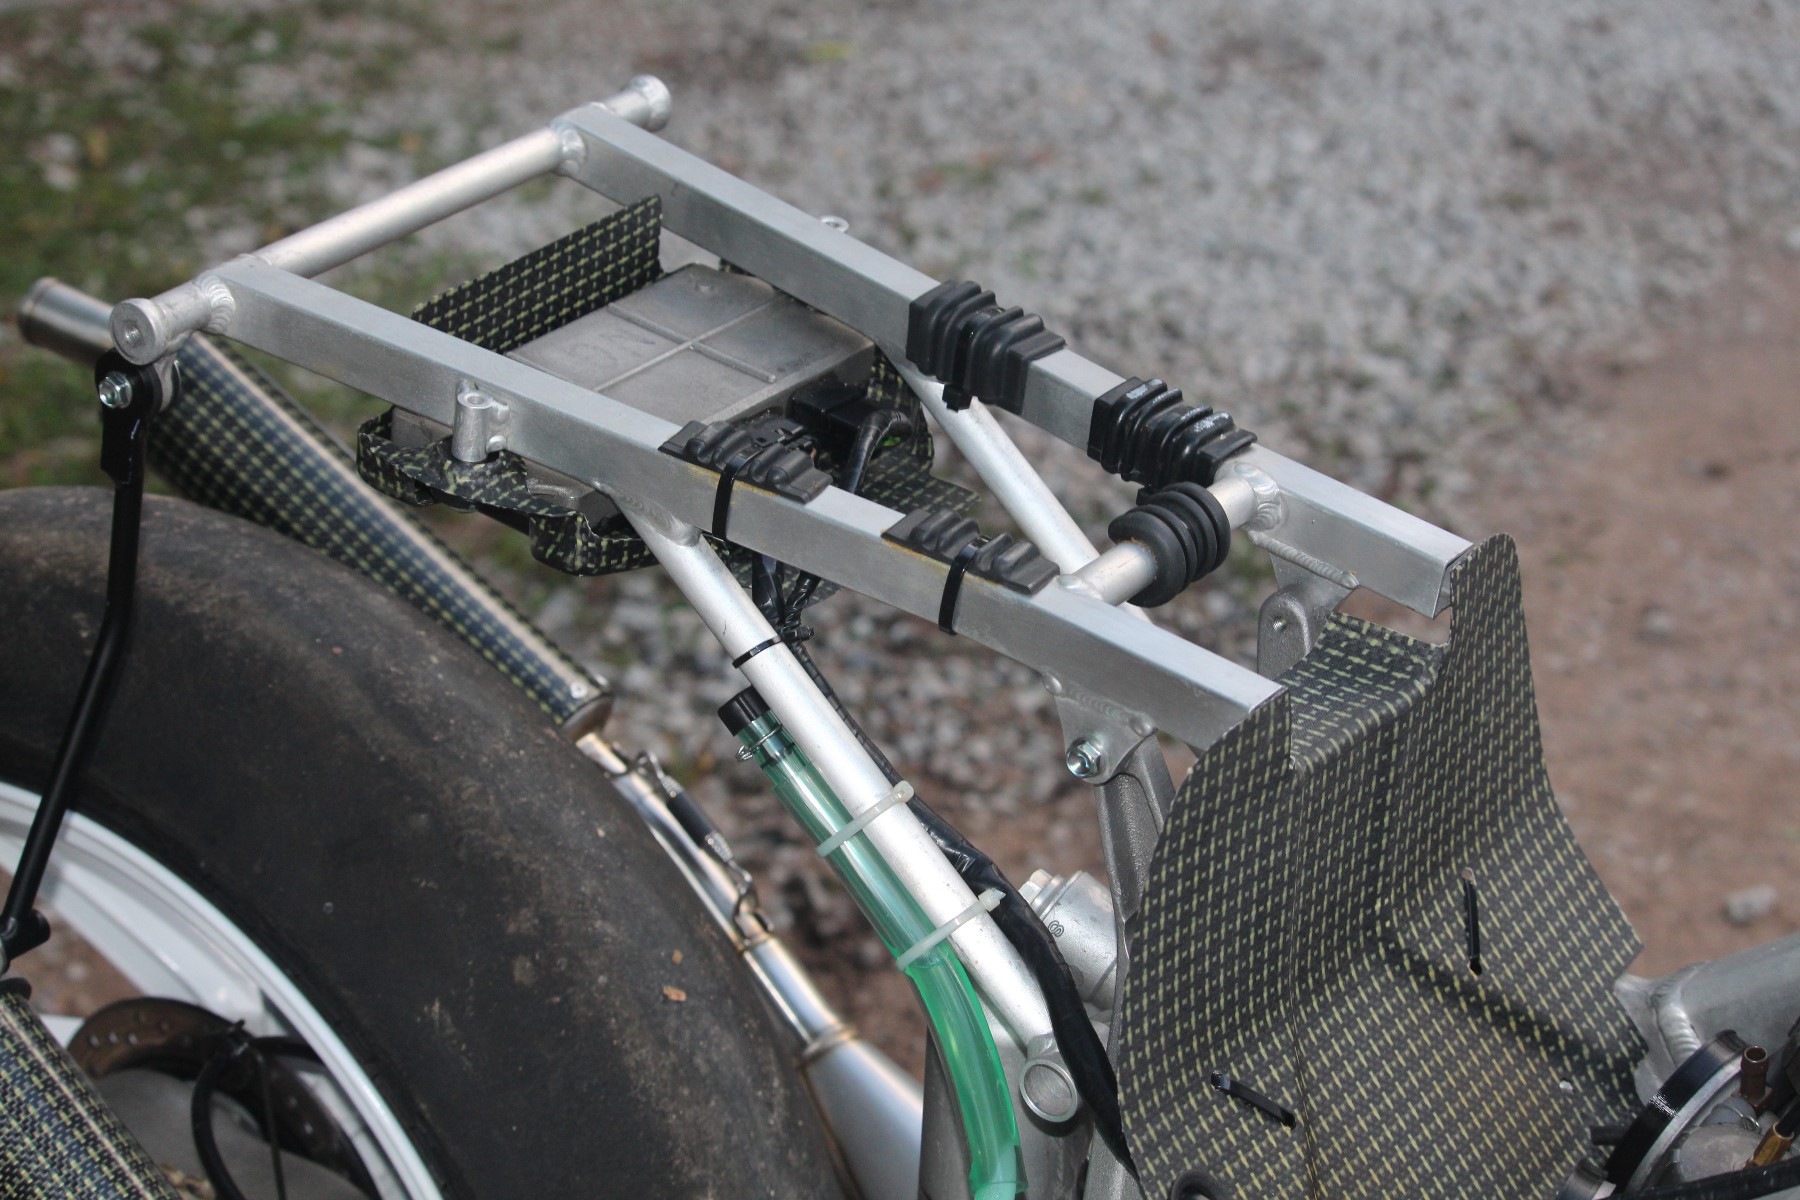
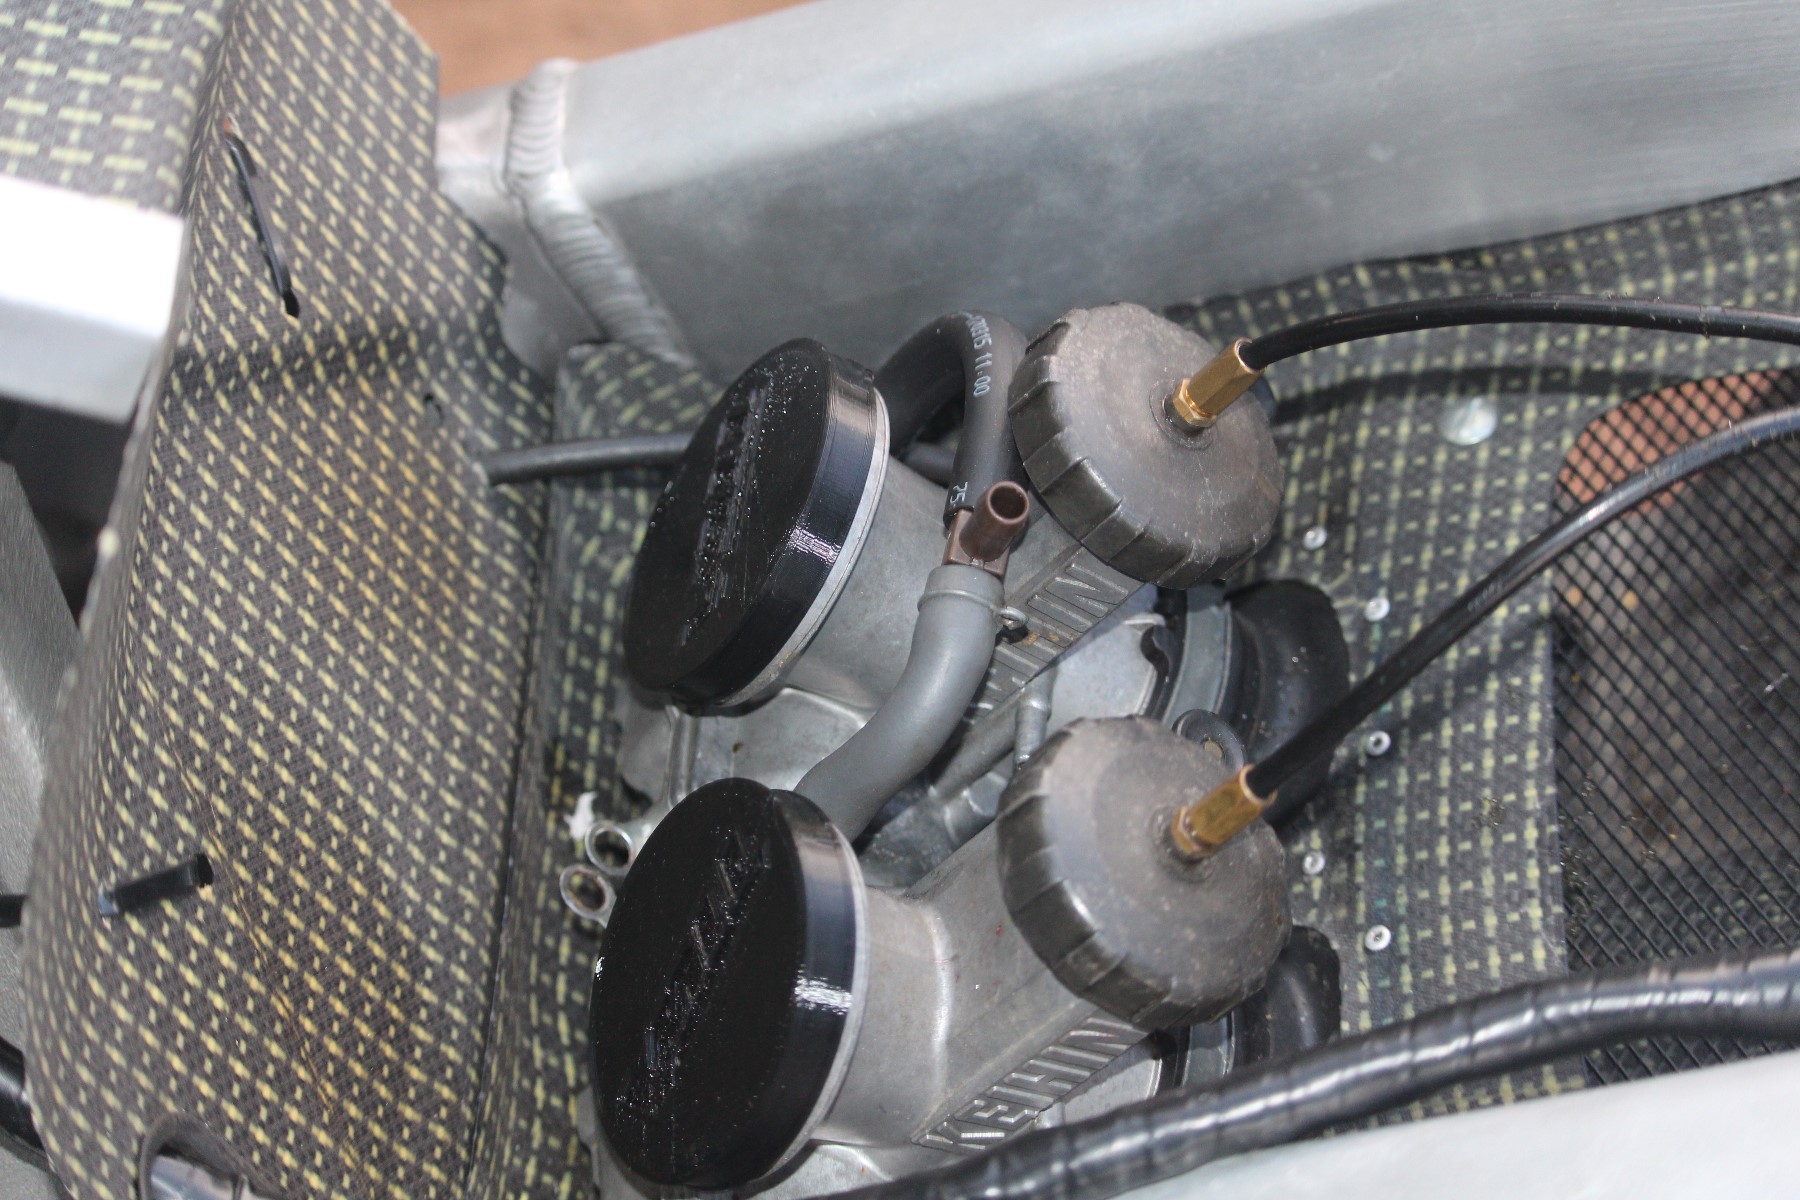
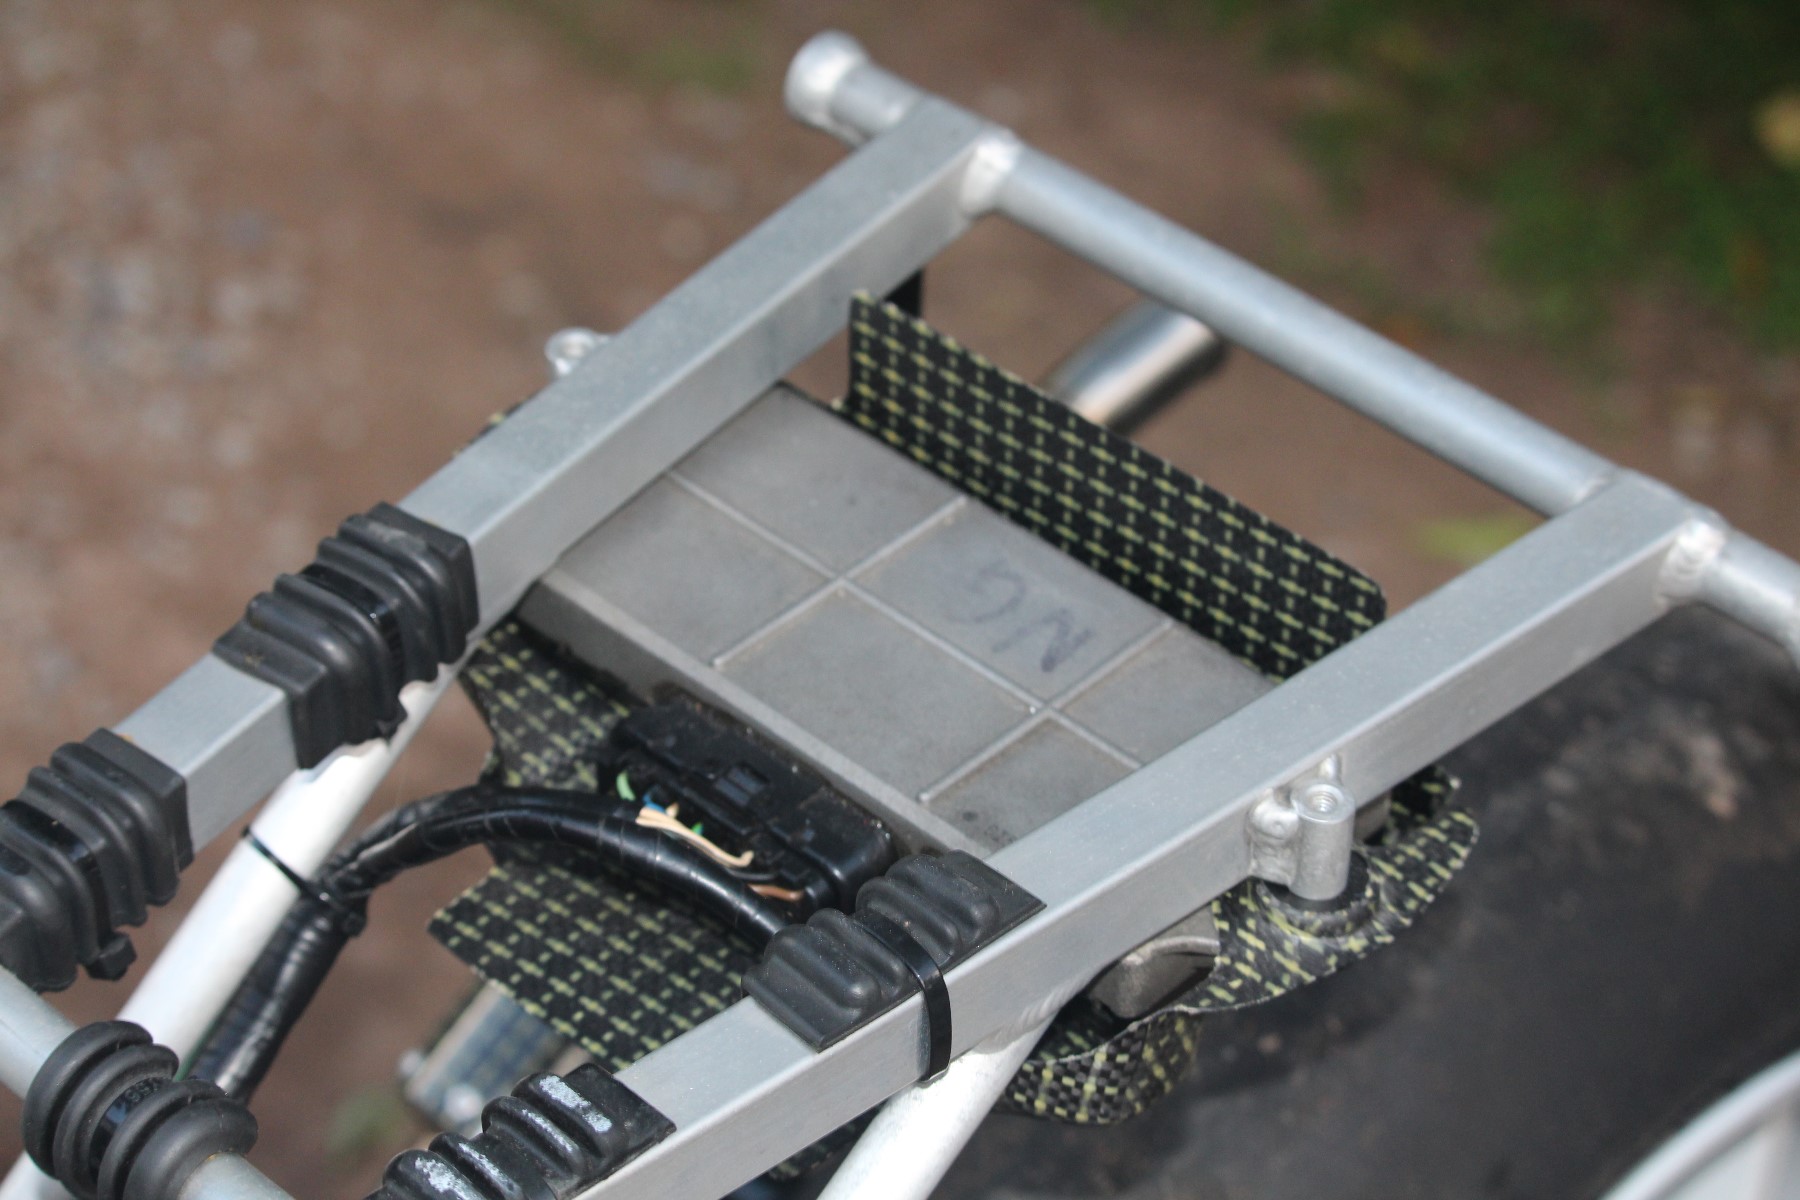

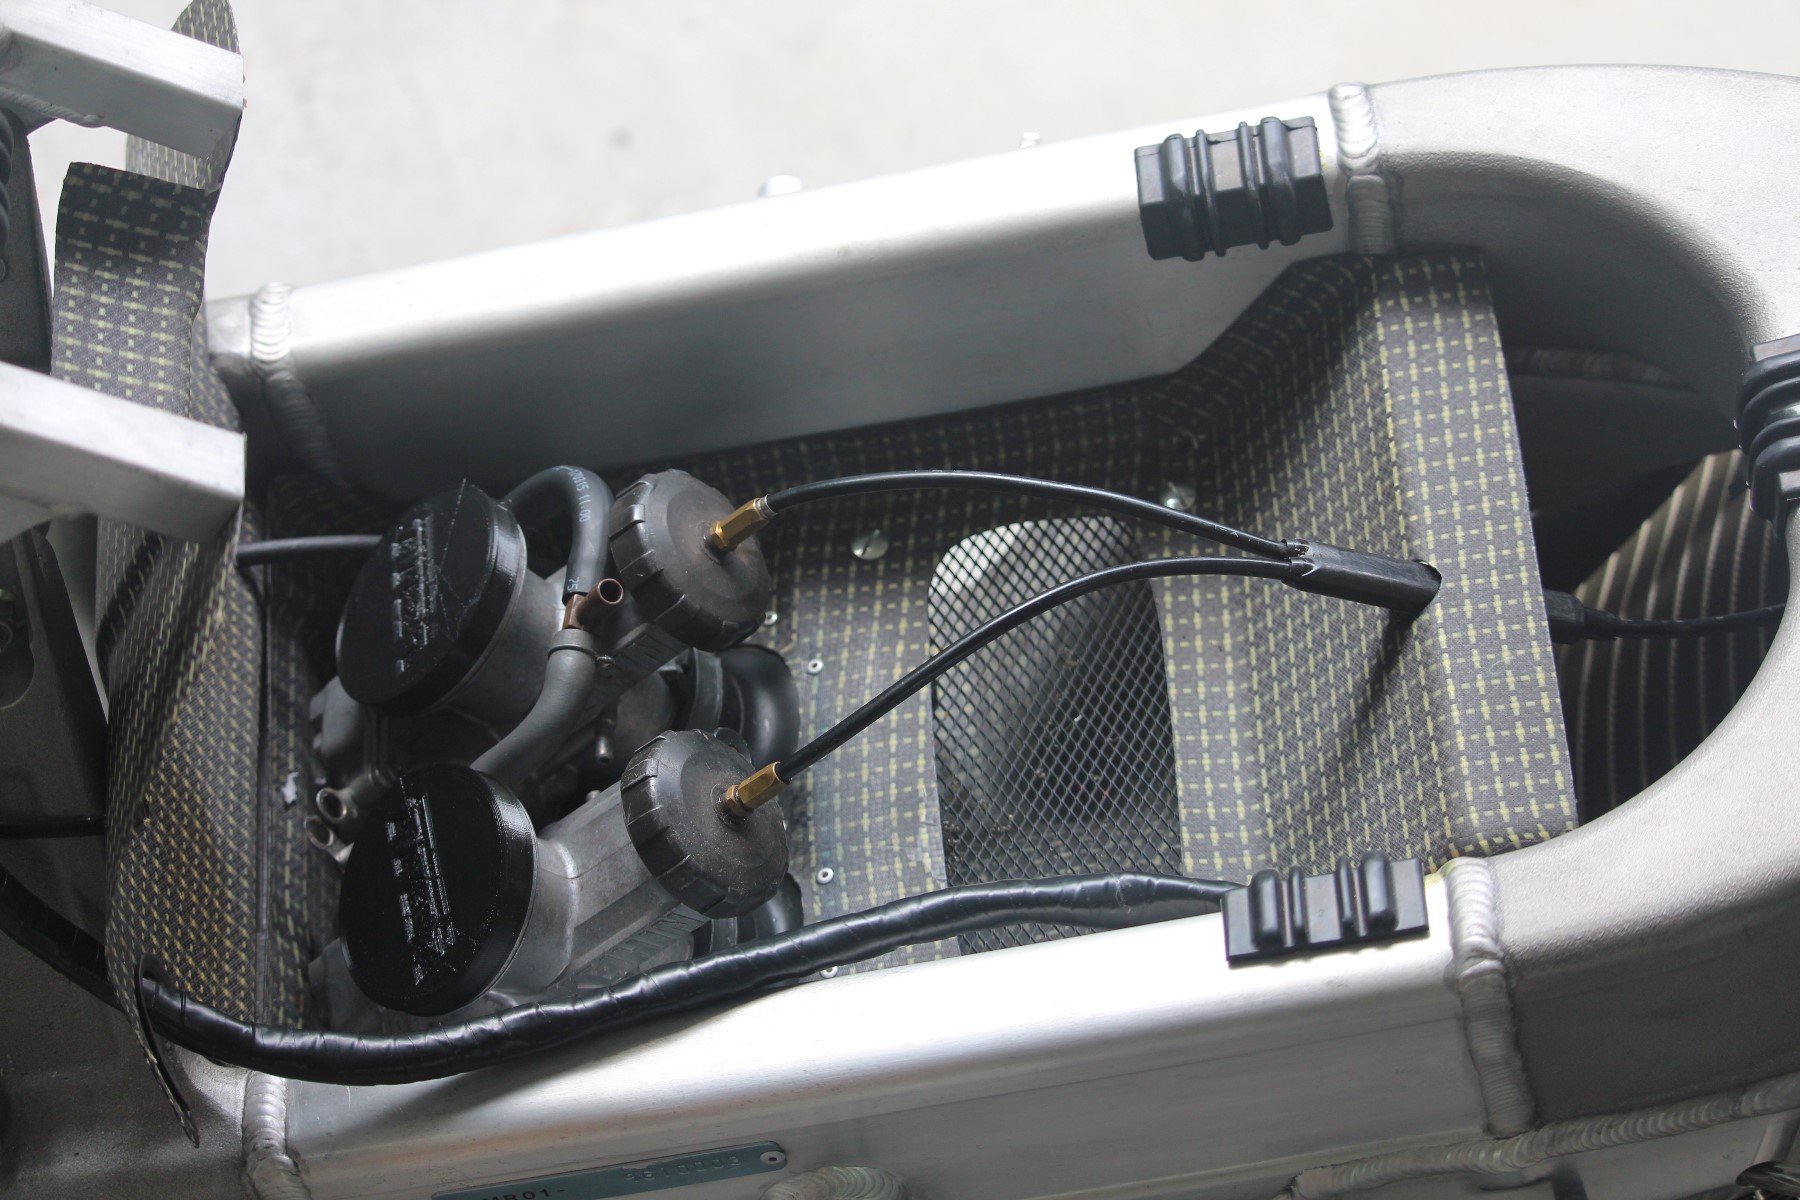
Things were really coming along. We had in our stock a couple of other major components, namely, carbs and radiator. Now things were really coming together. Next, a bunch of TYGA Performance parts were ordered out of stock and added to the build including bodywork, tank, exhausts, air box and CDI tray. We also checked out handlebars, HRC brake reservoir, radiator overflow bottle and a few other details.
The bodywork and fuel tank we sent off to K Pong for paint where it sat there and did nothing for months... Oh well, at least it gave us time to get the rest of the bike together.
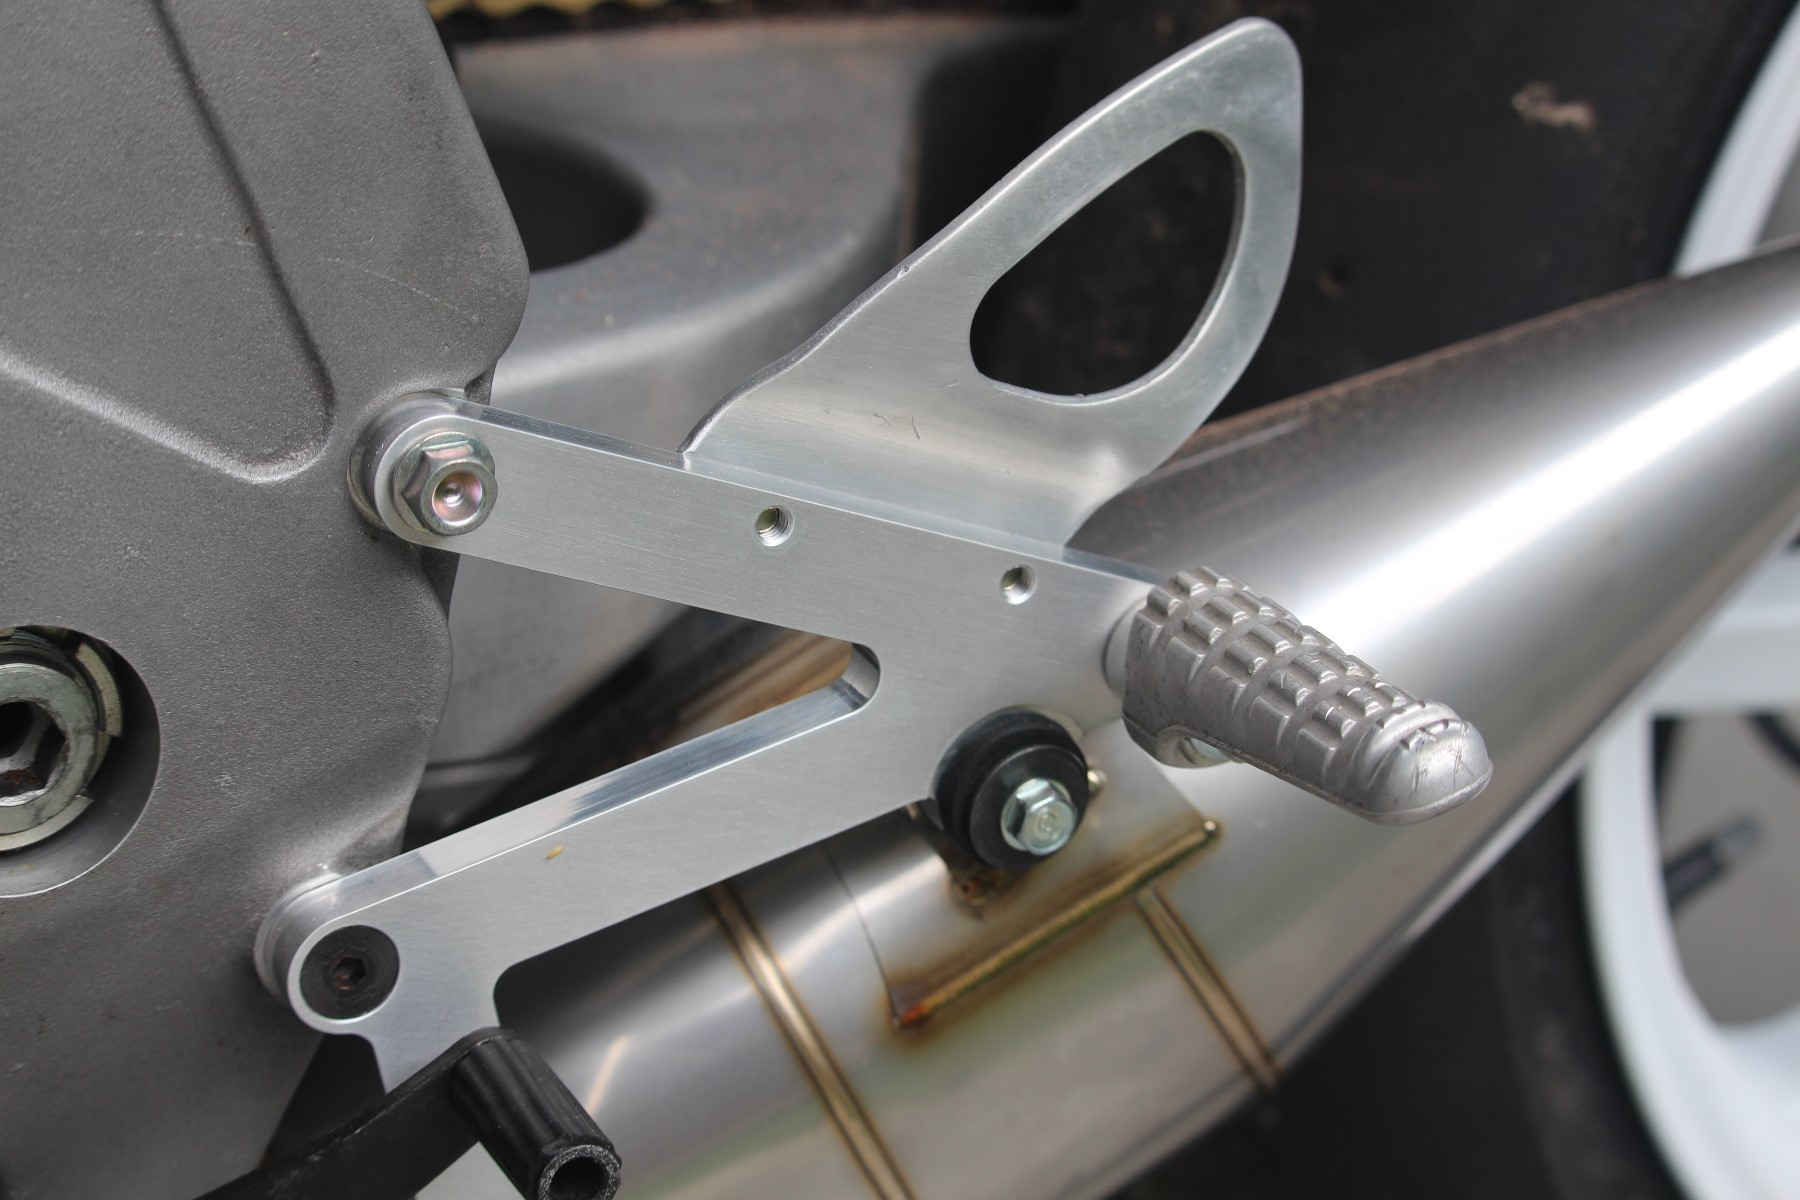
We were mostly successful with sourcing parts but a few things alluded us at this time. One was the RC valve rod ends and hex bar and also the standard foot peg hangers, ironic for a business that produces them. The trouble was we wanted stock type ones. St Neots sorted us out with hangers and we sourced levers and pegs.

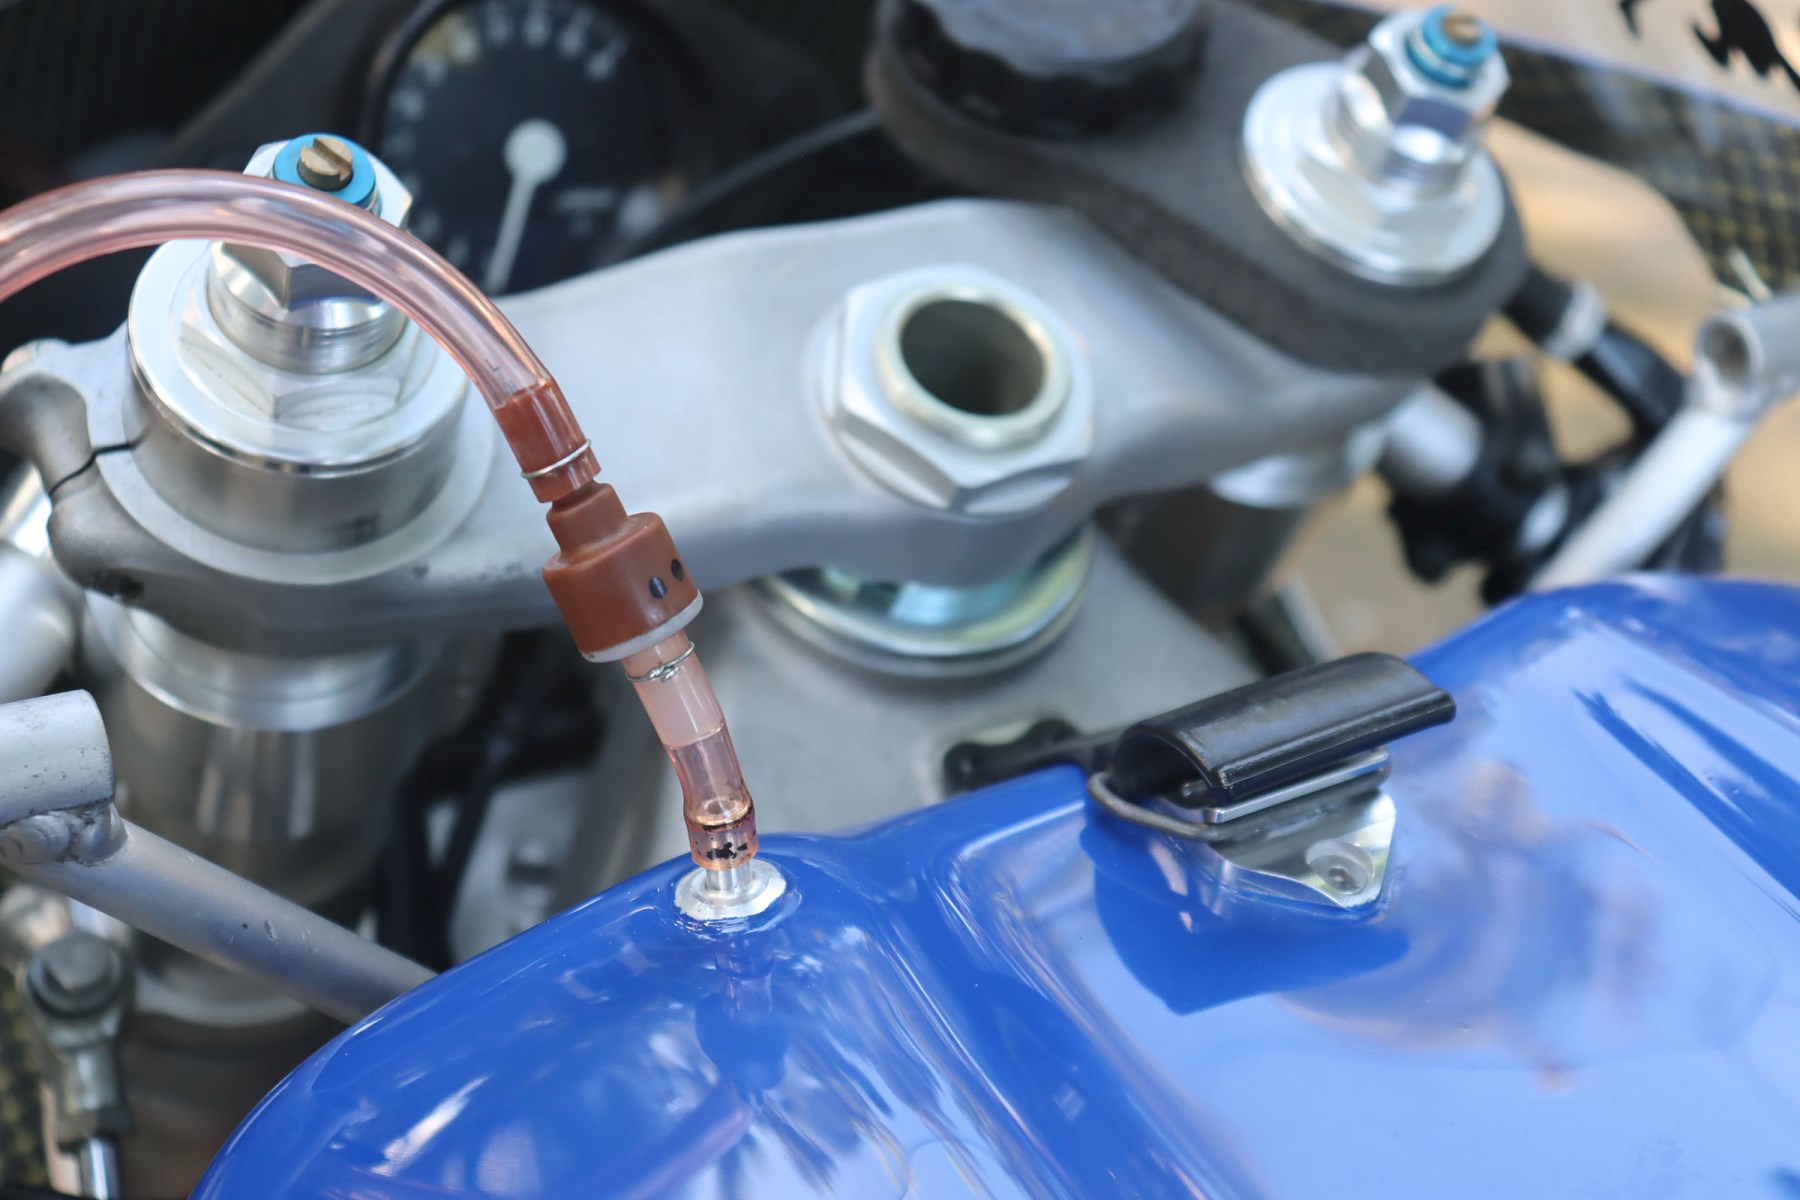
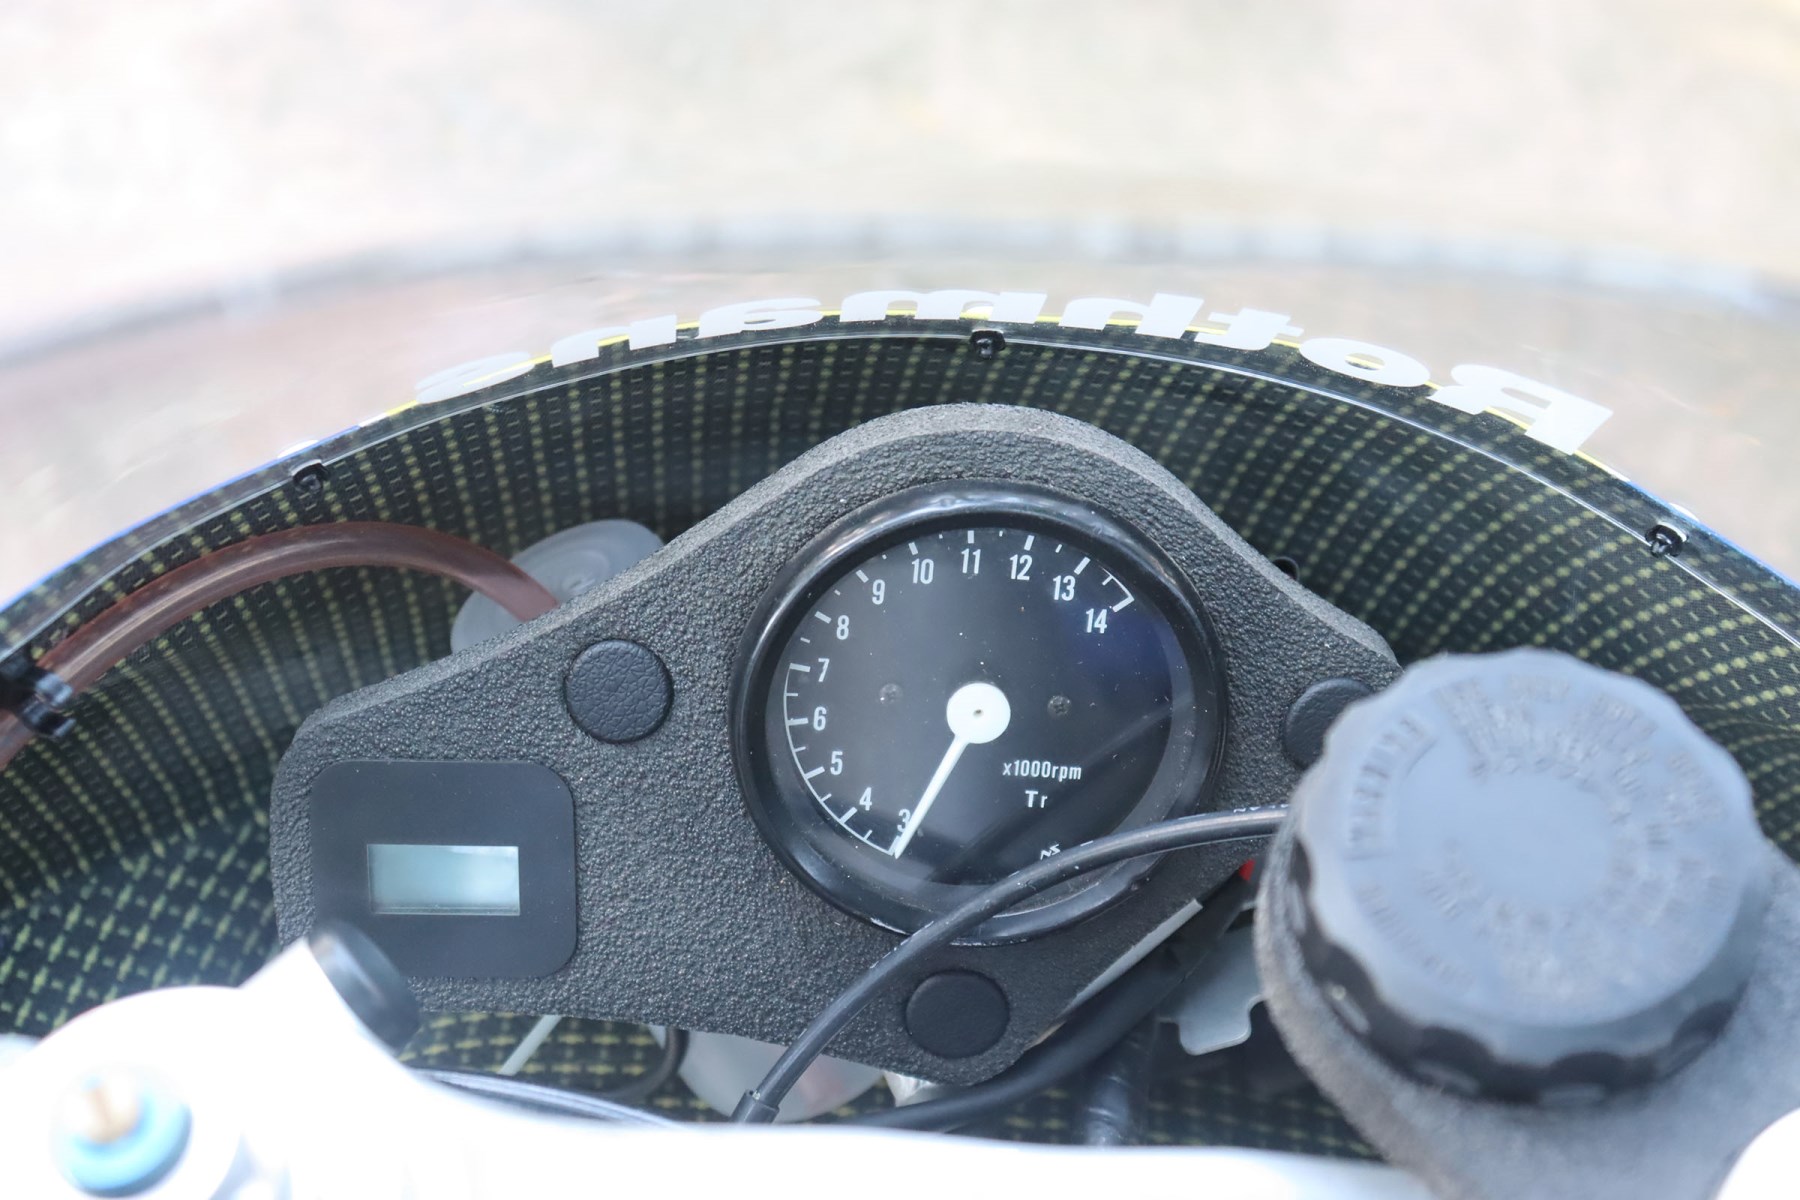
Matt made the hex bar from solid round bar and set up the RC valves. Like I mentioned earlier, we were short of instrumentation. We had a couple of rev counters that had definitely seen some serious action and were all dented and scratched. Our friend Stephen, at GT Performance Engineering after he visited us, took them back with him and had them refurbished. We have a bag of HRC temp gauges and most have faded LCDs. Luckily, one is decipherable so that was chosen. We had to cut down a later model meter stay but as far as I can tell, there is very little difference and it fits great. Foam for instruments and reservoir holder was supplied by a guy on facebook who has them reproduced and they are perfect.


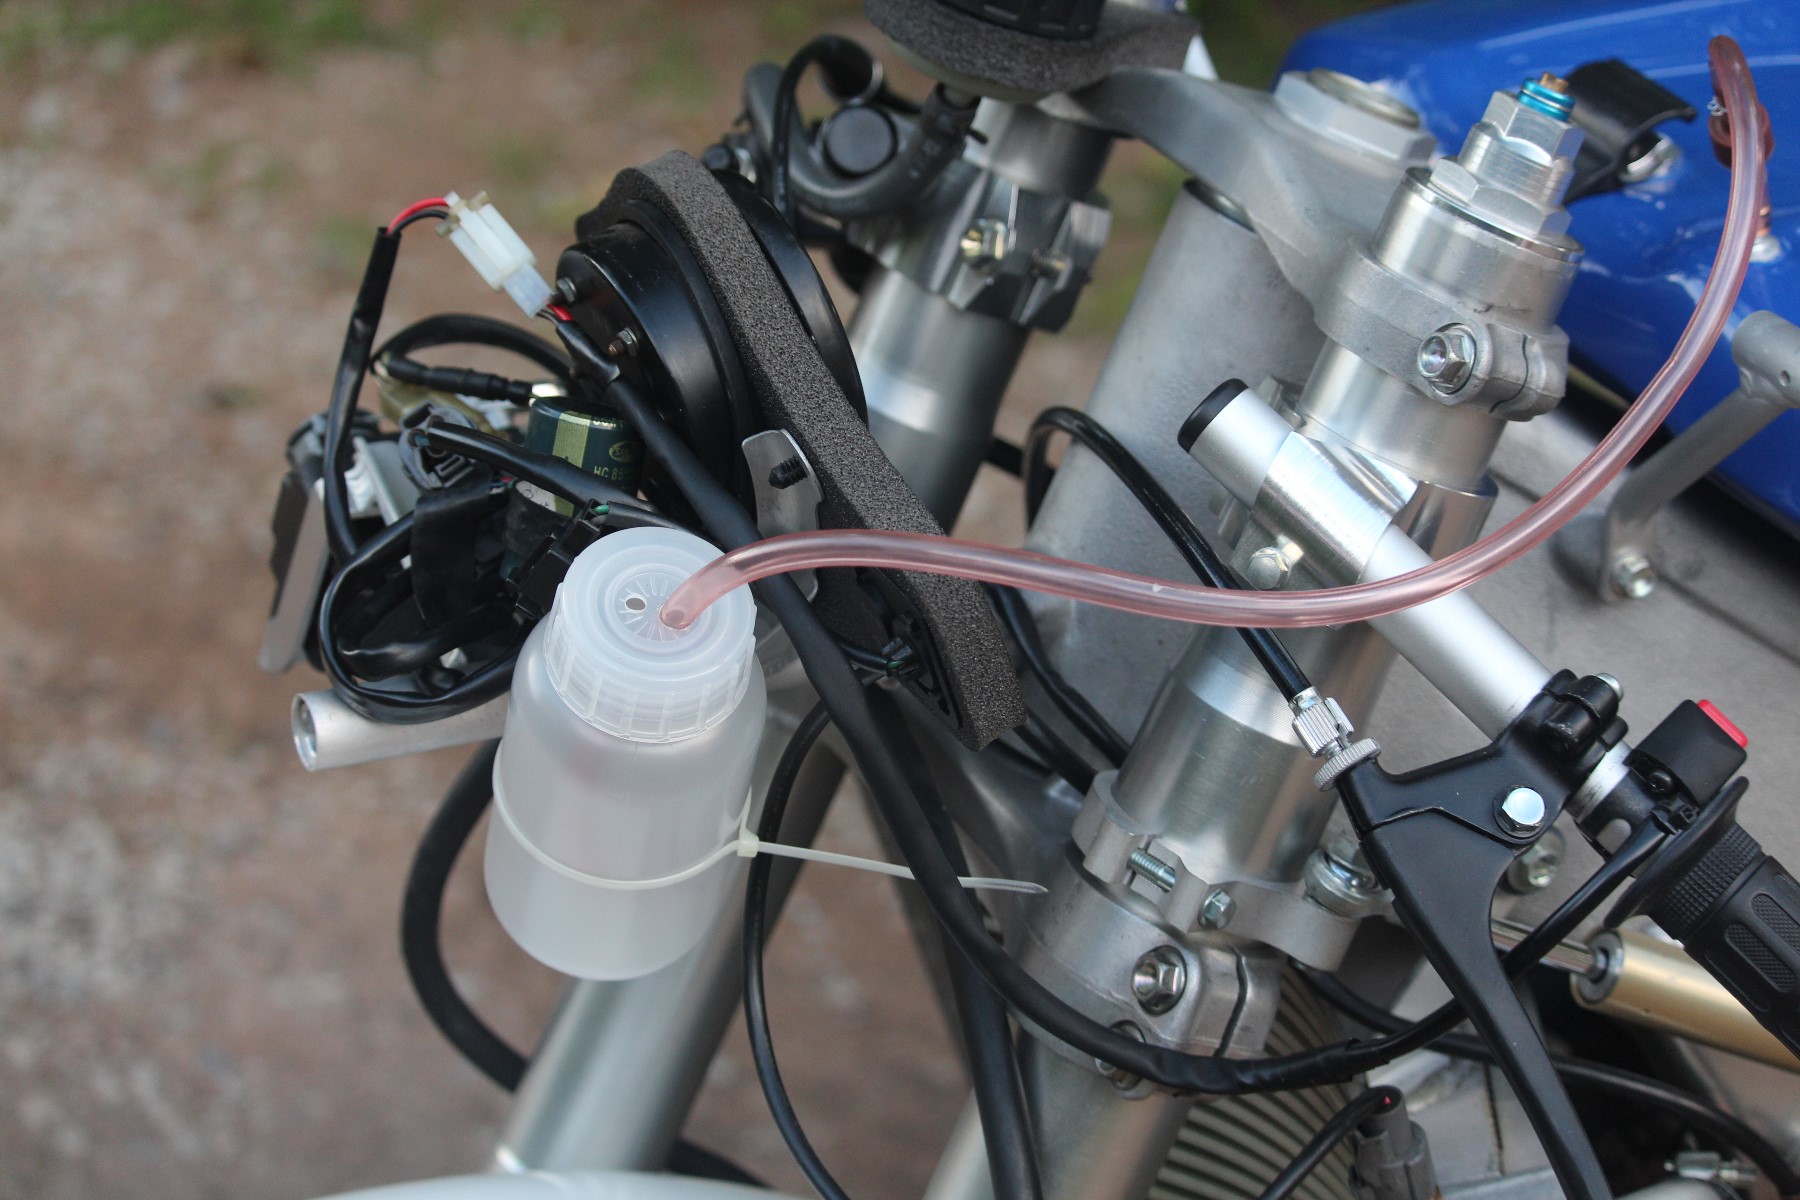
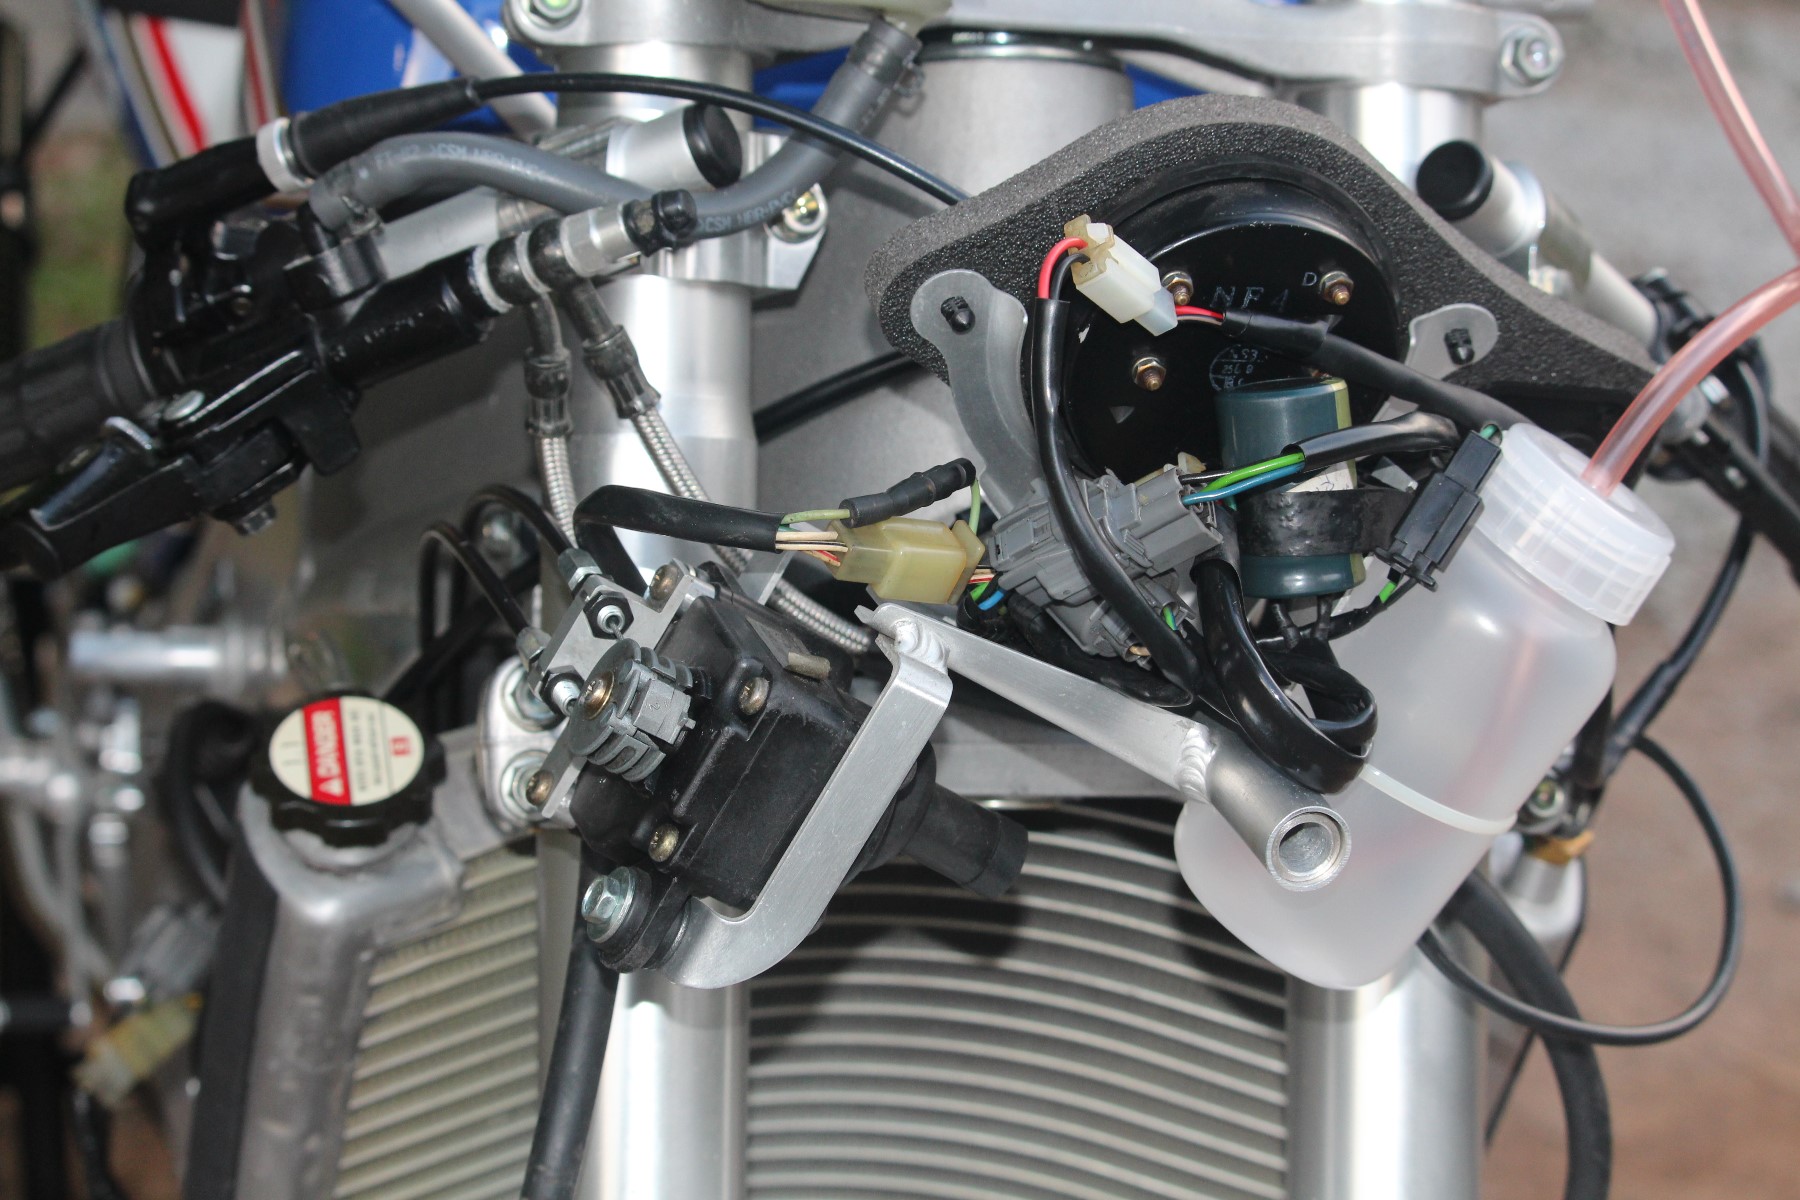
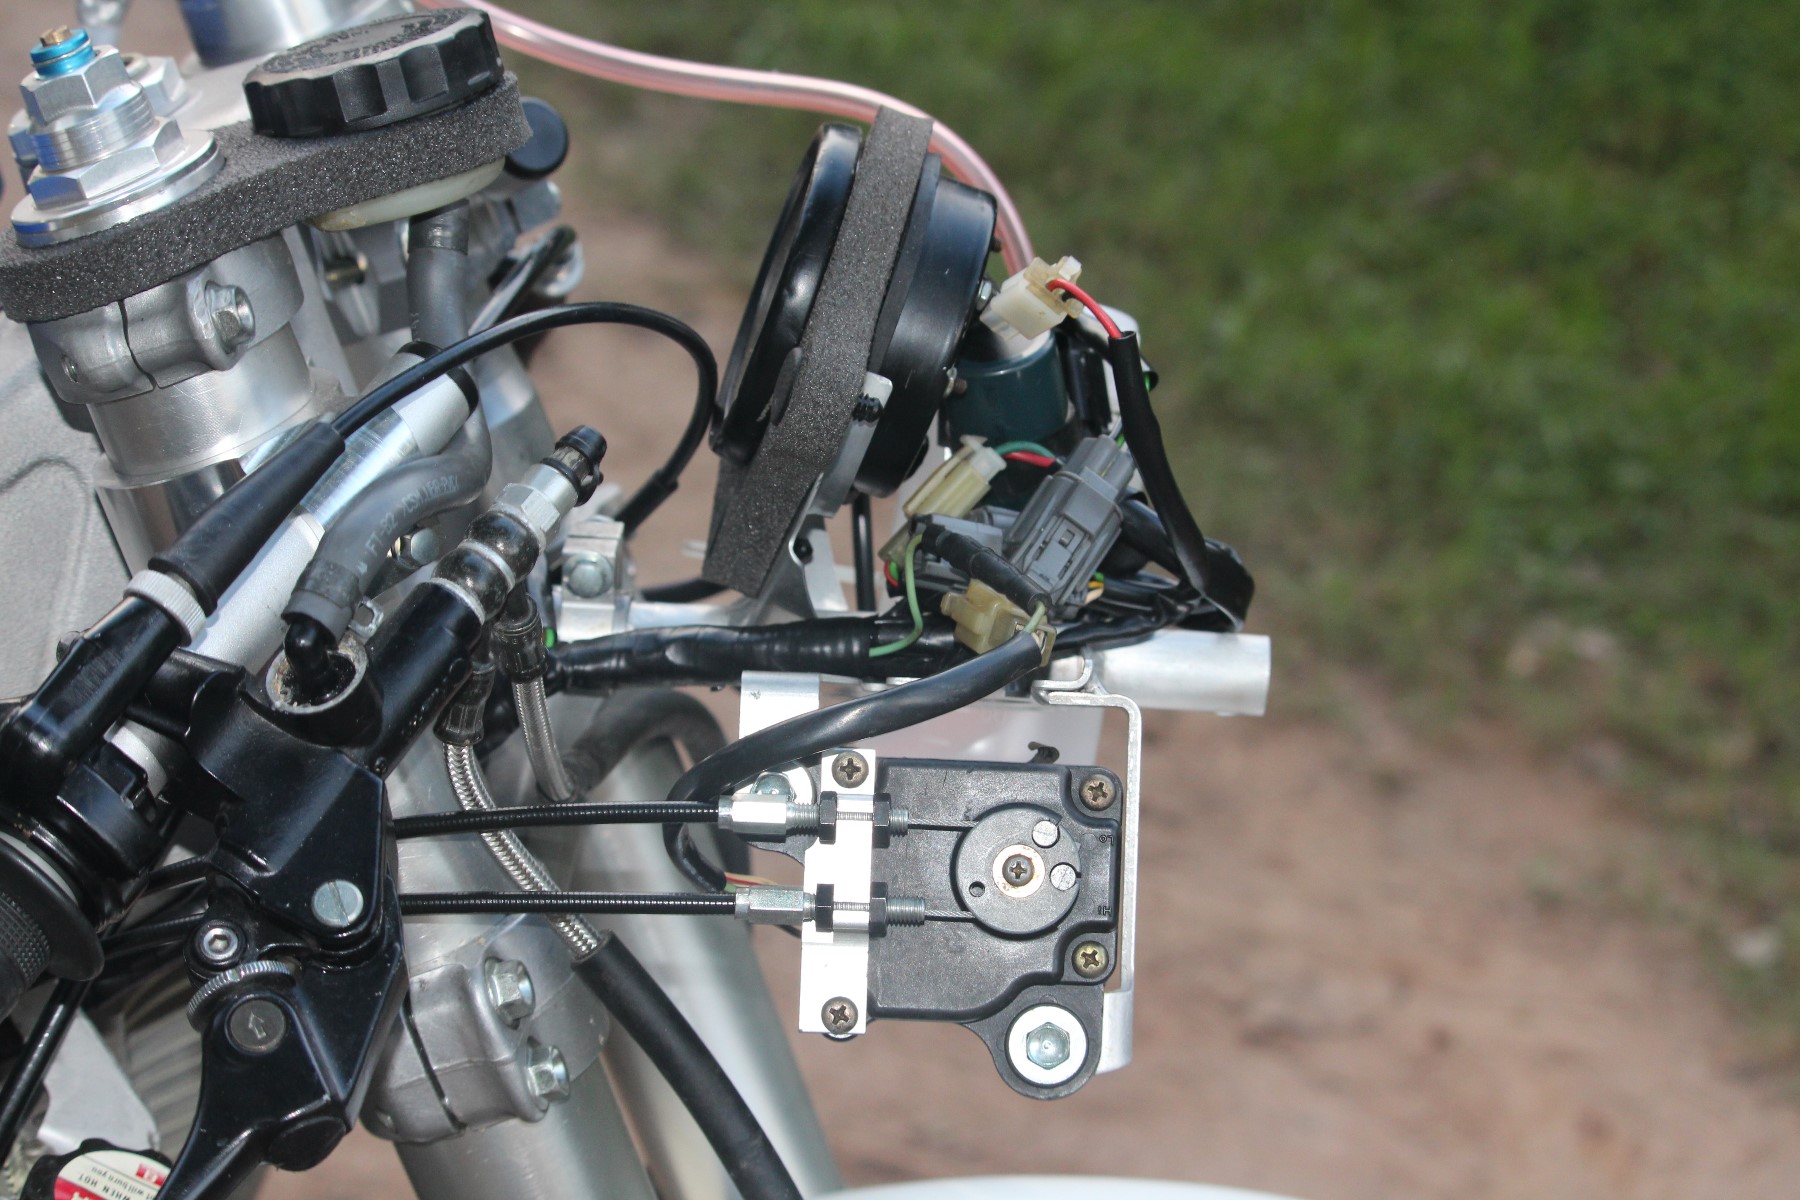
There are always odd jobs to do such as clean up the harness and wrap it in new PVC tape. Kills switches, coils, regulator/rectifier, throttle and controls were all sourced and installed. Now was the time to attempt the first start up in probably nearly 20 years. I'll let Matt explain this part because I was away on a jolly or business and something and wasn't here to witness it.
As Paul mentioned earlier, I'd already had a quick look at the top end. This was mainly because the coolant bleed bolts in the cylinders and heads needed replacing, but while trying to undo one of them it just cleanly sheared off, even after warming it up. Not good. Thankfully I had a couple of spare heads from my bike (mine has VHM heads), so I dug them out and scrubbed them up ready to fit. As the heads were off I figured I'd pop the cylinders off and all looked good. So in true "that'll be alright" fashion, I just threw it back together.
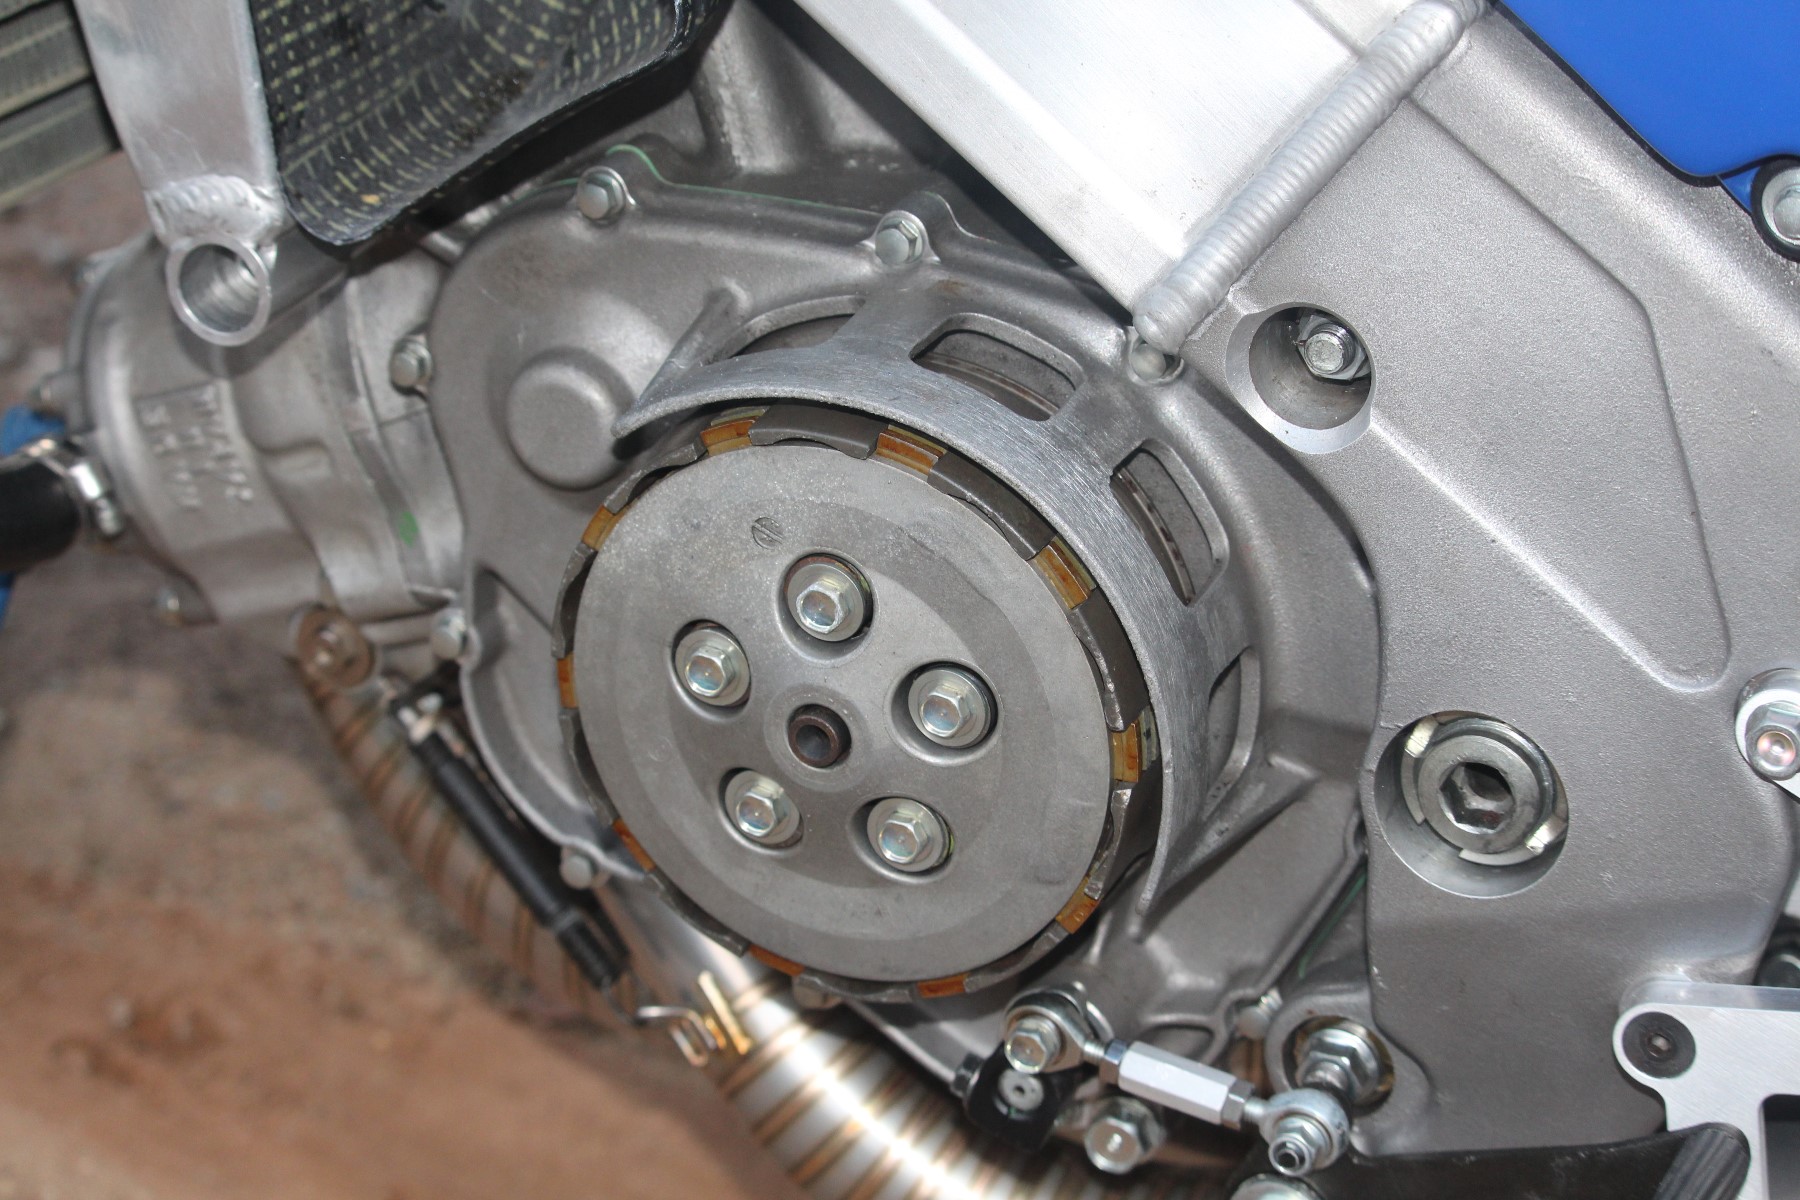
The clutch felt a tad dodgy and I was struggling to get the right free play and what have you, so pulled the clutch apart to discover that the push rod and the clutch lifter were mangled, and no sign of the usual three balls. It wasn't even as if there was a load of nasty mashed metal in there, so I've a feeling that they'd just been thrown in to make it sort of complete. After rummaging through my boxes of bits I found a good clutch lifter and three new balls, but no push rod. Paul's a master at sourcing stuff so just let him get on with that, and in no time we had a push rod.
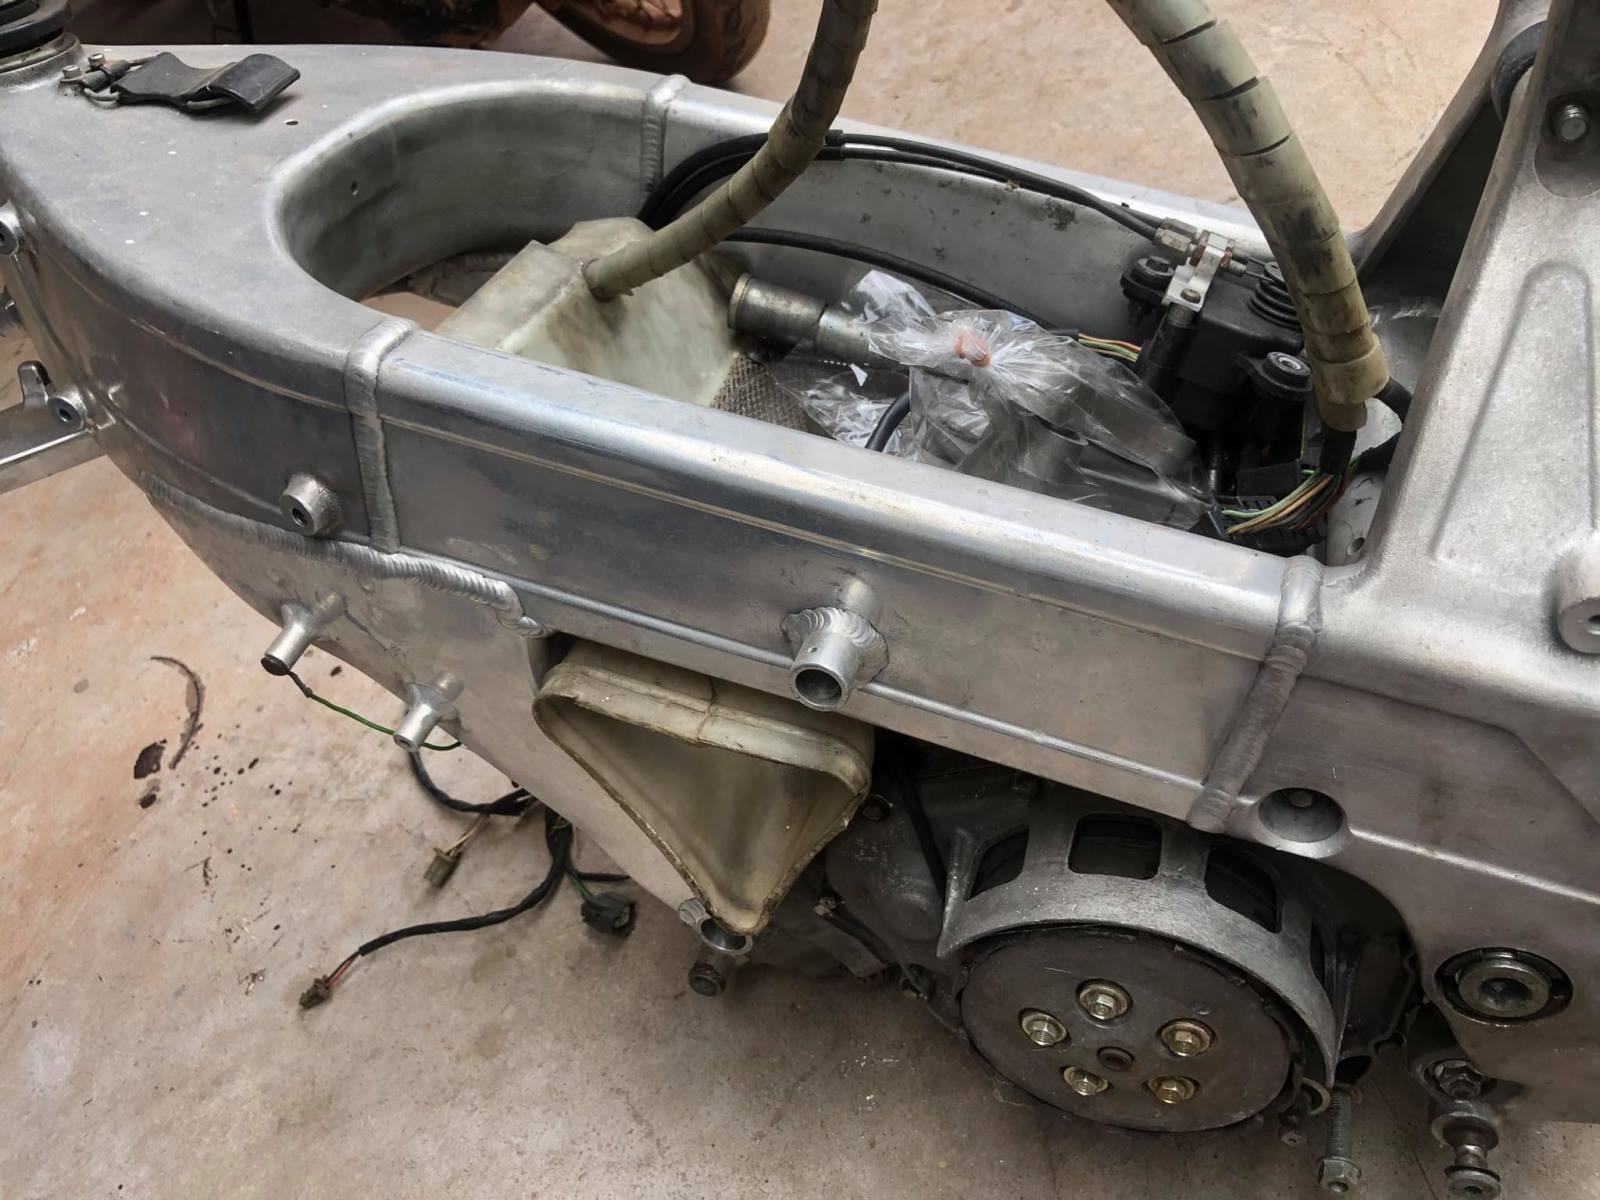
Now to see if this thing will start. First I set up the RC valves using the HRC checker, and then connected up my ignition sim which will check that it sparks and that the valves move etc. All good here. So threw in some fuel, chokes on, kicked it into gear and started pushing.....and pushing.......and pushing......Eventually it fired into life, but it wasn't really sounding like a proper GP bike. Intermittently onto one cylinder, then two, then one. I fiddled with the wire harness and cleaned all the connections again (been caught out here before), but to no avail. I had this nagging feeling that it was a crank seal issue. So instead of doing what I should have done and do a leak down test, I stuck some other carbs on it. Same problem of course. Swapped plugs, swapped coils, checked a few connections. Nope. Most definitely the crank seals. So dragged out the leak down tester, hooked it up and sure enough the centre seal was totally shot. Surprised that it even started!
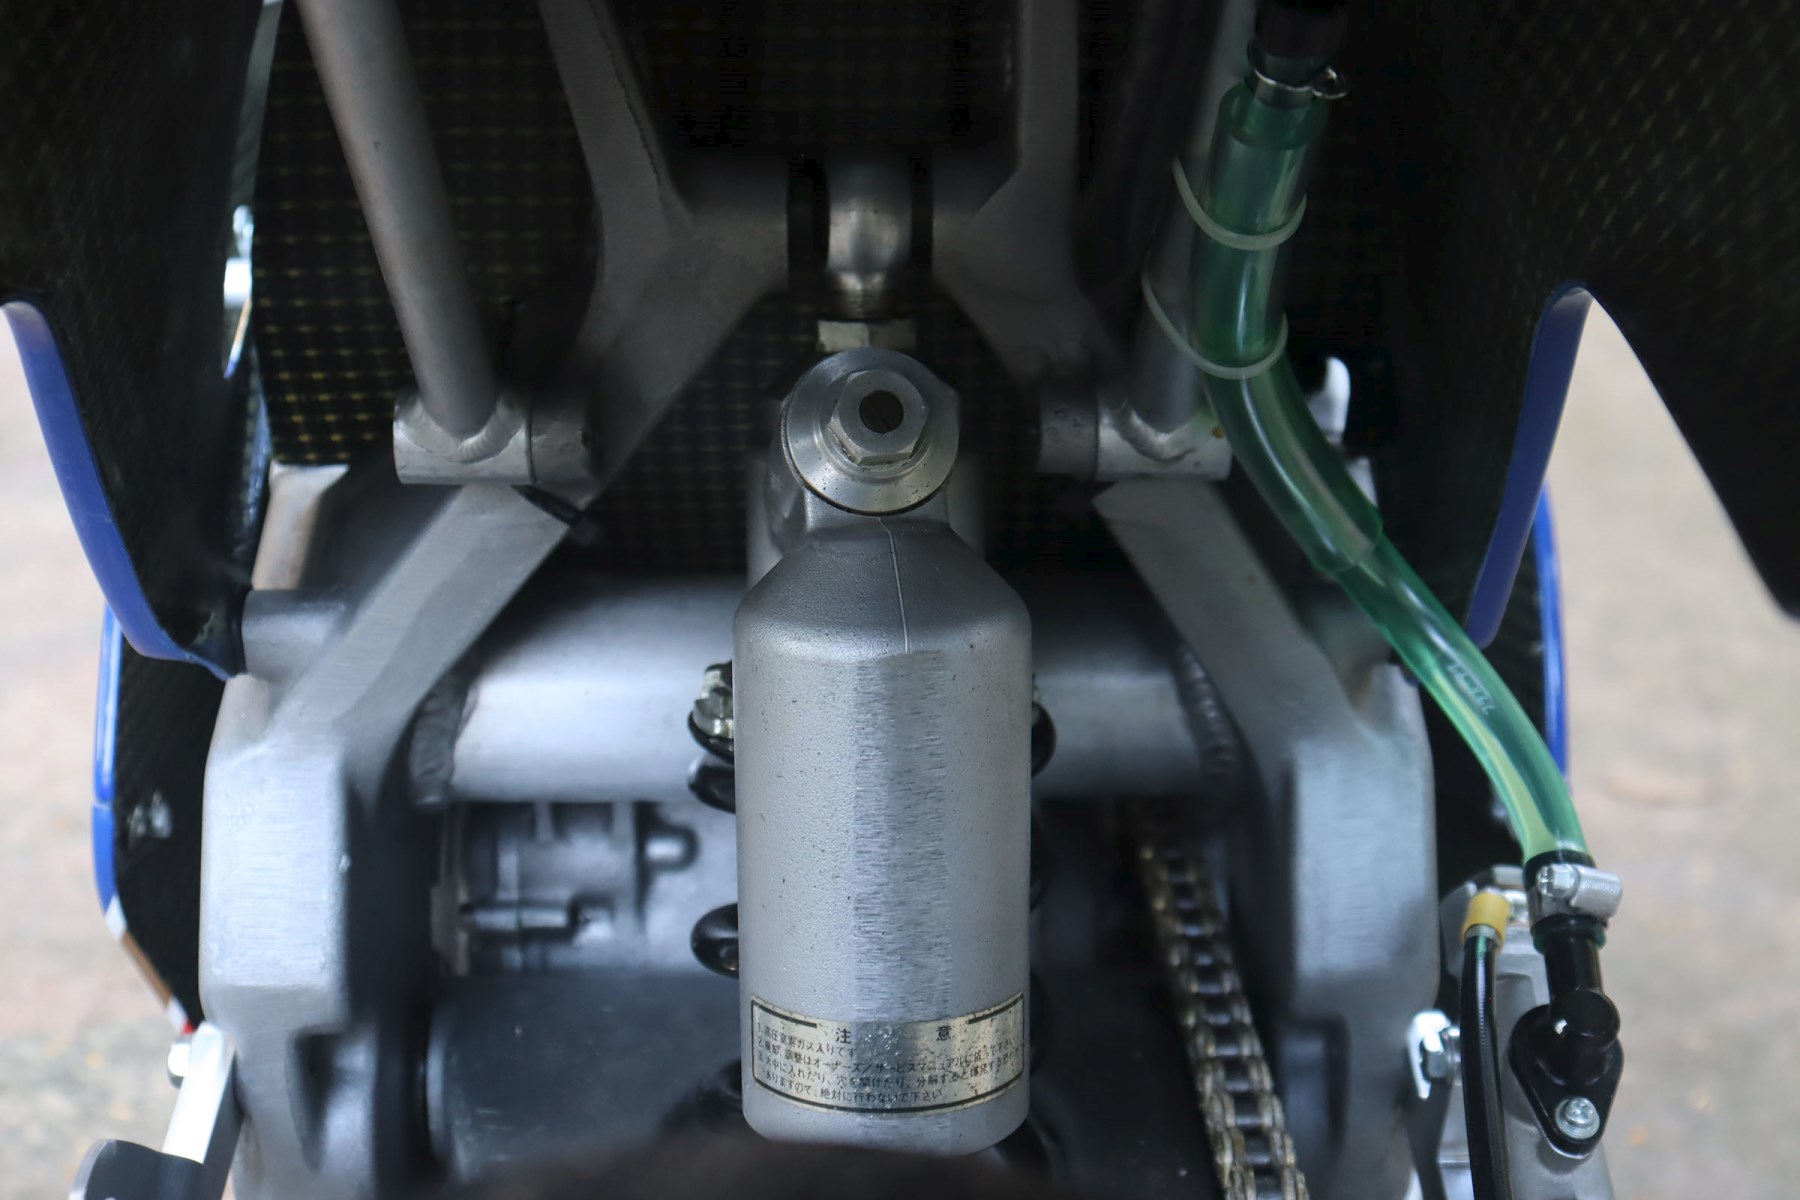
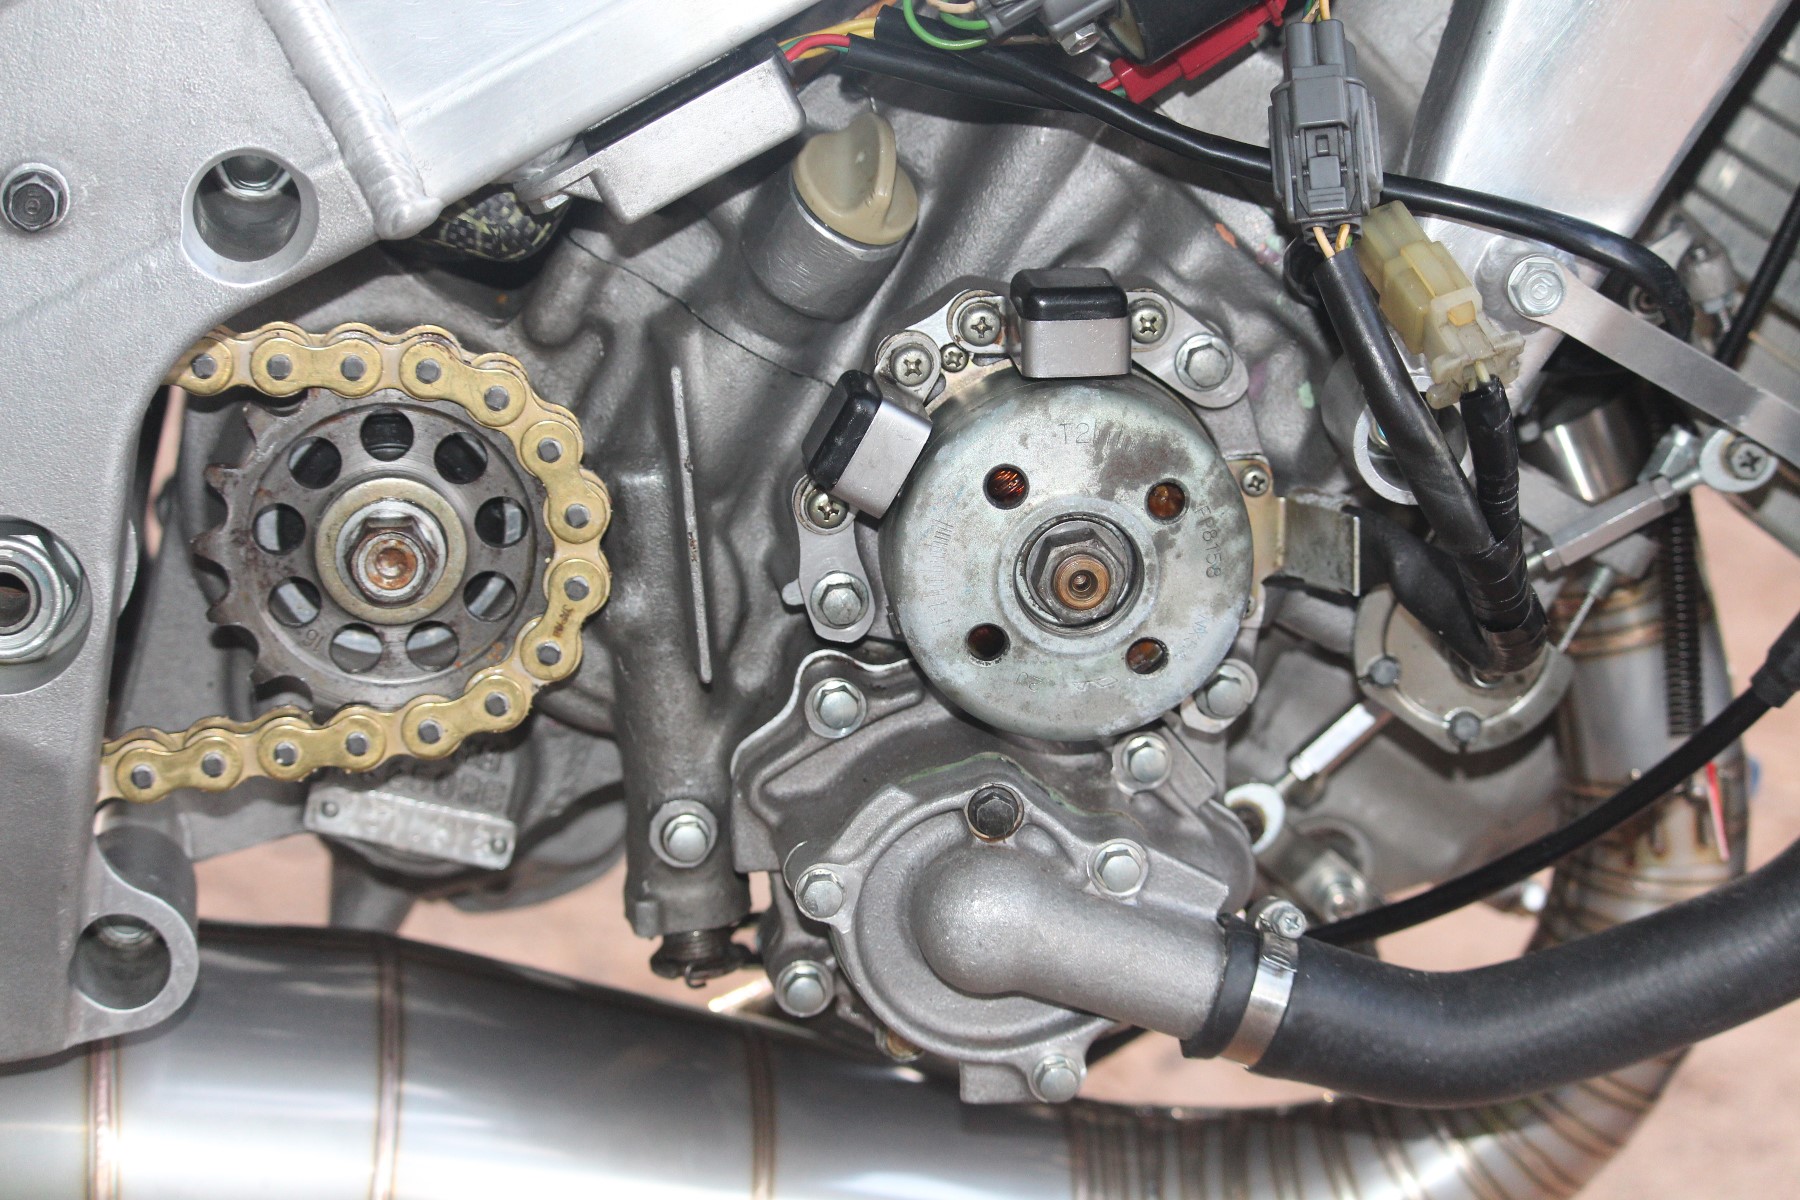
Another dig through my boxes, and under my stash of hen's teeth I had a brand new NX5 crank. Woohoo! So armed with that and a set of new seals I rebuilt the engine with its shiny new crank. The leak down test after the rebuild showed that it was sealed nicely. So threw the engine back in the frame, plugged it all in, and barely three steps were enough for it to fire into life. Thank goodness for that. But then of course another story came into play, and now the water pump was leaking. So pulled the water pump apart for a look, and the shaft was a little worse for wear. Back to the magic boxes and I was able to find a water pump shaft in somewhat better condition and some new seals and bearing. Popped them in, screwed it all back together and finally it worked without any problems.
The moral here is just rebuild it. Don't assume it will be good. Just rebuild it with fresh parts.....

So, the upshot was, we needed to rebuild the engine with new crank seals, clean up the water pump shaft and find a new clutch actuator rod. The latter was surprisingly difficult to source and the seller I eventually sourced on could have named any price. Luckily, he was reasonable and it was brand new and exactly what was needed. The mechanicals were now complete and the bike now starts and ran like a new one. After we were satisfied with everything, we parked it and waited for the bodywork to come back from paint.
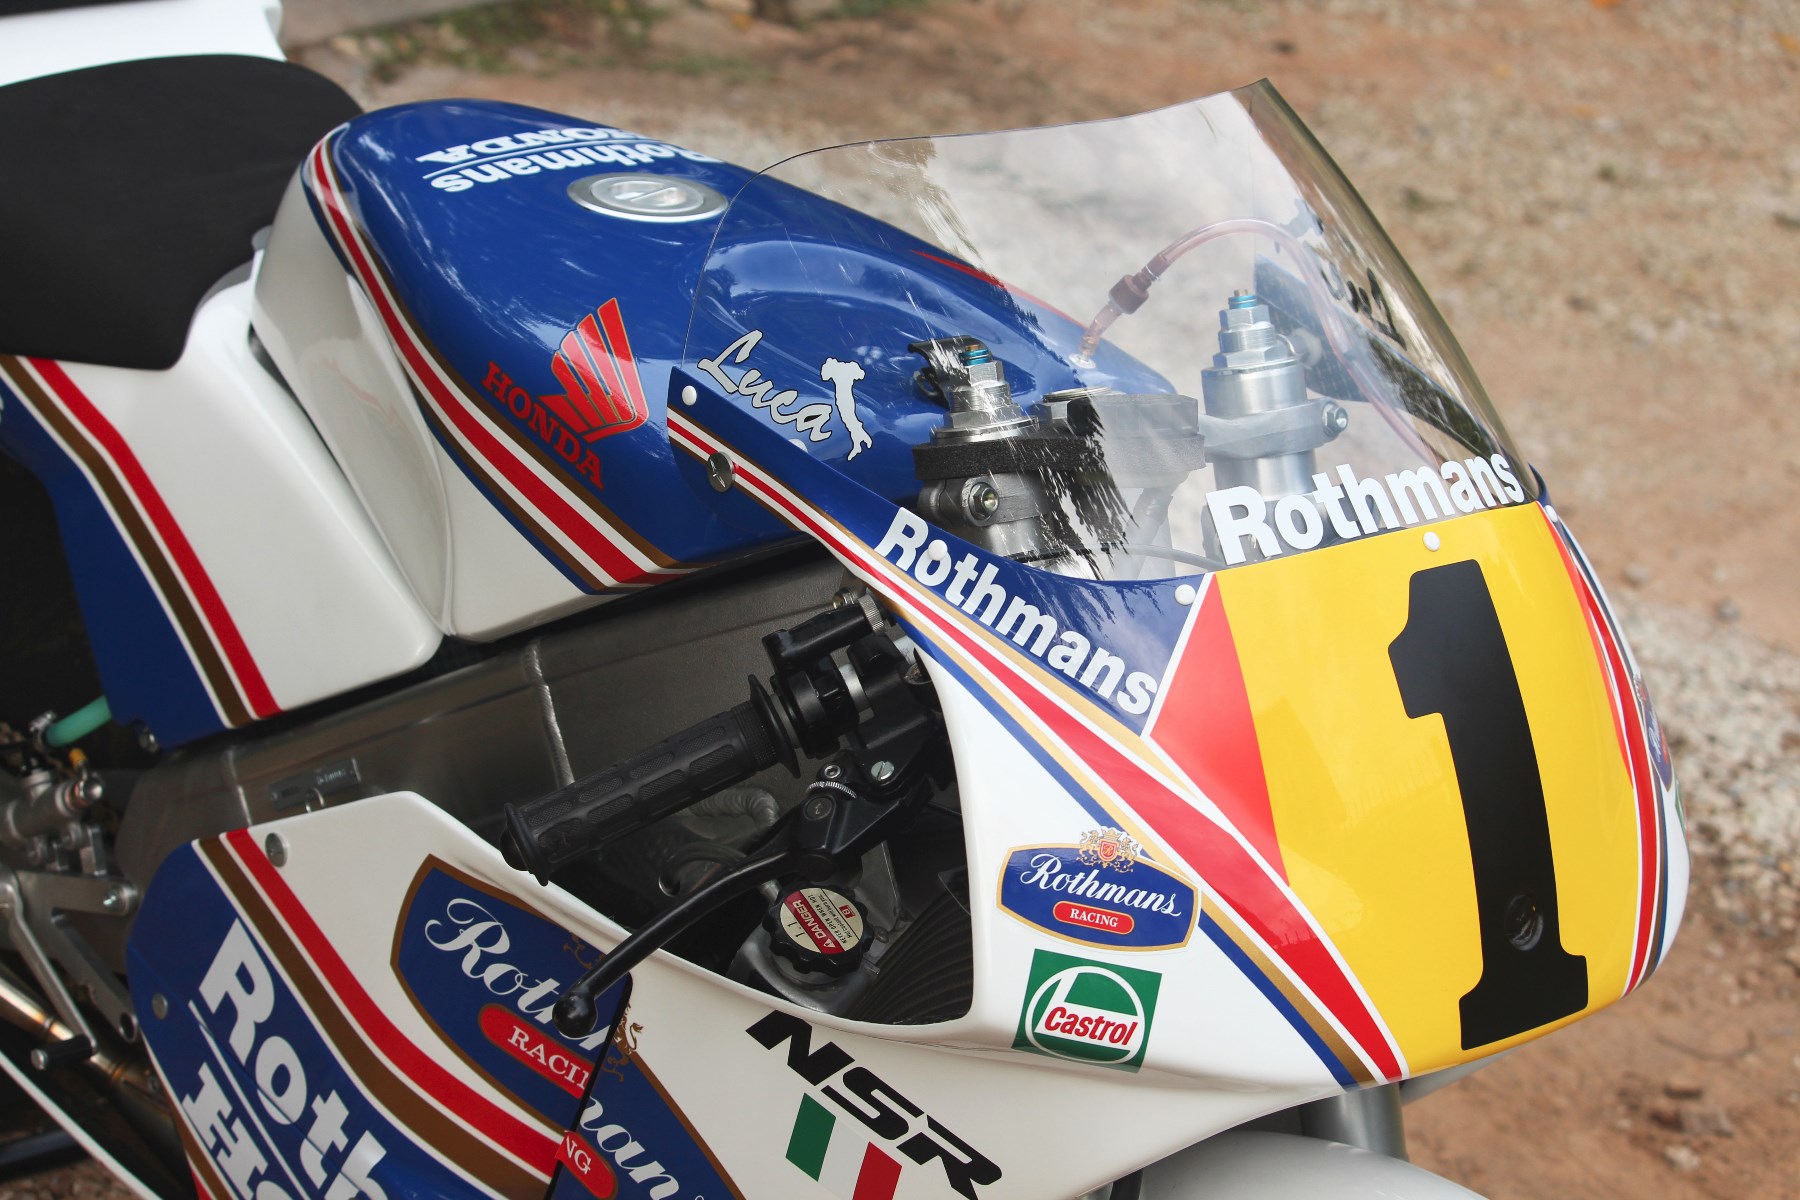
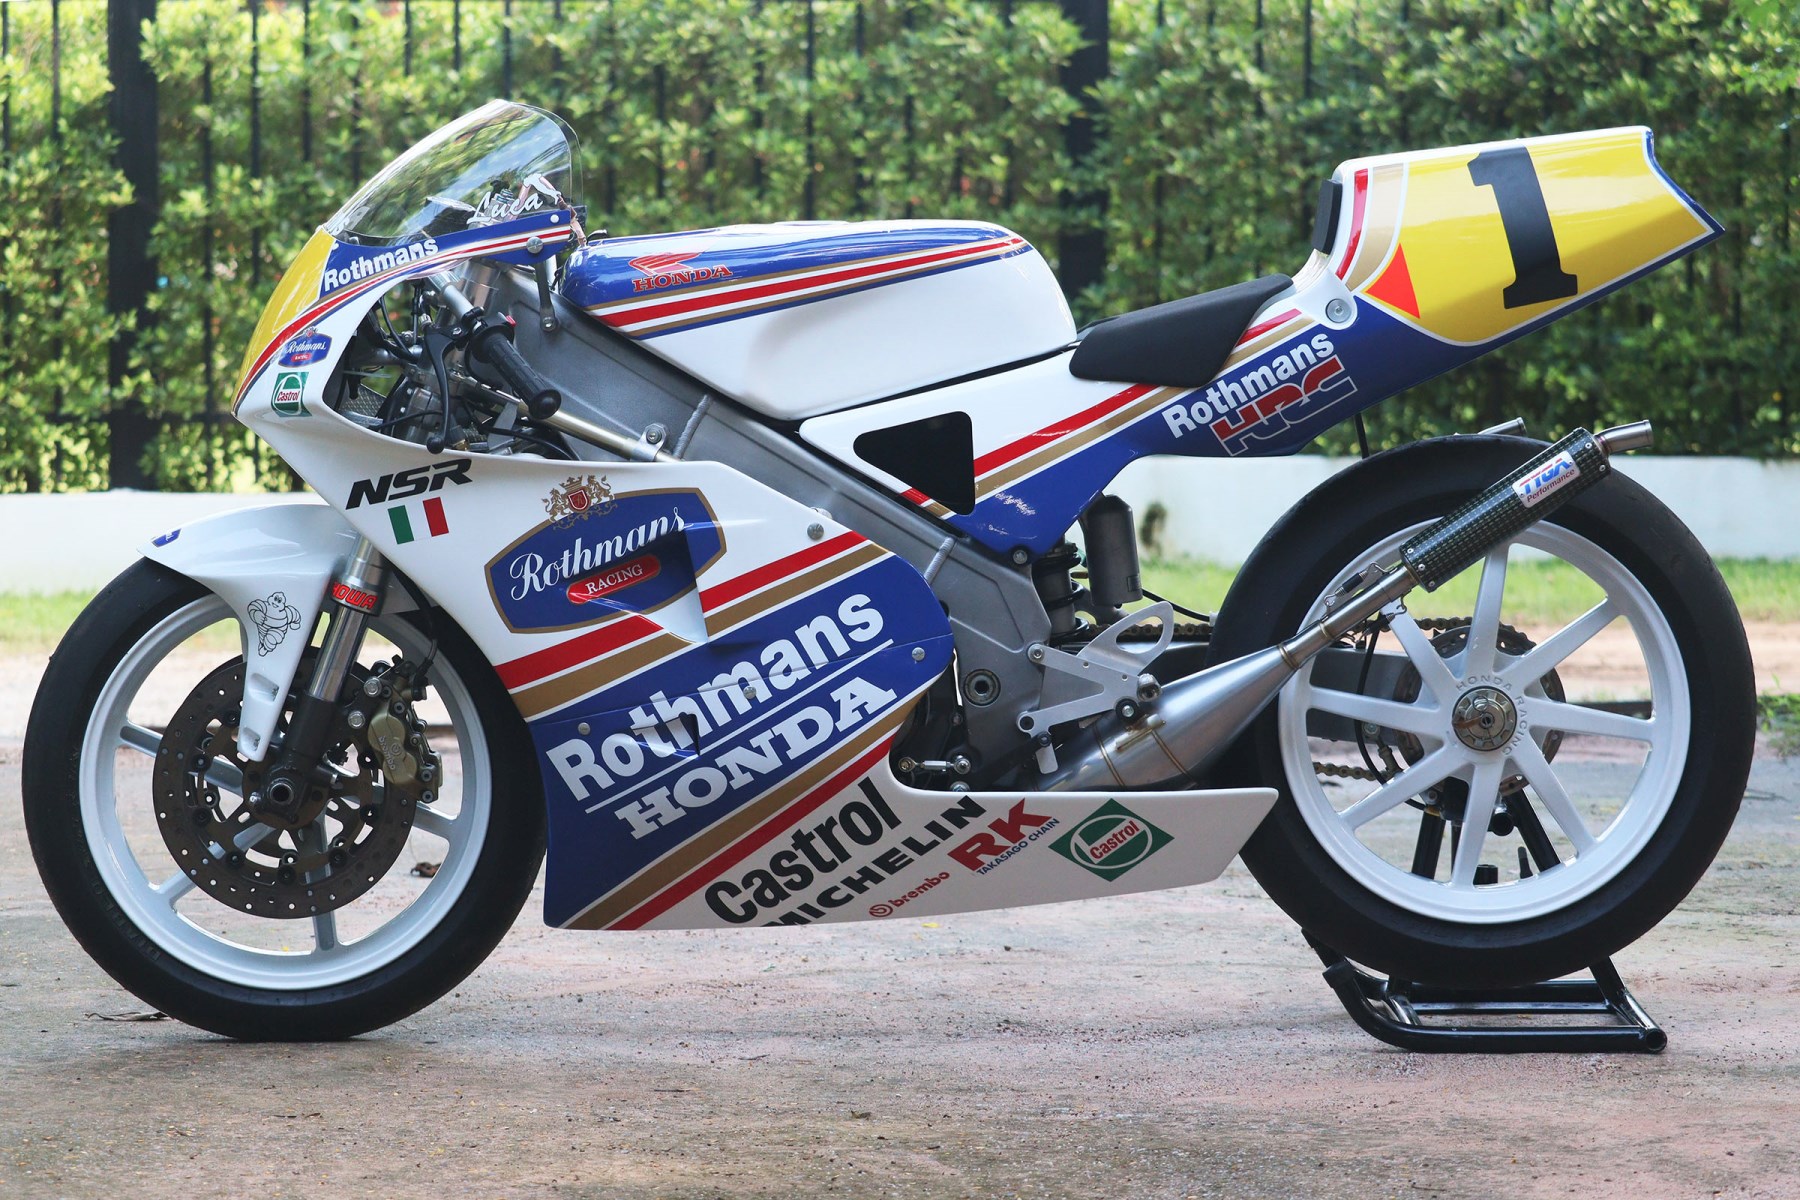
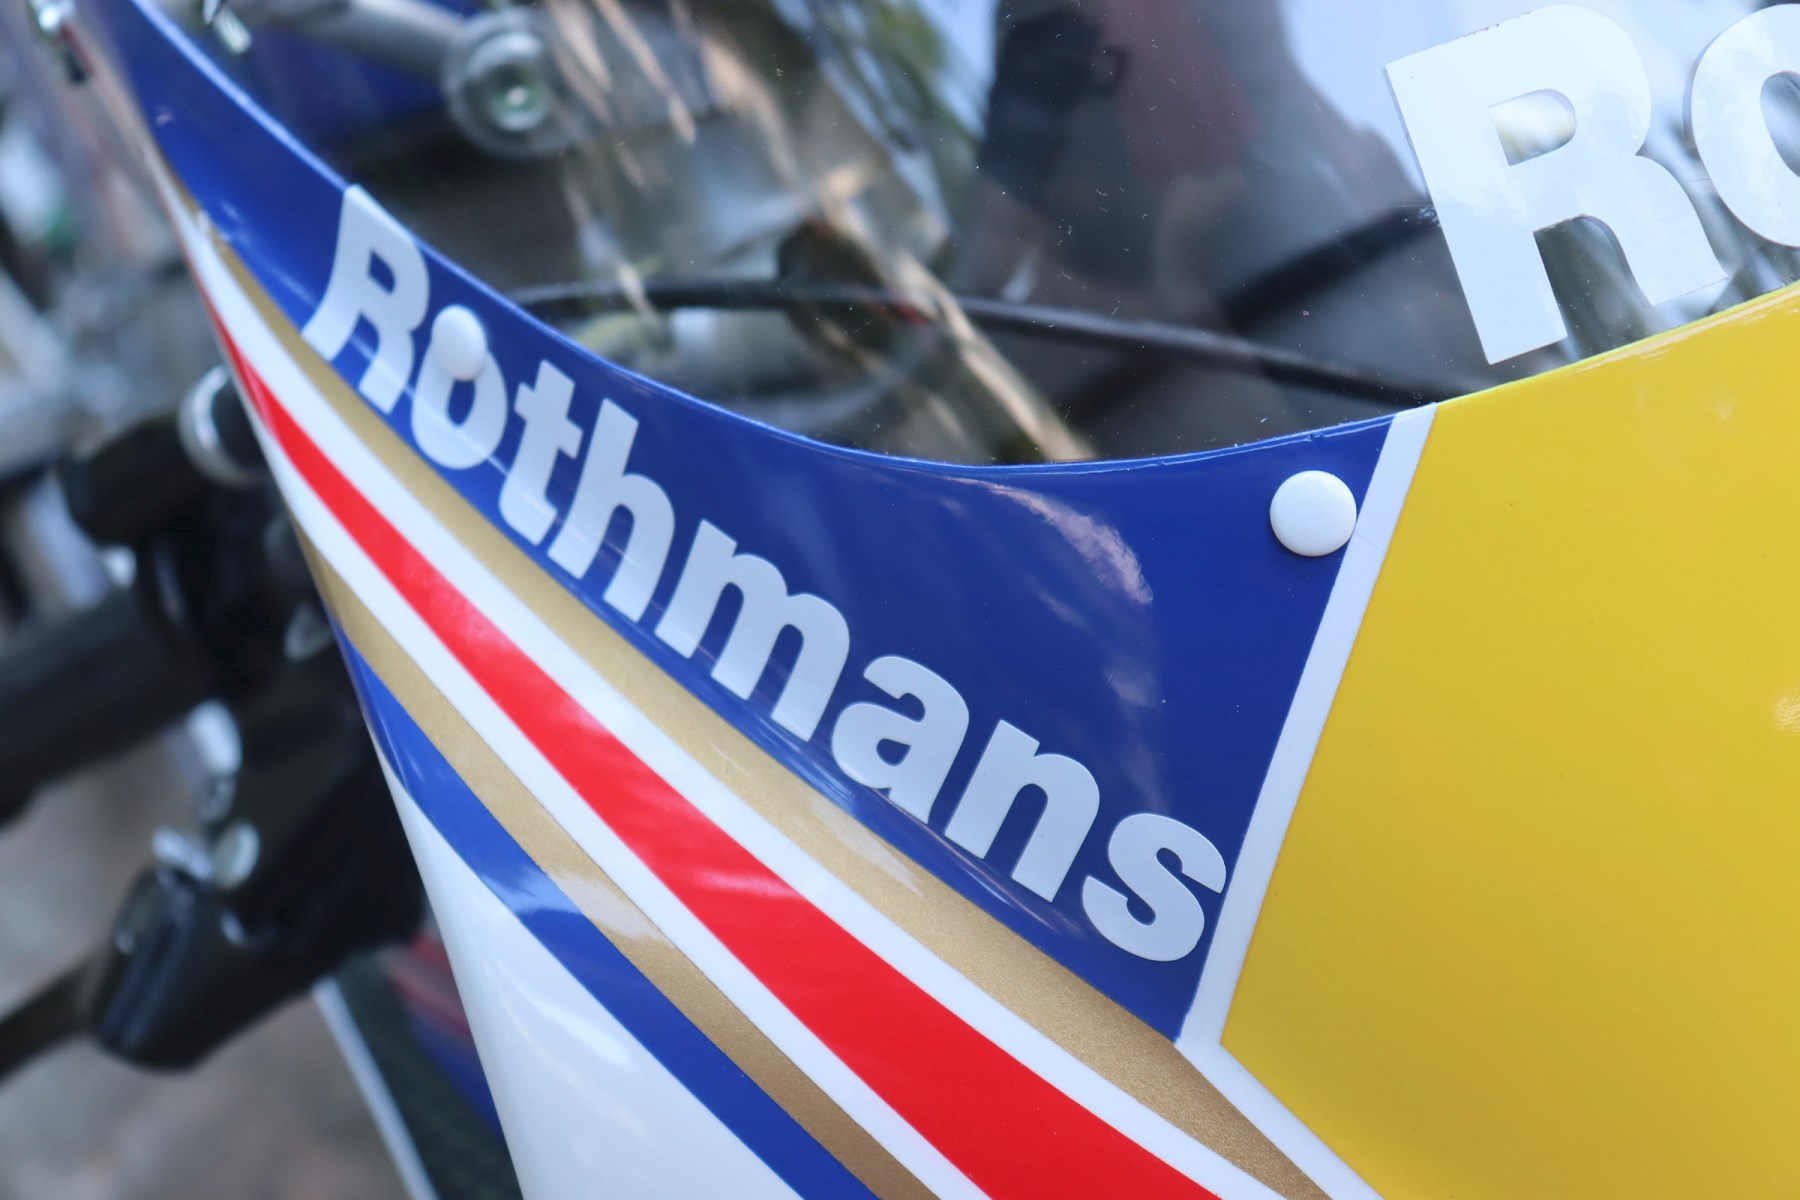
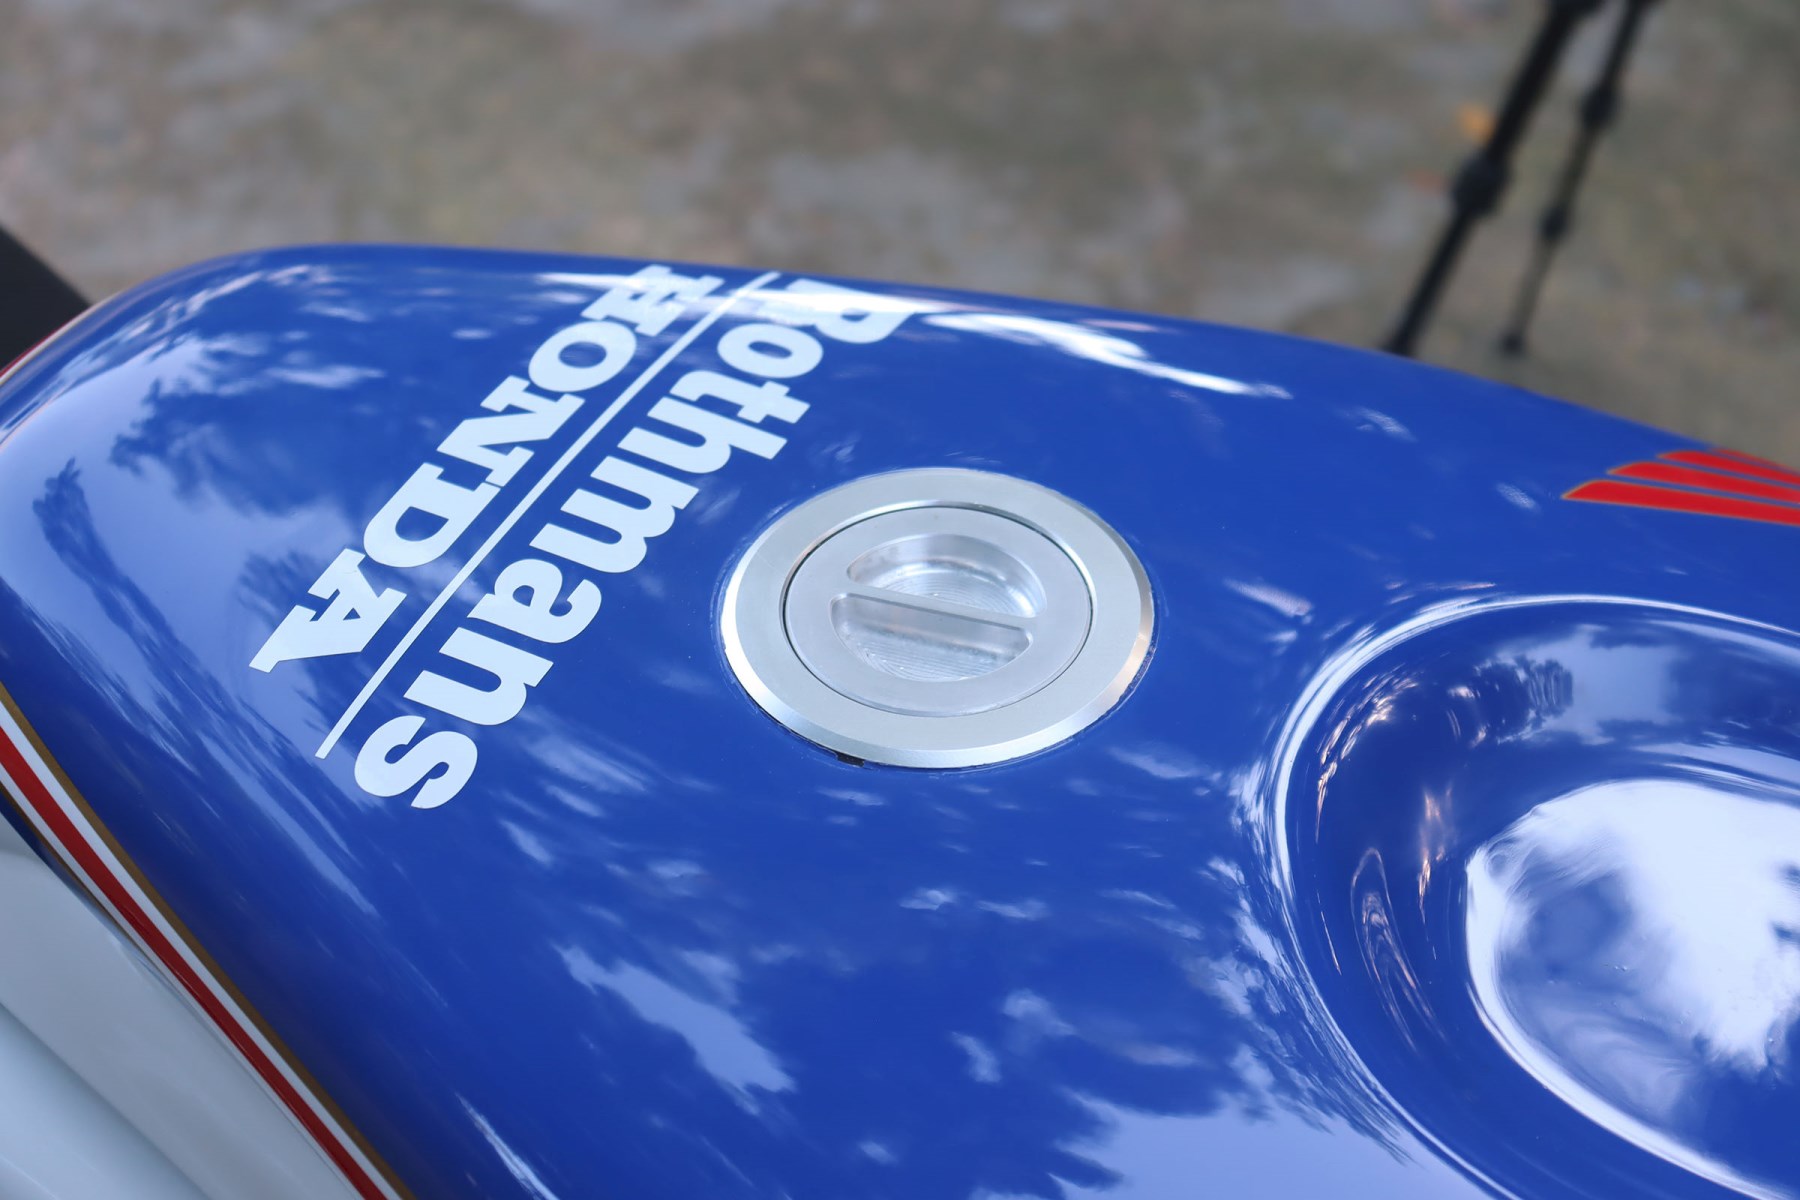
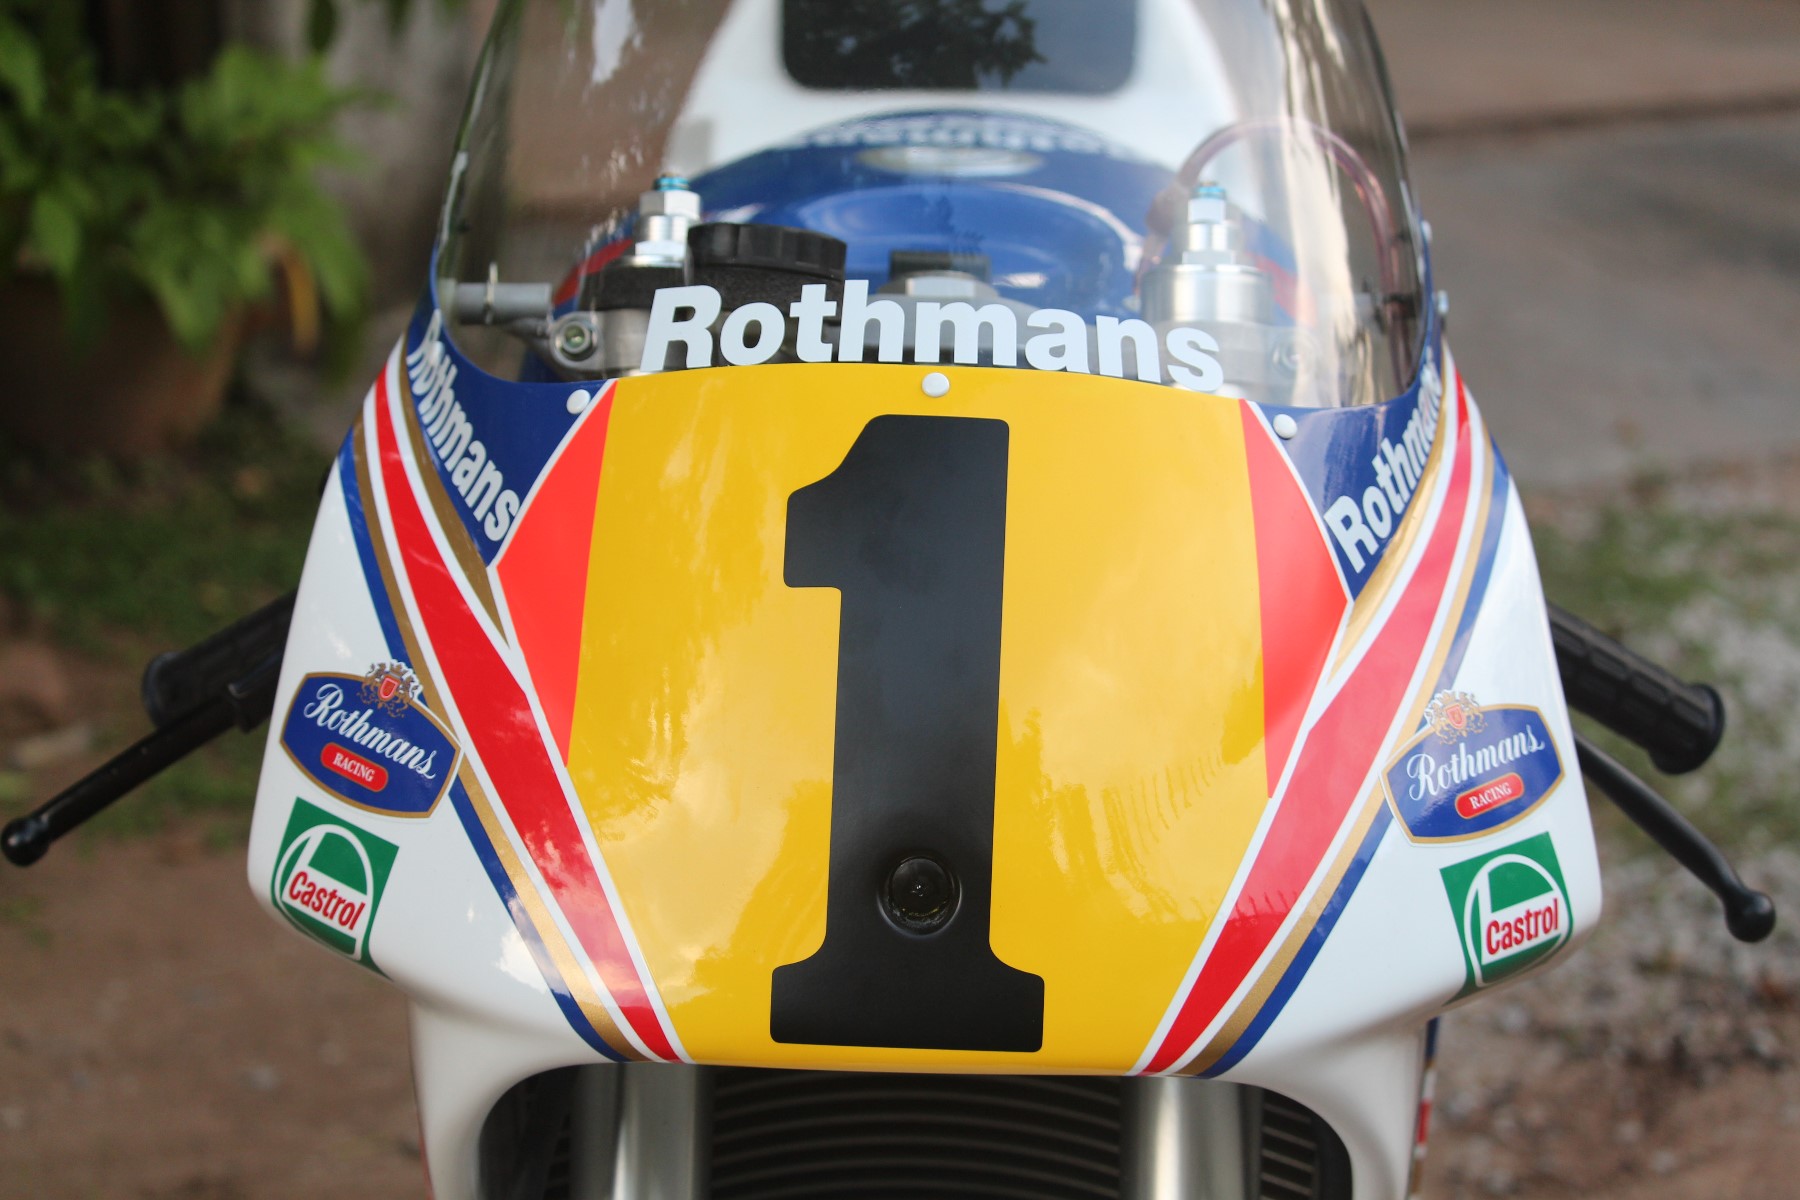
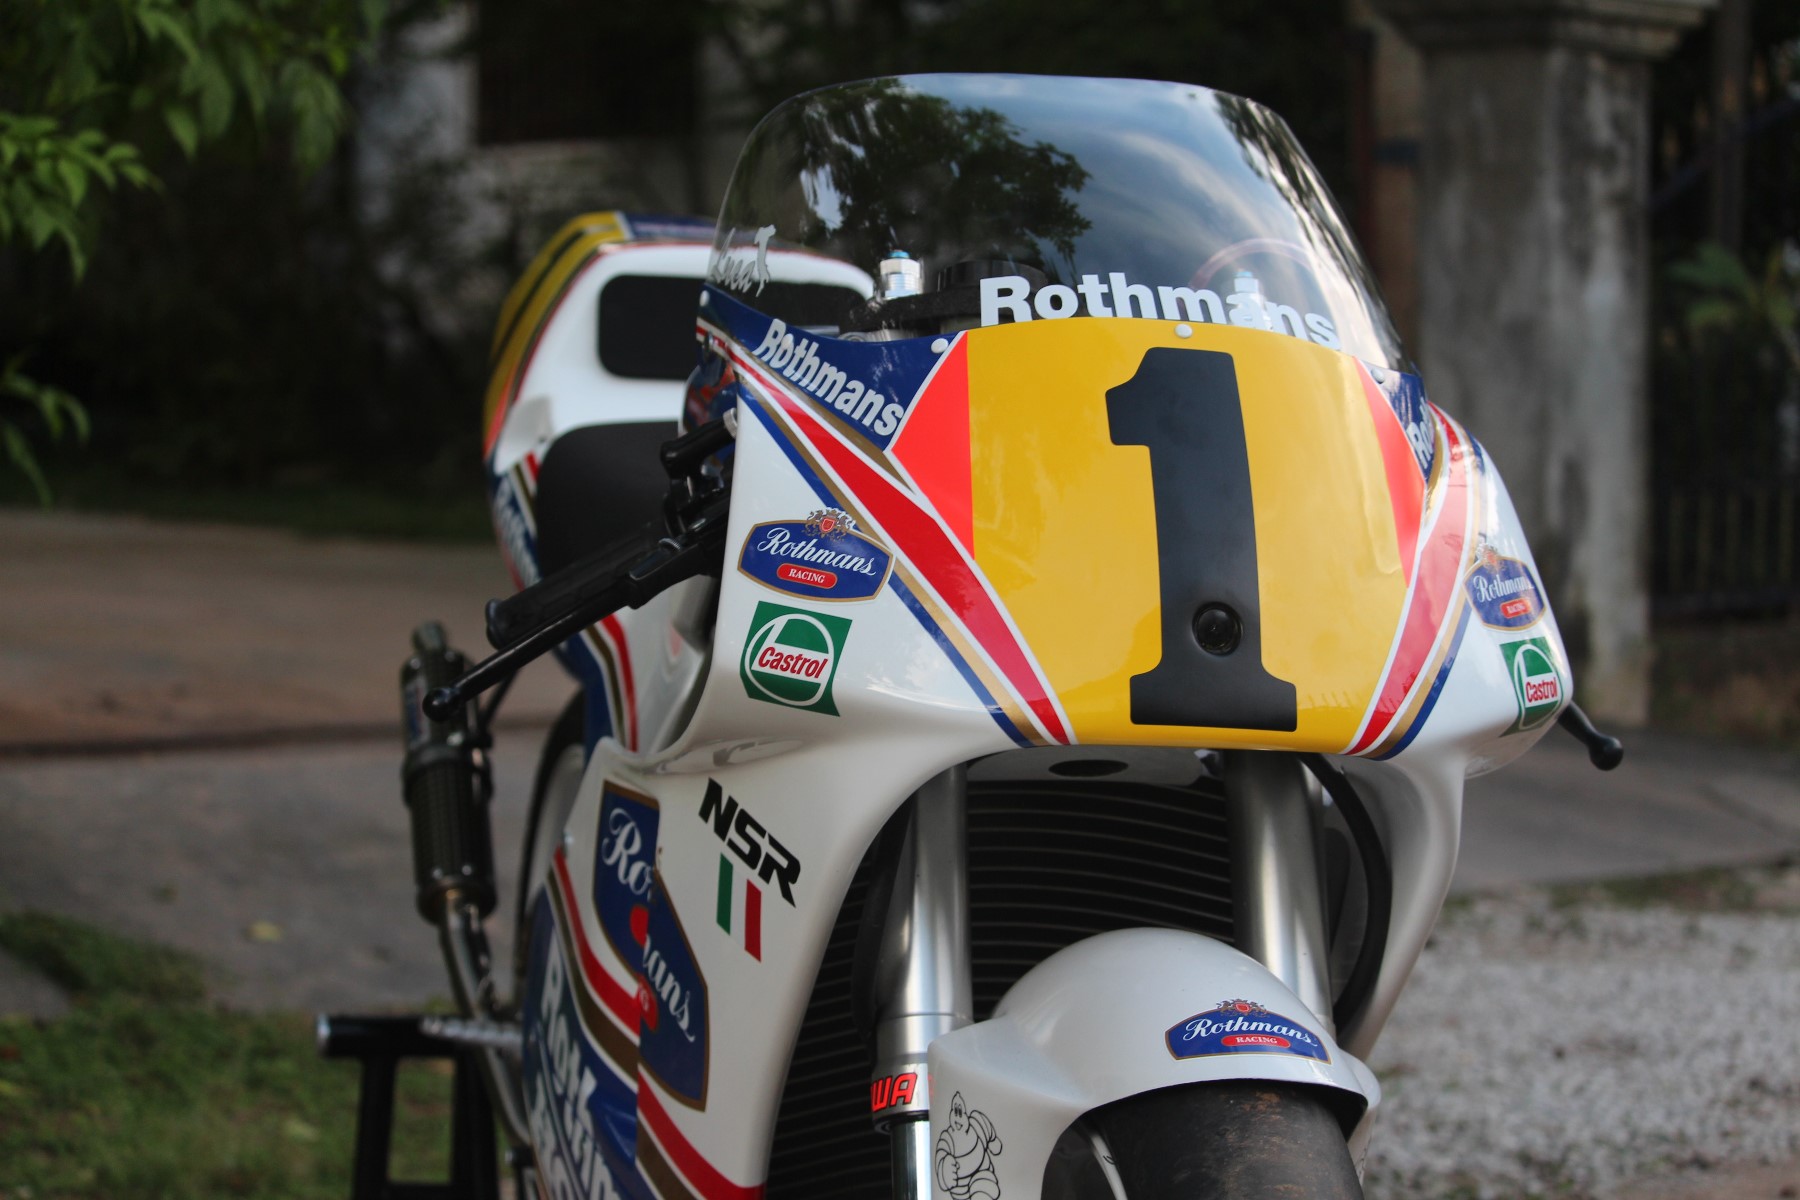
The wait was long, so while we are waiting, there is time to explain a bit more about the livery we chose and why. So, first of all, you can't beat a well executed Rothmans paint job. The lines are just so iconic and the colours so vivid that it will make the least interesting or worn out bike look factory fresh. Install Rothmans on a nut and bolt restoration and you can't lose. That is the first reason. The second one is that of all the factory racebikes which are basically unobtainable, the 1992 NSR250 has the most similar looking customer version out of any of them. By the way, just in case anyone is getting confused, NSR250 in this context means the bike that the factory teams used in the World championship that was leased to satellite teams and was never sold. The one you could buy is the RS250 and normally lacked a lot of the titanium, magnesium etc. unobtanium that was found on the factory bike and trailed it in terms of development by a year or two. Very often, the customer version bore little visual appearance with the factory bike but luckily for us, the 1992 factory bike which introduced the Pro Arm to the 250, was followed on the following year on the newly launched NX5 RS250. Moreover, it seems they closely followed the same shape of fuel tank and bodywork and both had a subframe (no self supporting seat on the factory racer) so visually they are very similar.
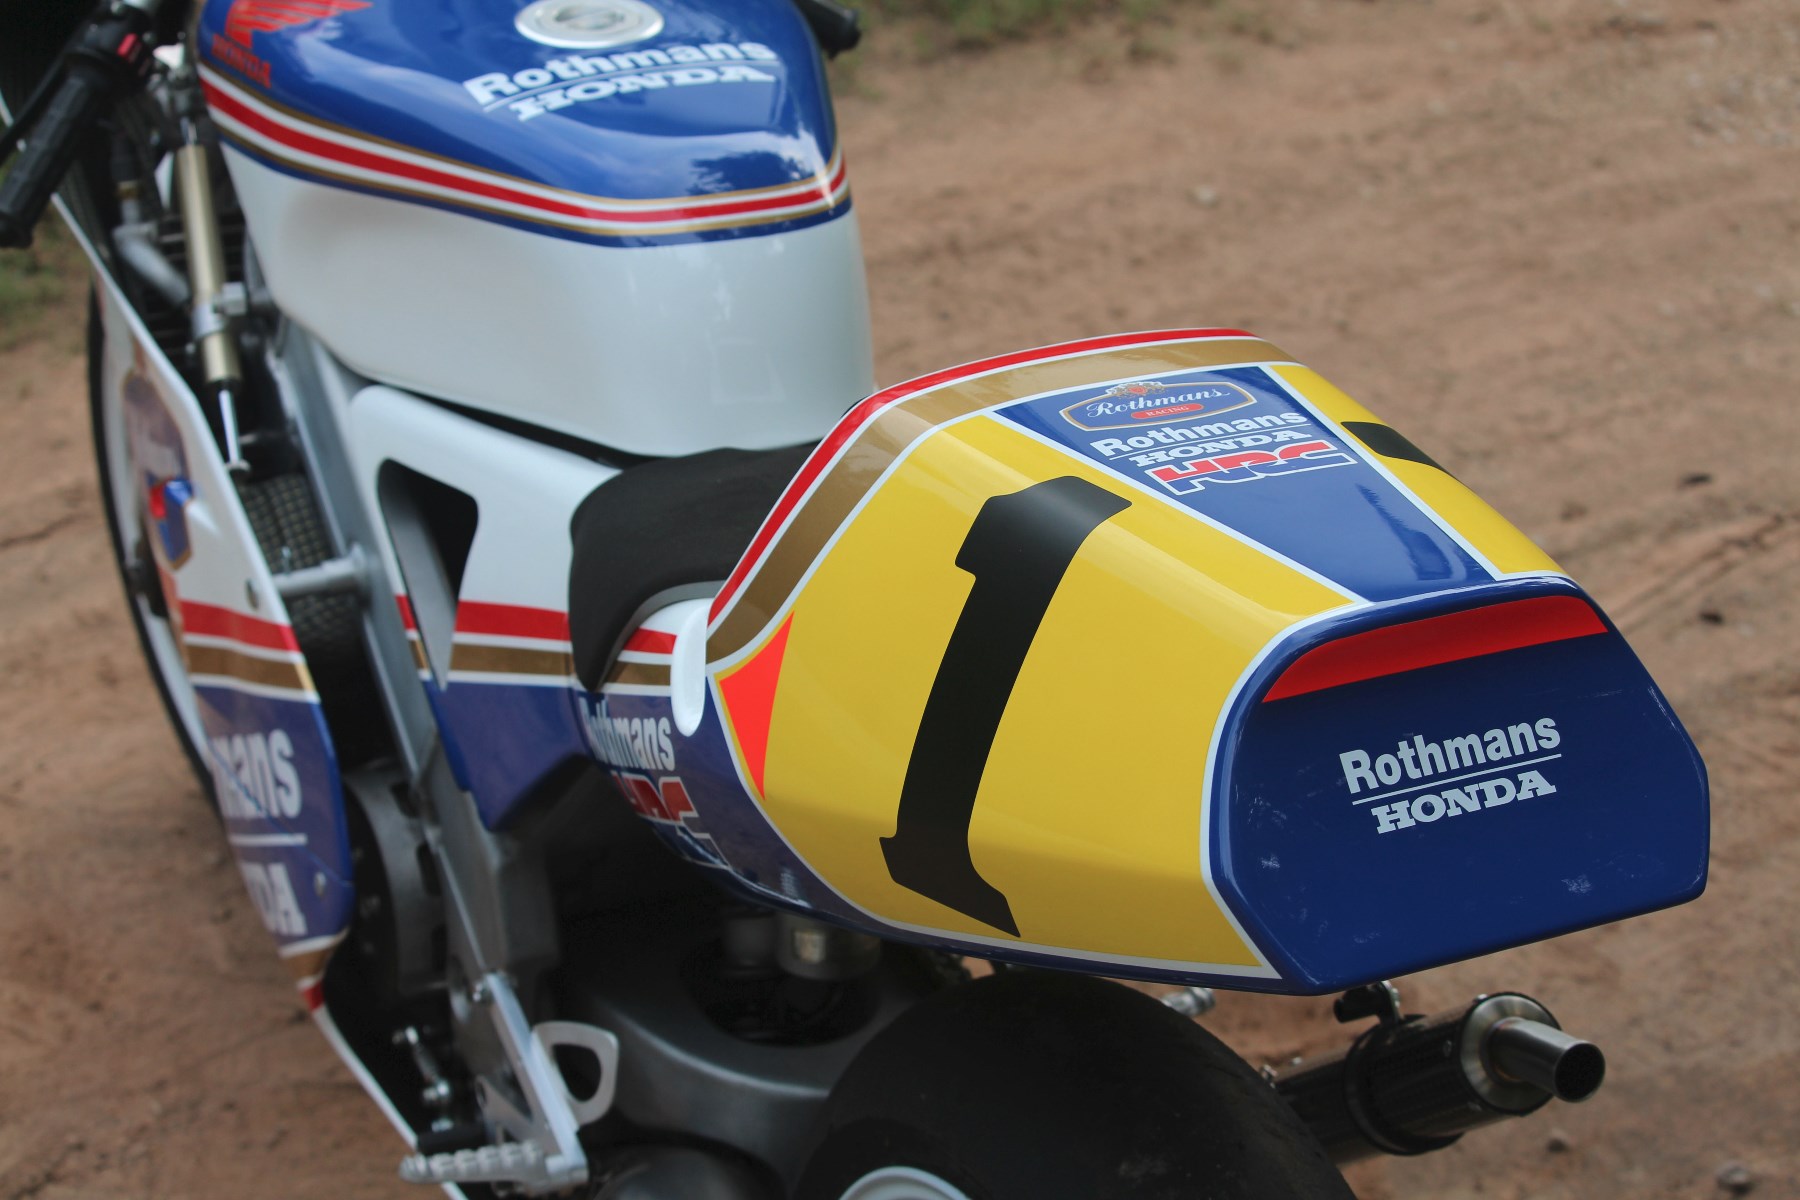
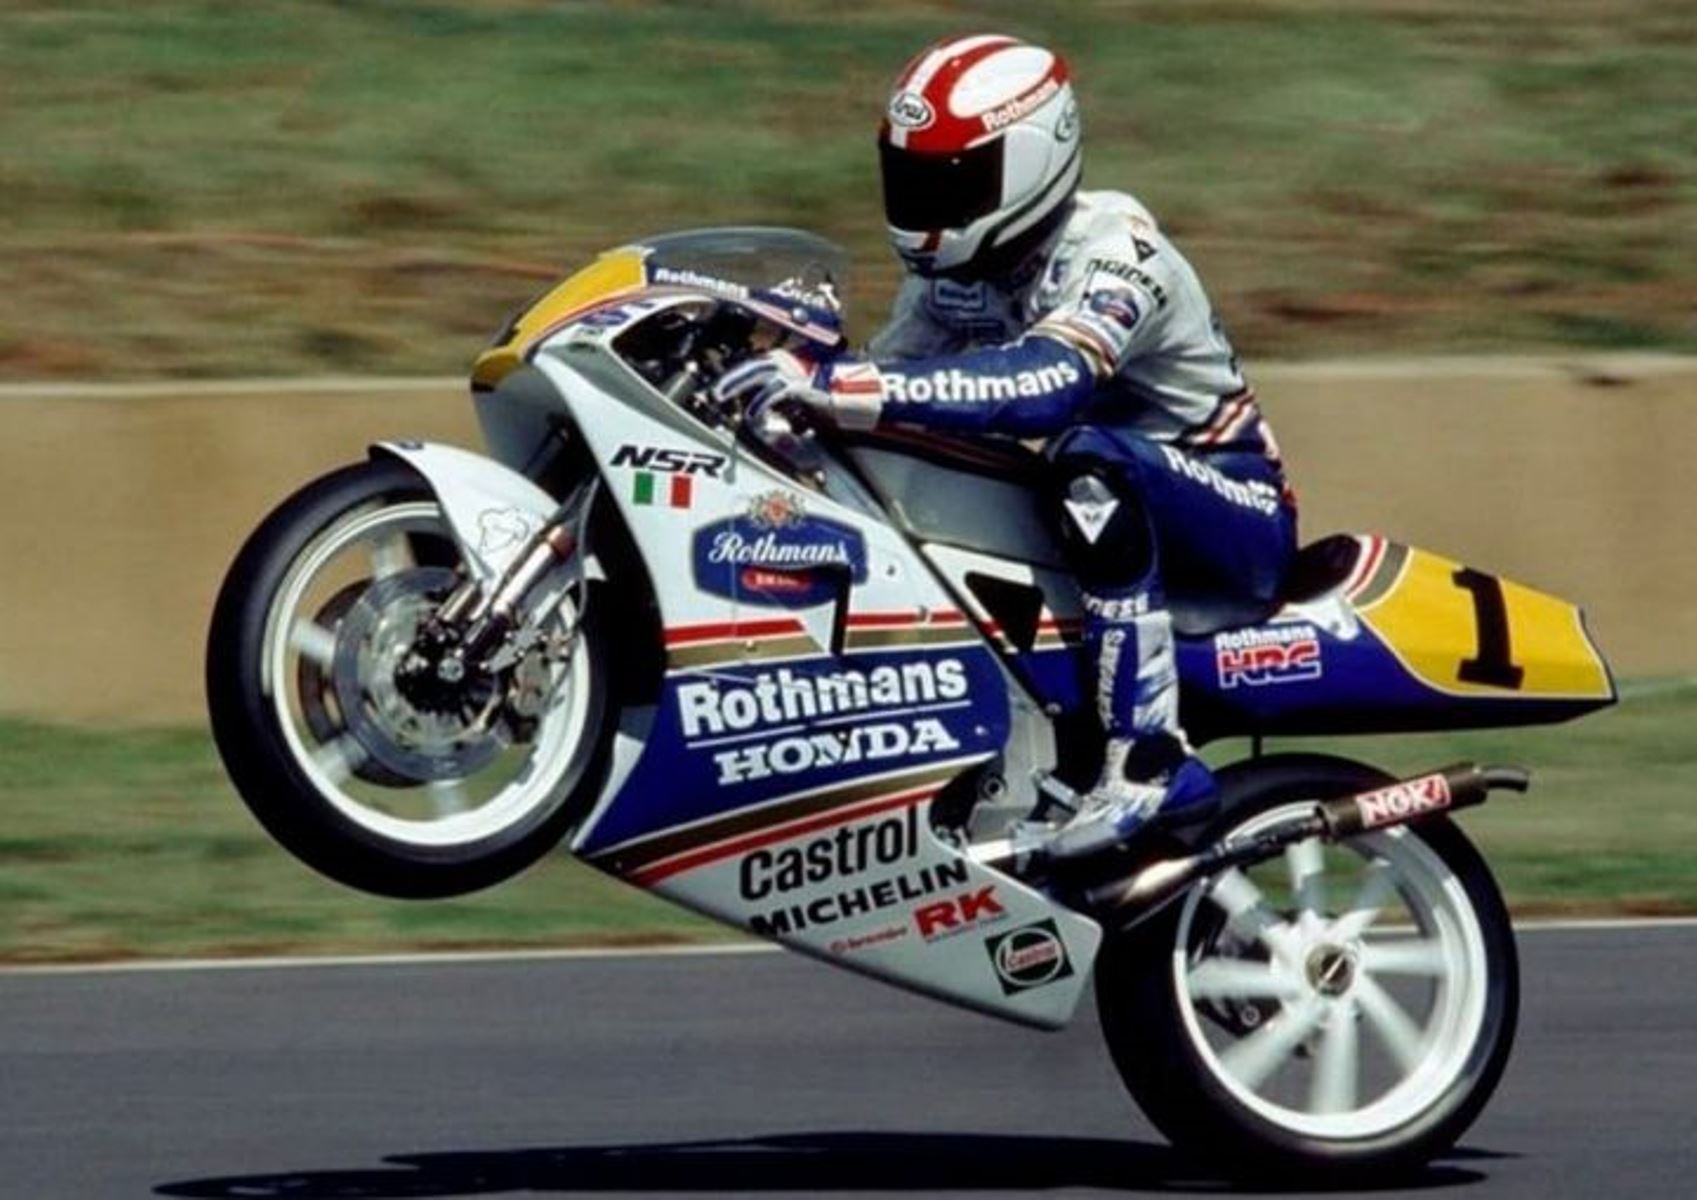
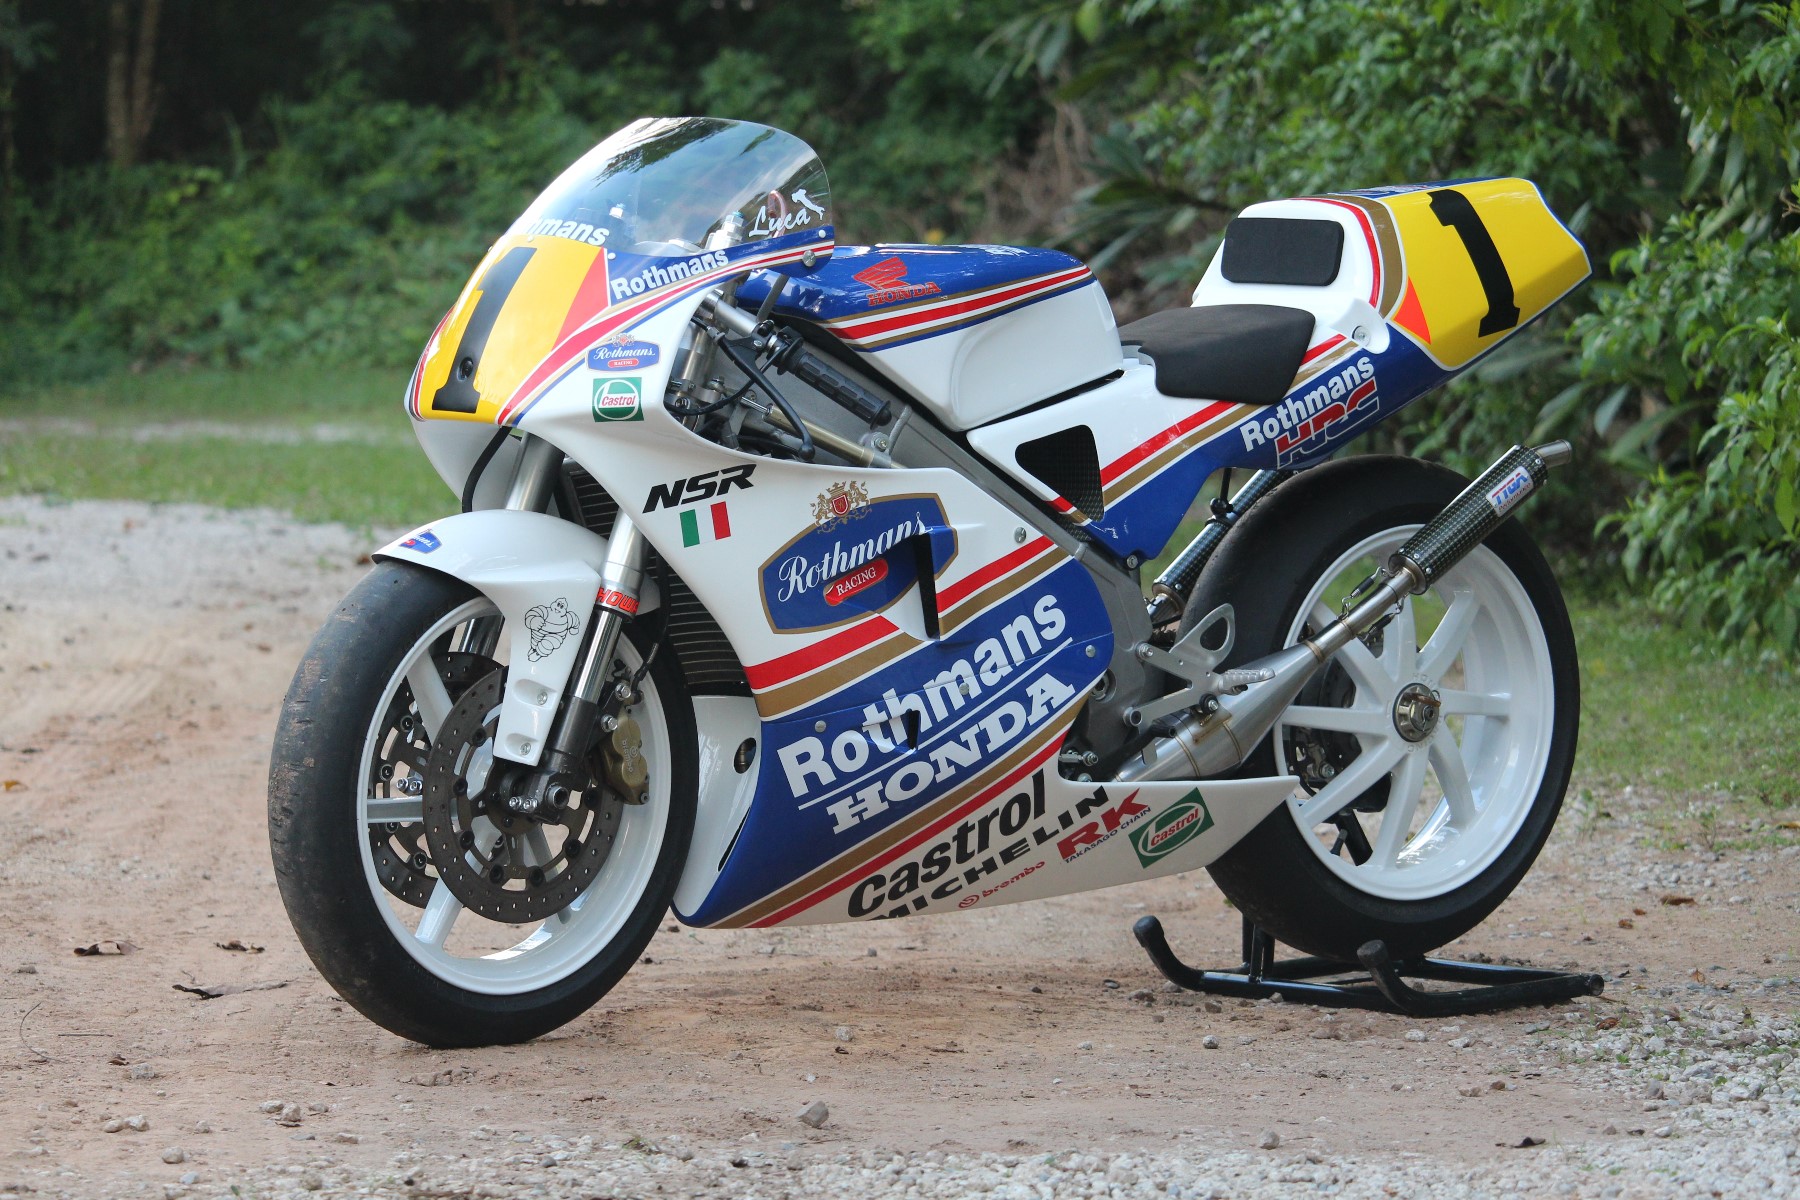
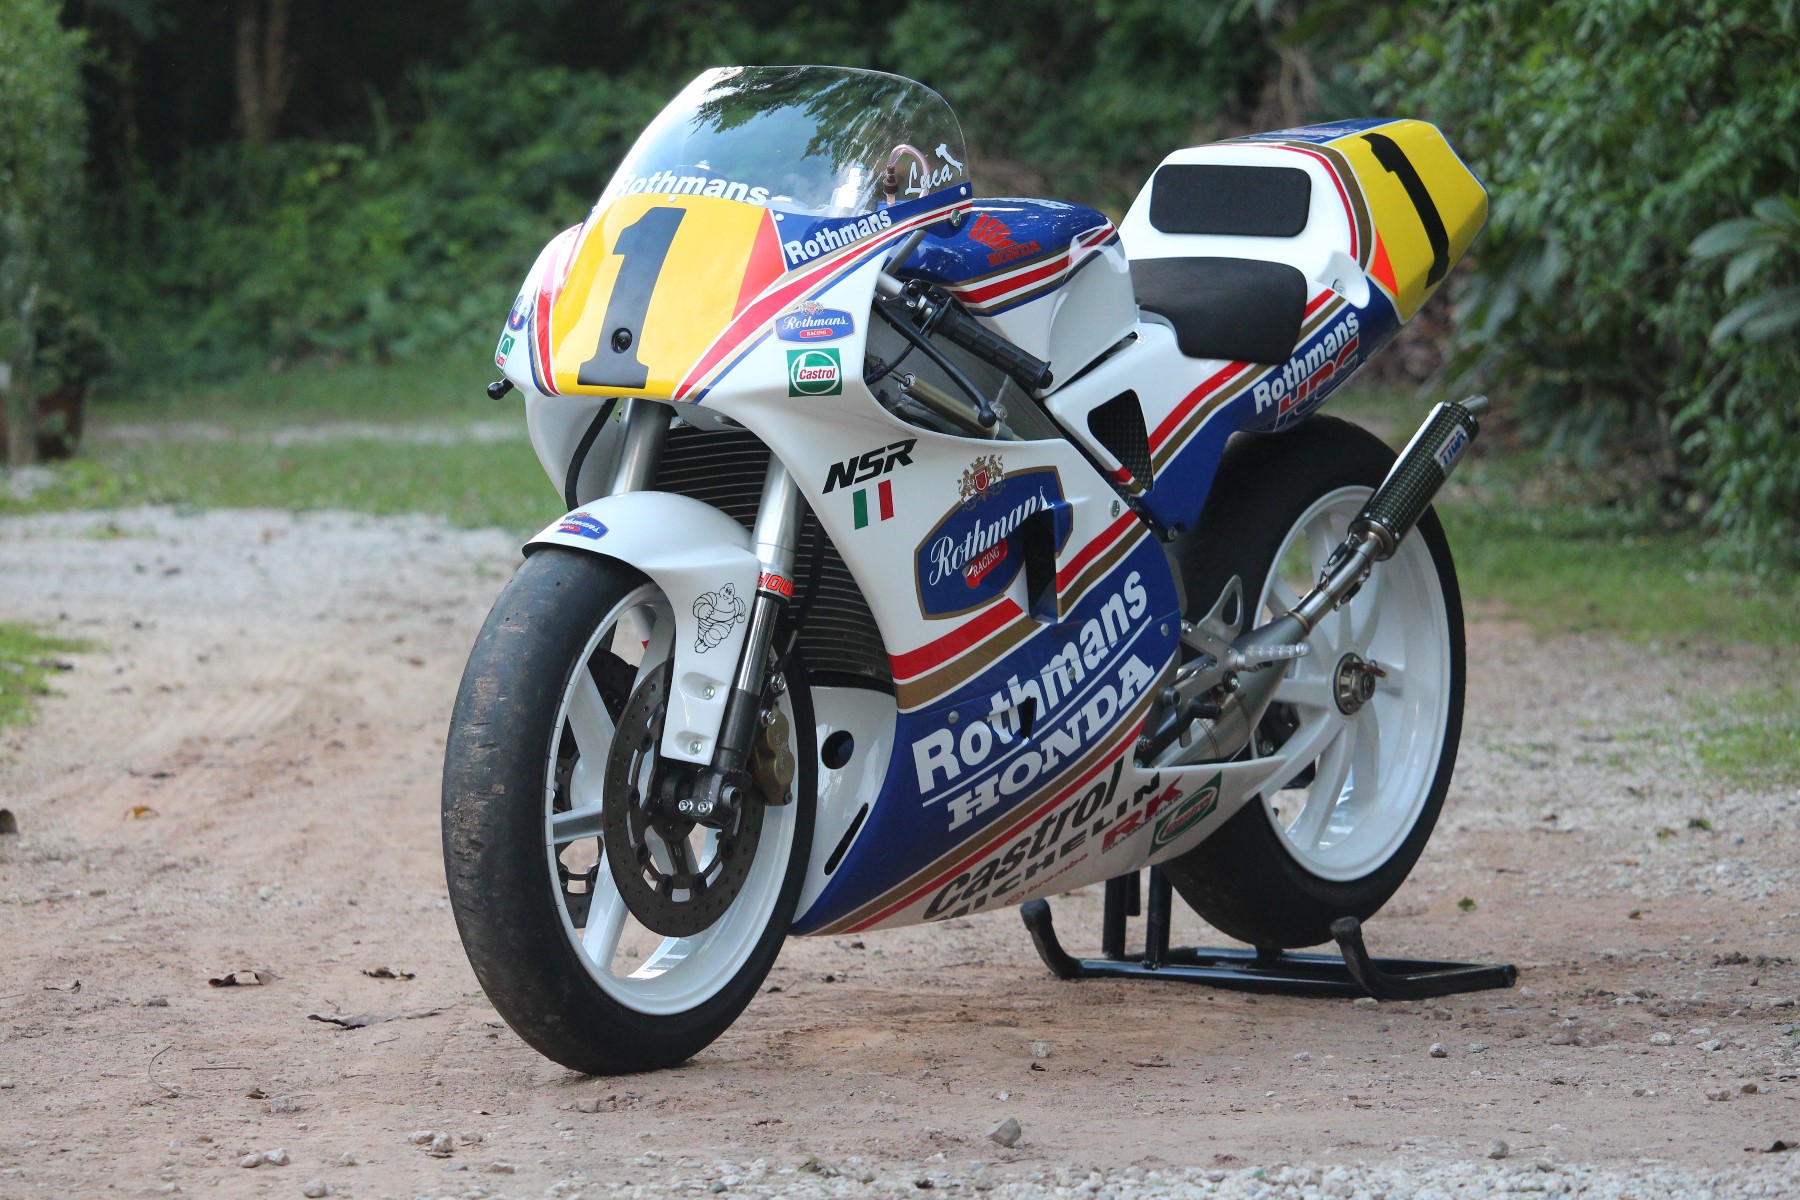
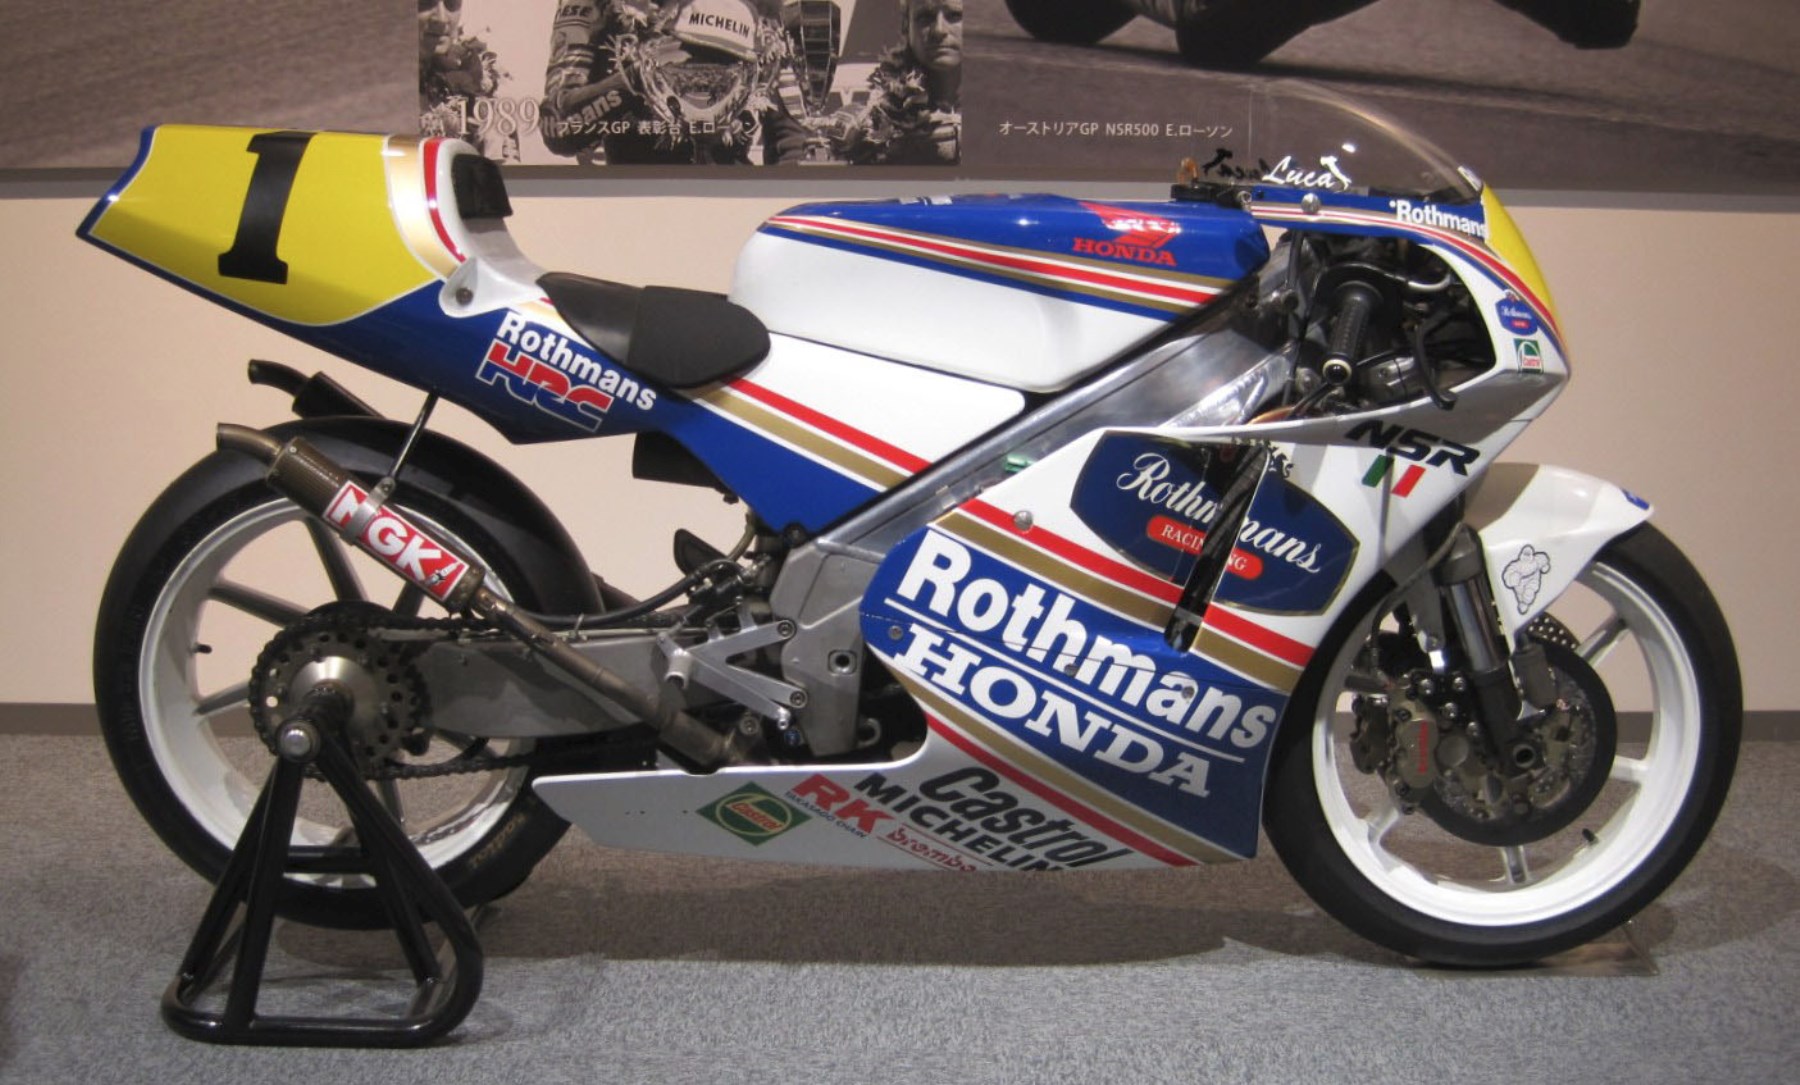
So back to the paintwork, when visiting the Honda Collection Hall, they have the 1992 World Champions bike there which is the Rothmans NSR250 as ridden by Luca Cadalora.
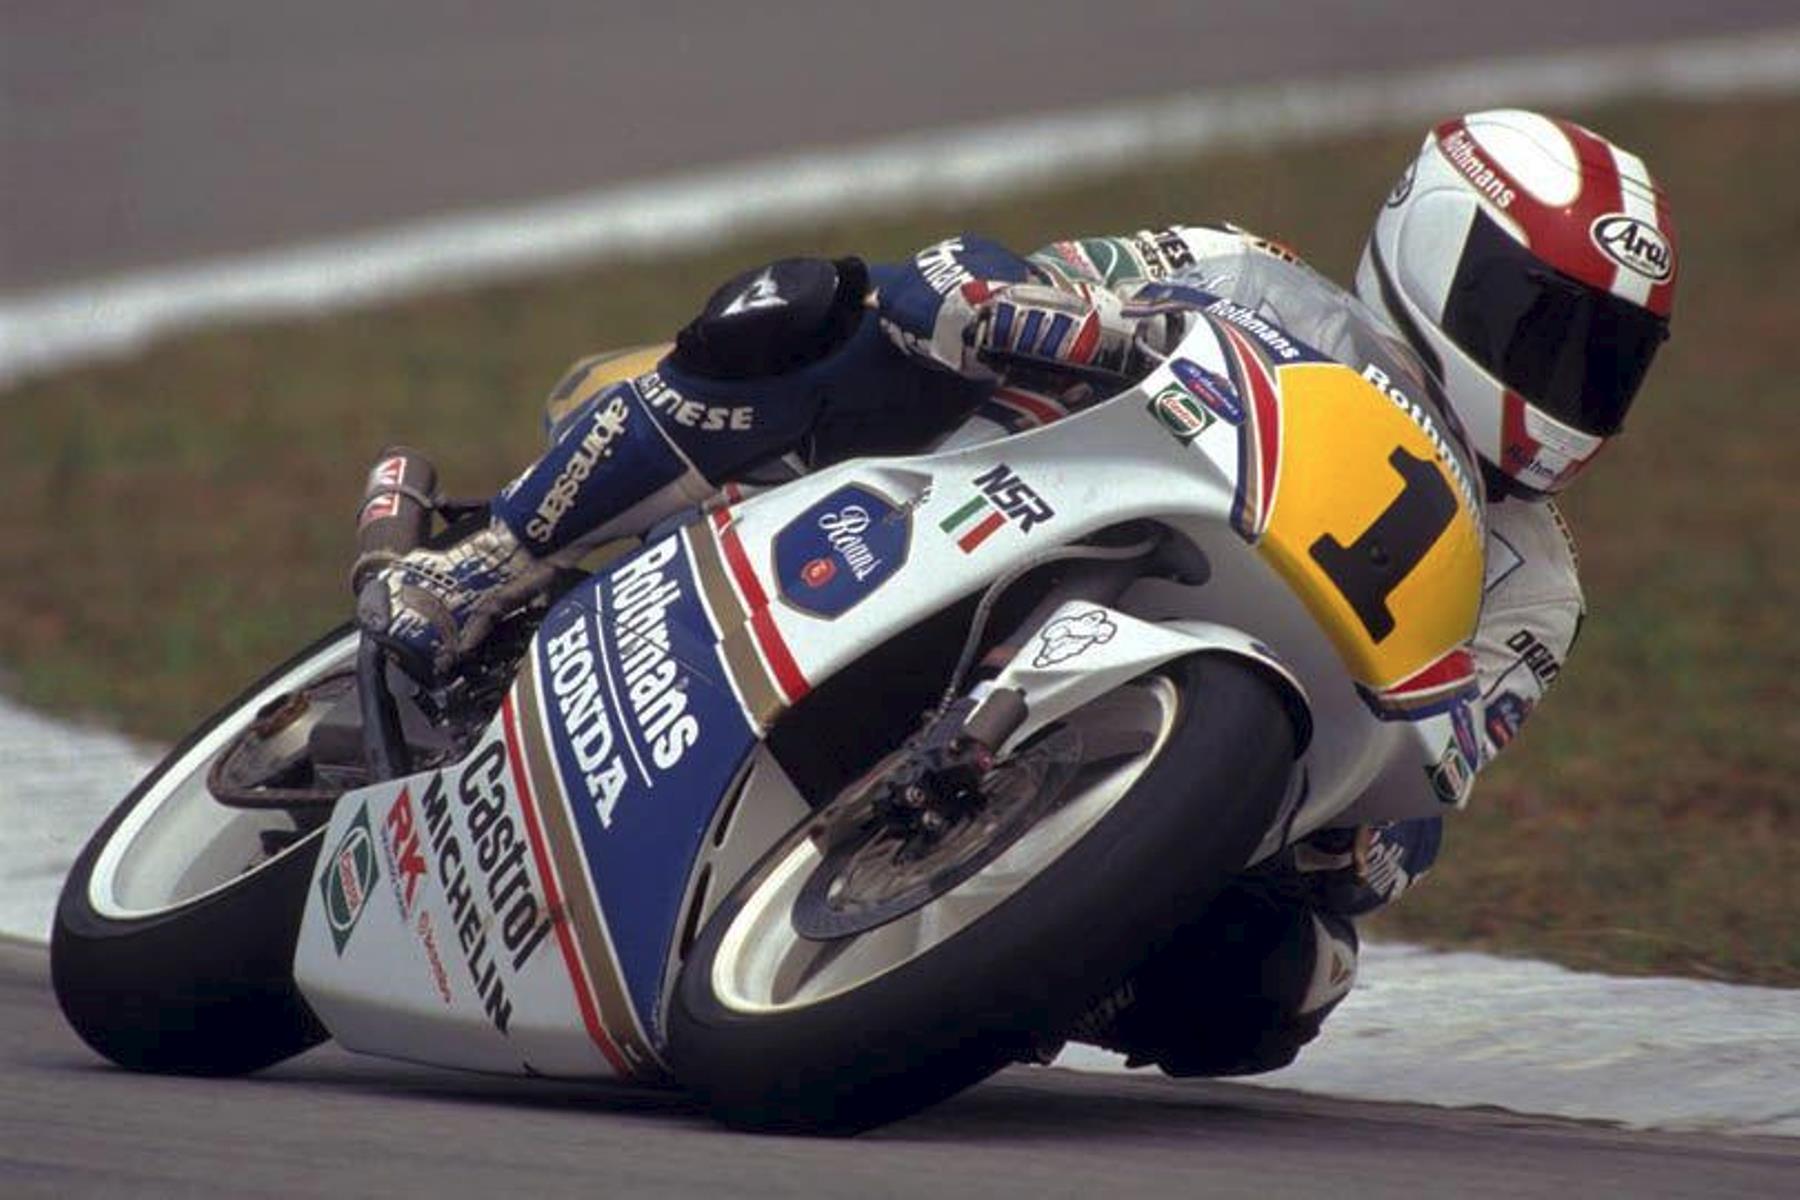
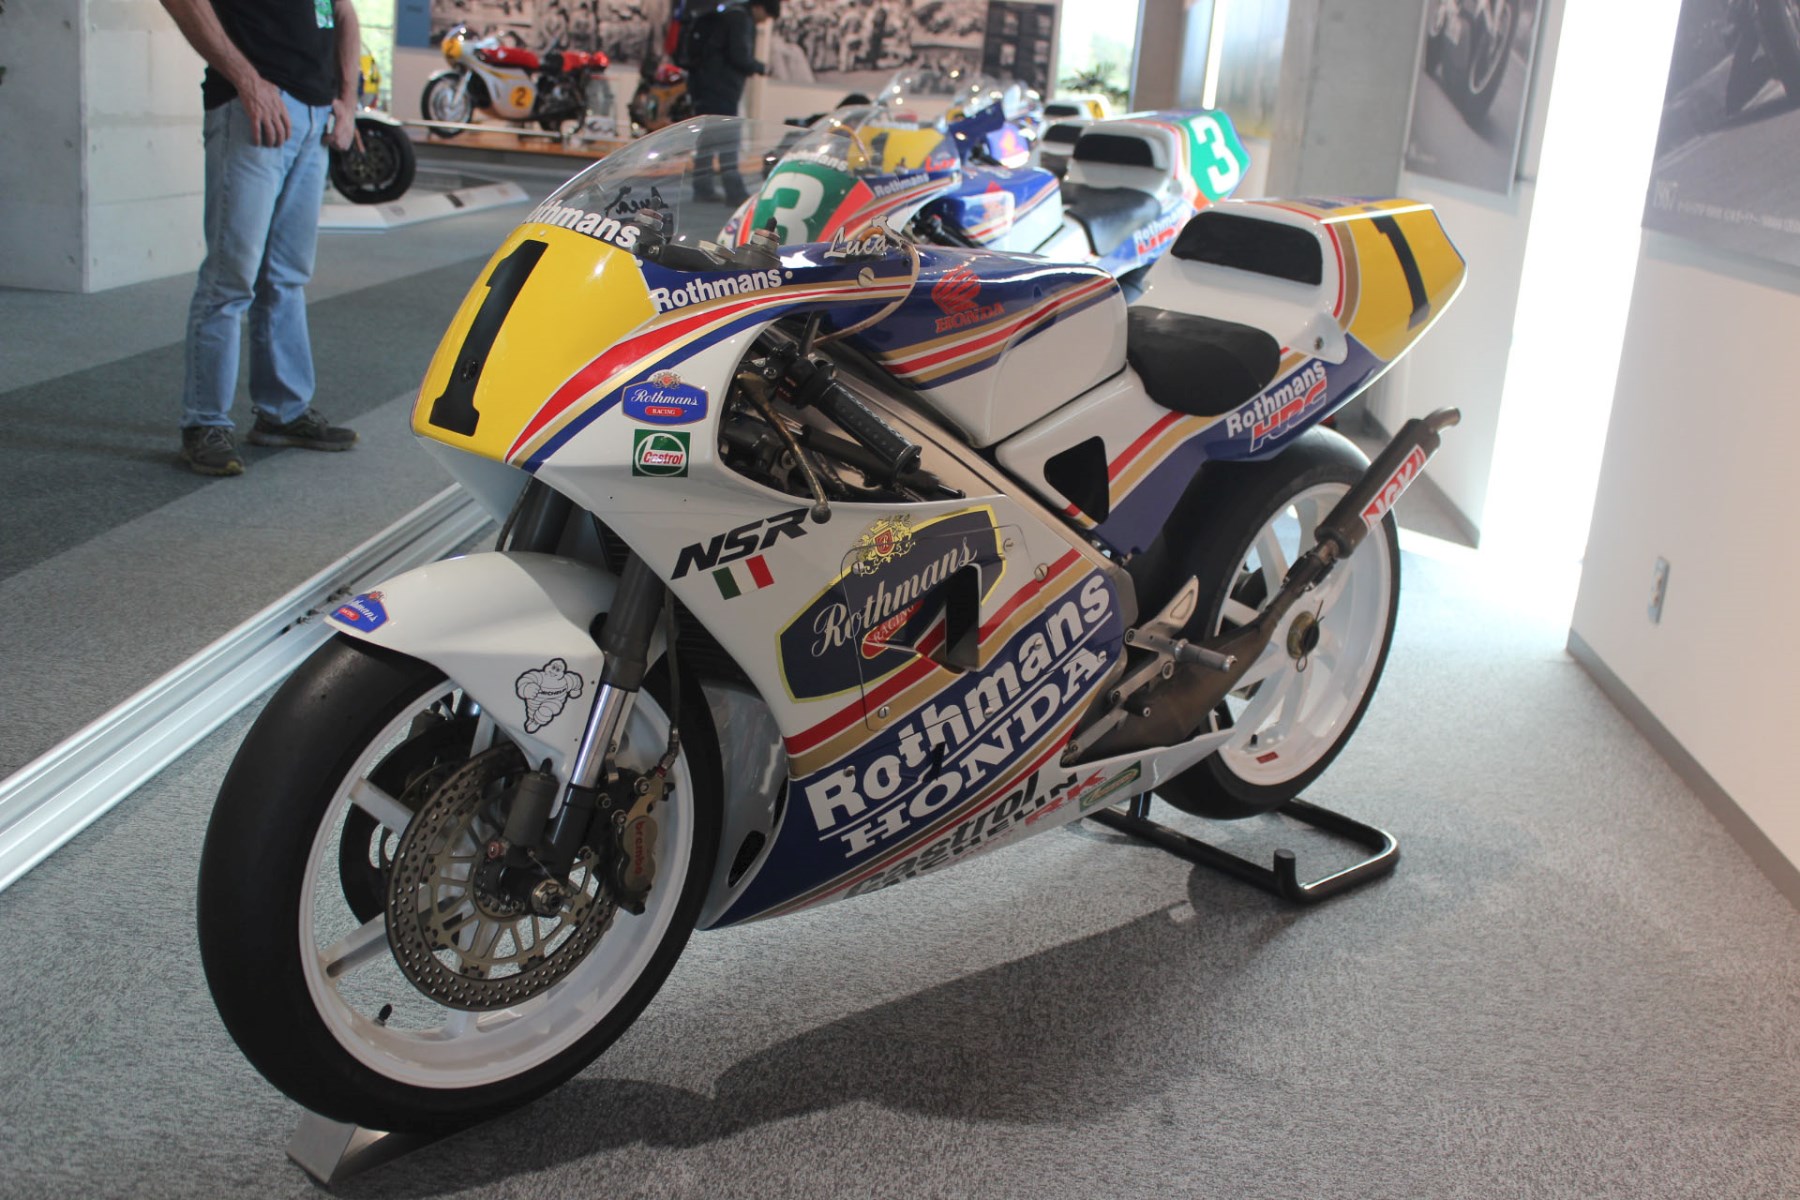
The place is amazing and there are NSR250s and 500s all over the place. The Cadalora really stood out from even other pedigree Rothmans racers with its uncluttered and beautiful lines. I was also struck by the similarity between this and the NX5 as I previously mentioned and decided there and then to work on making a project bike based on this bike. I took a great deal of photos which have proven to be very useful when researching this project and decals such as the windscreen Luca were made a lot easier by having high res pics to give our sticker guy.
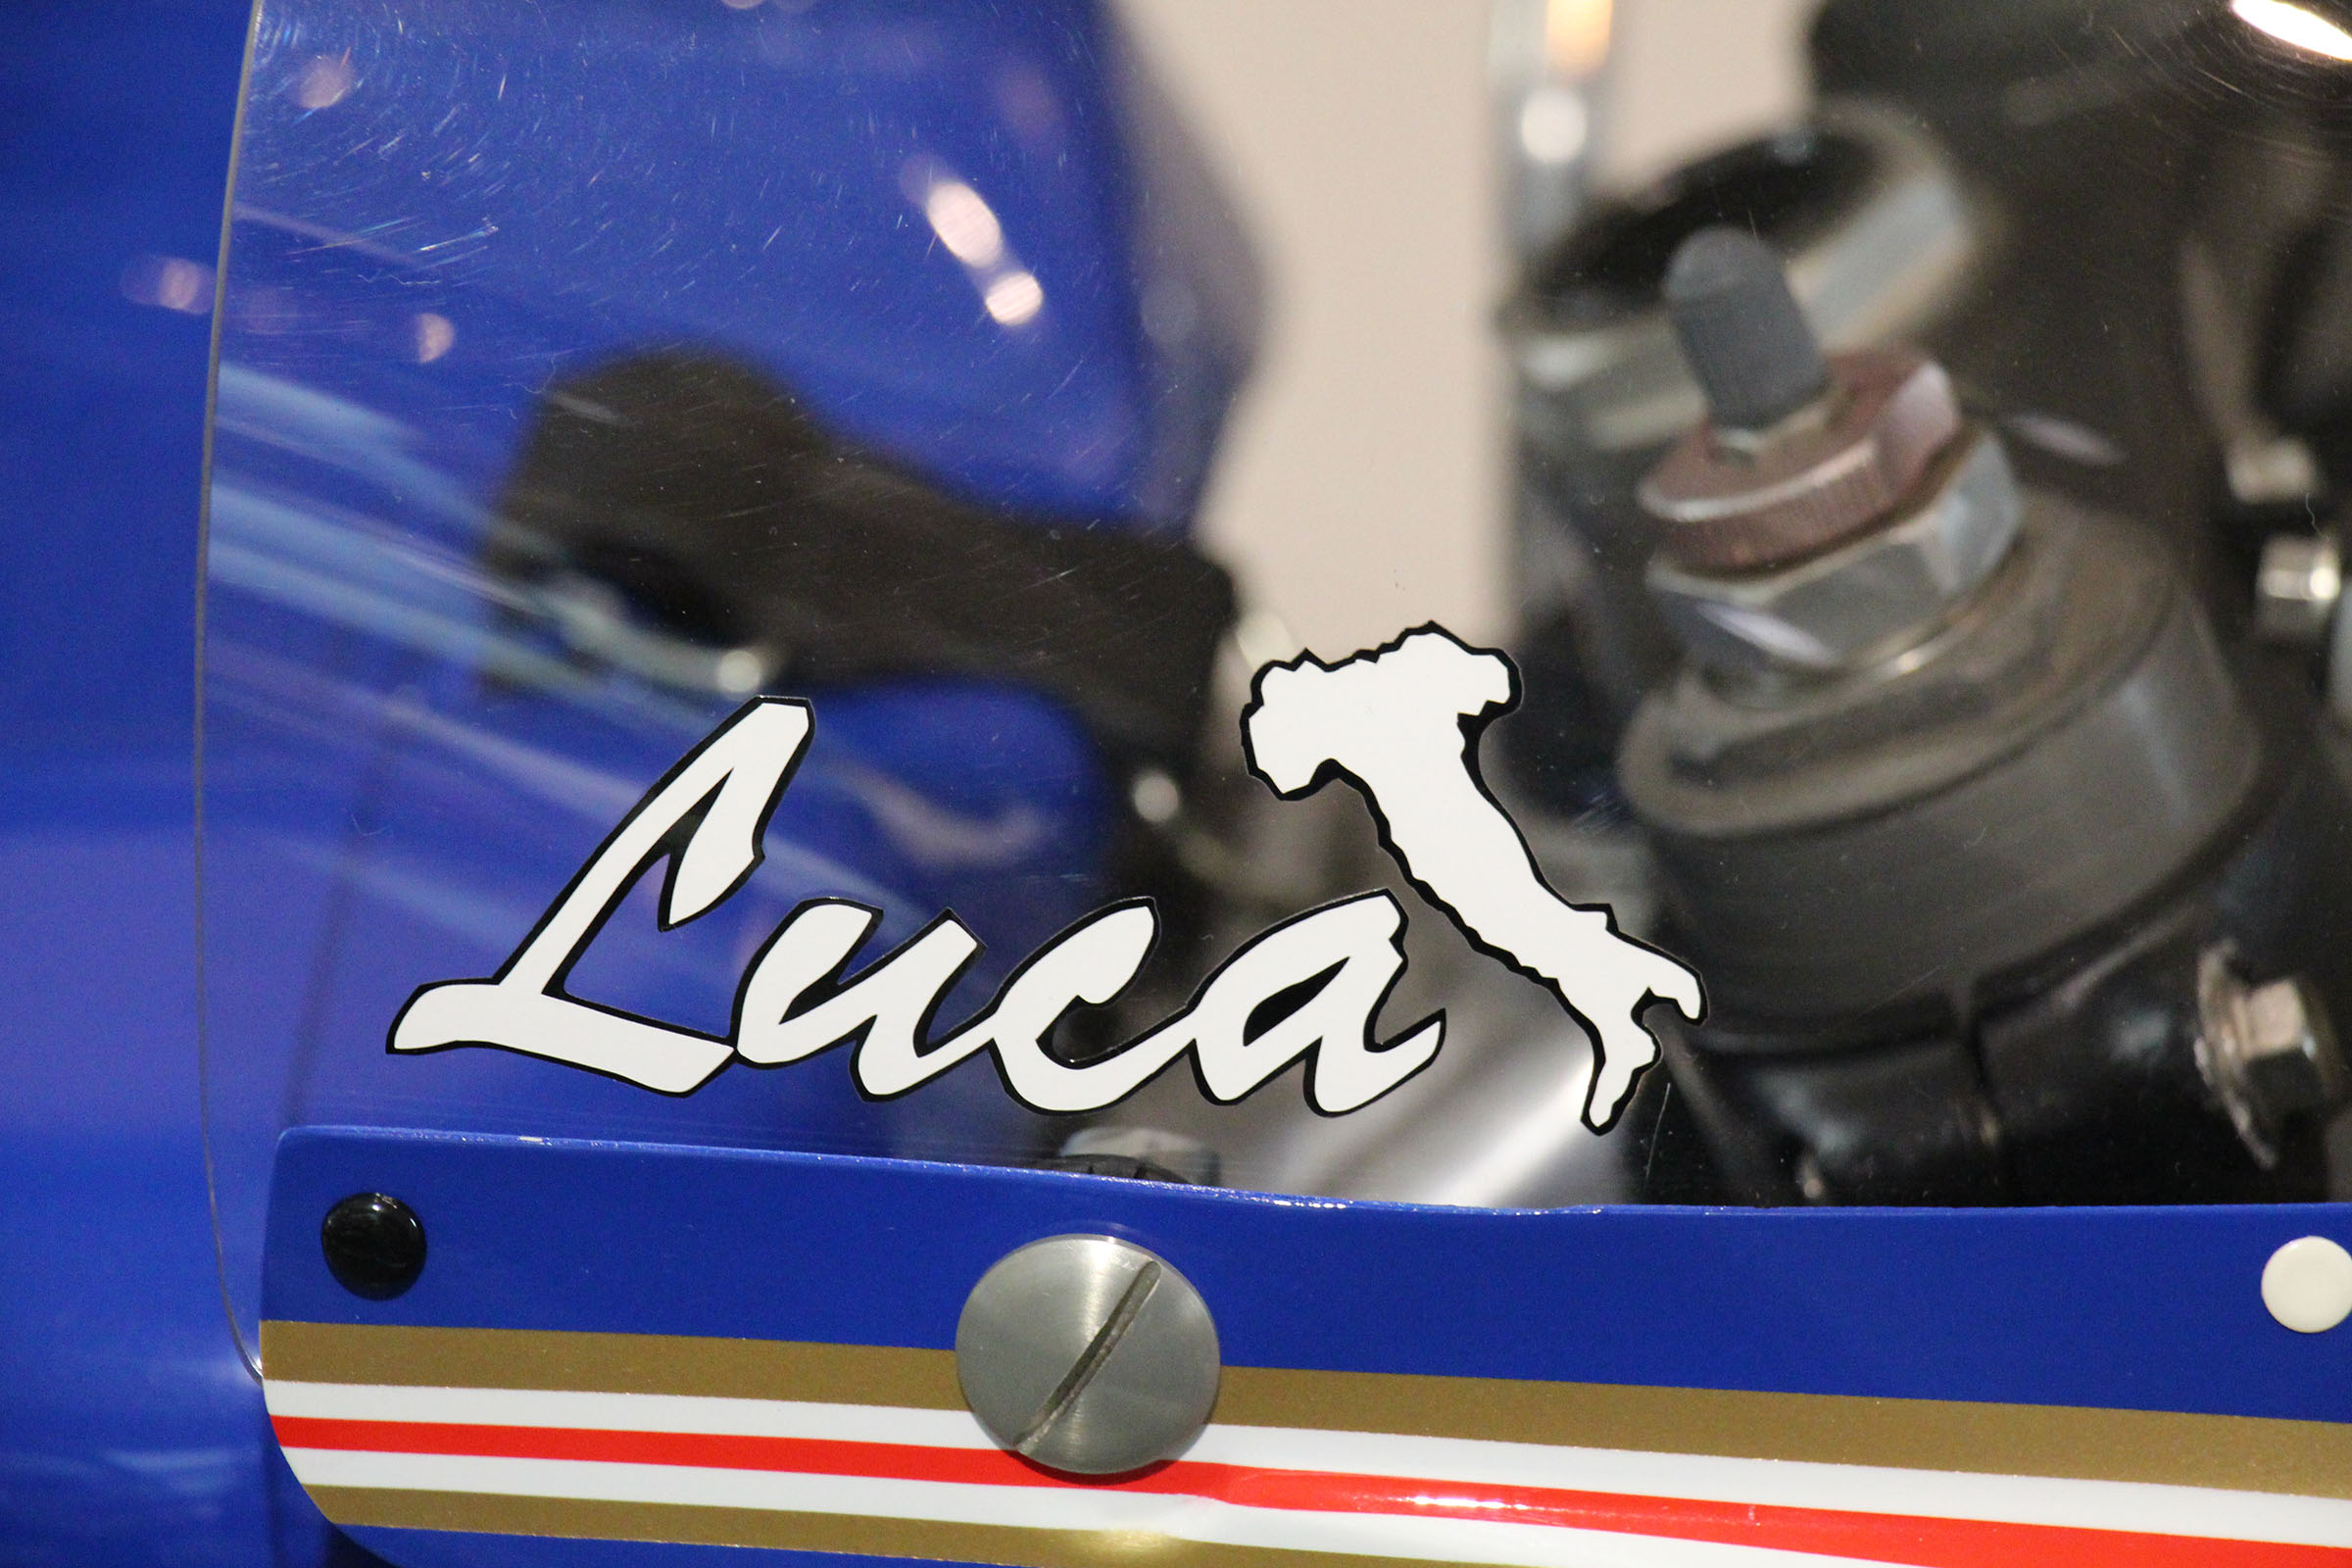
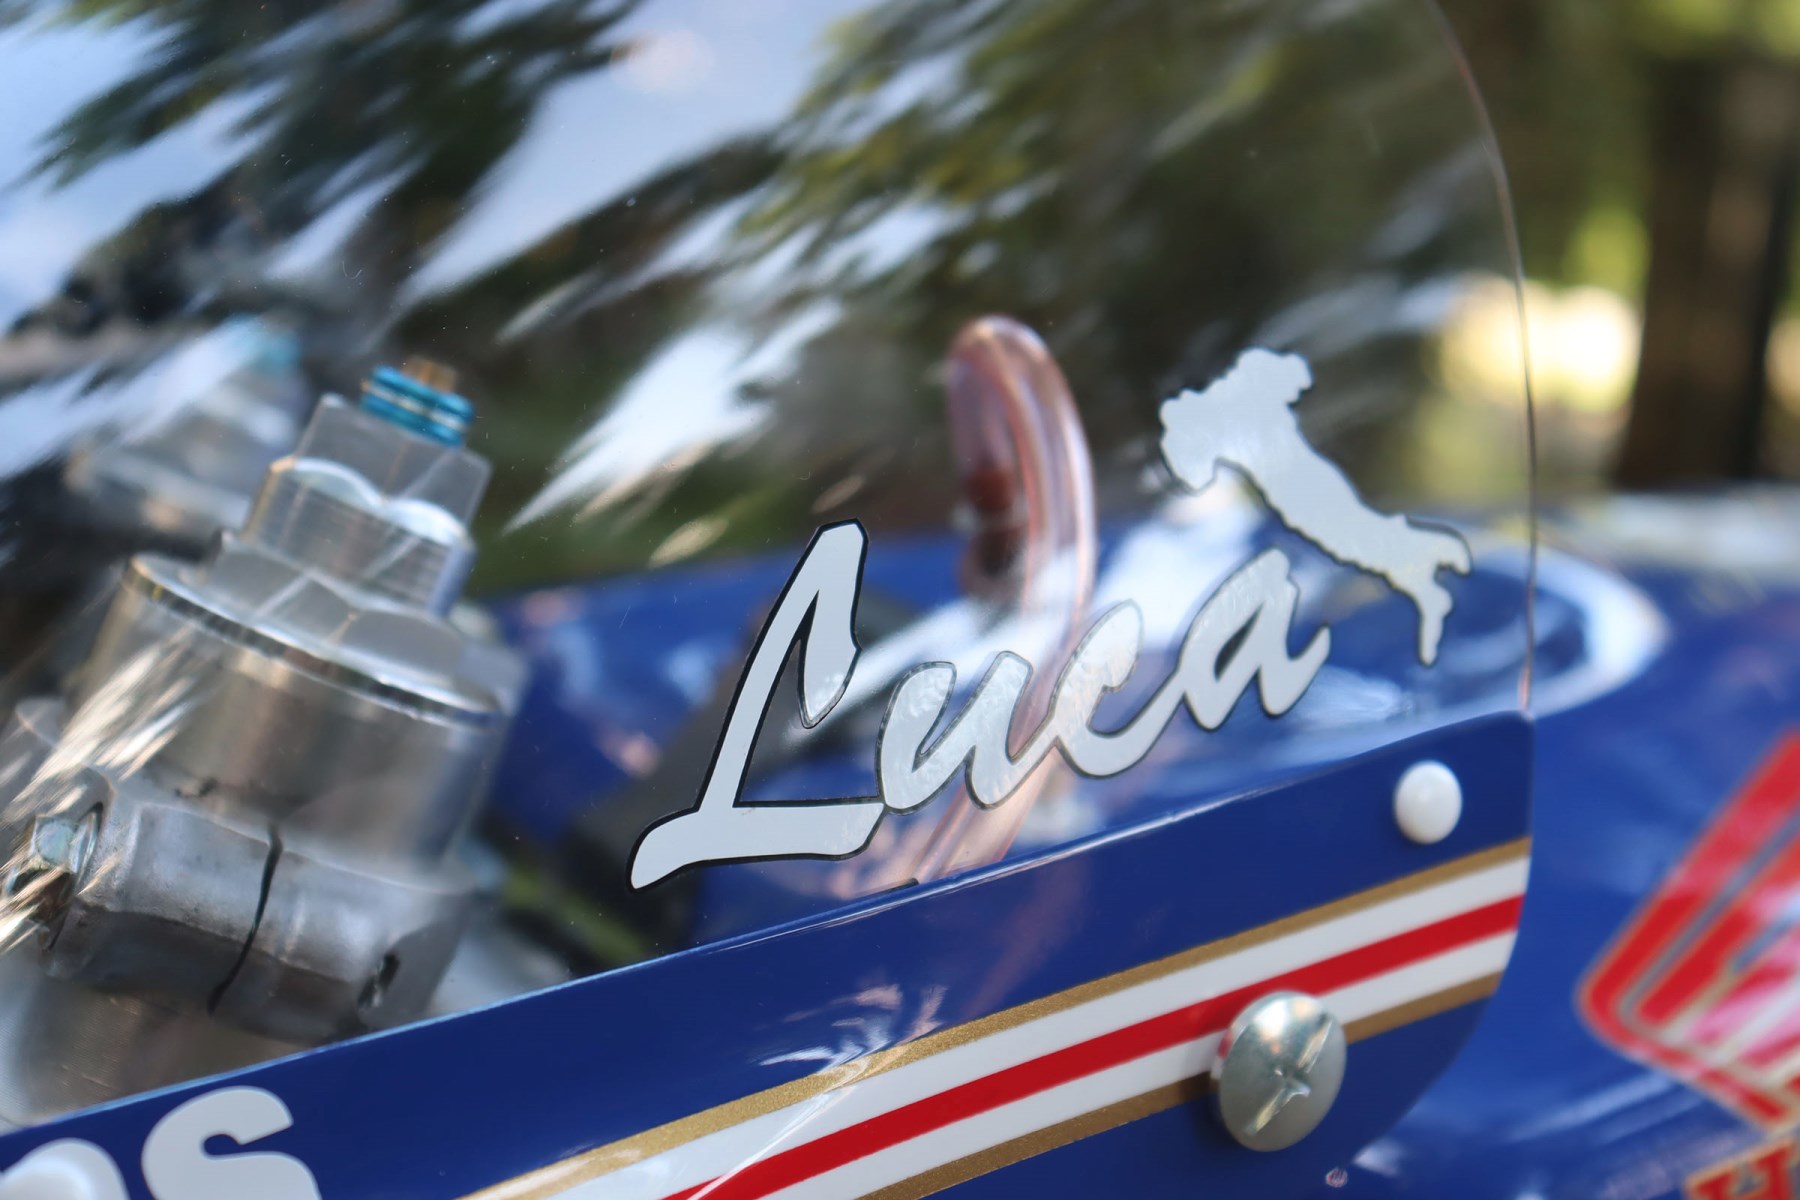
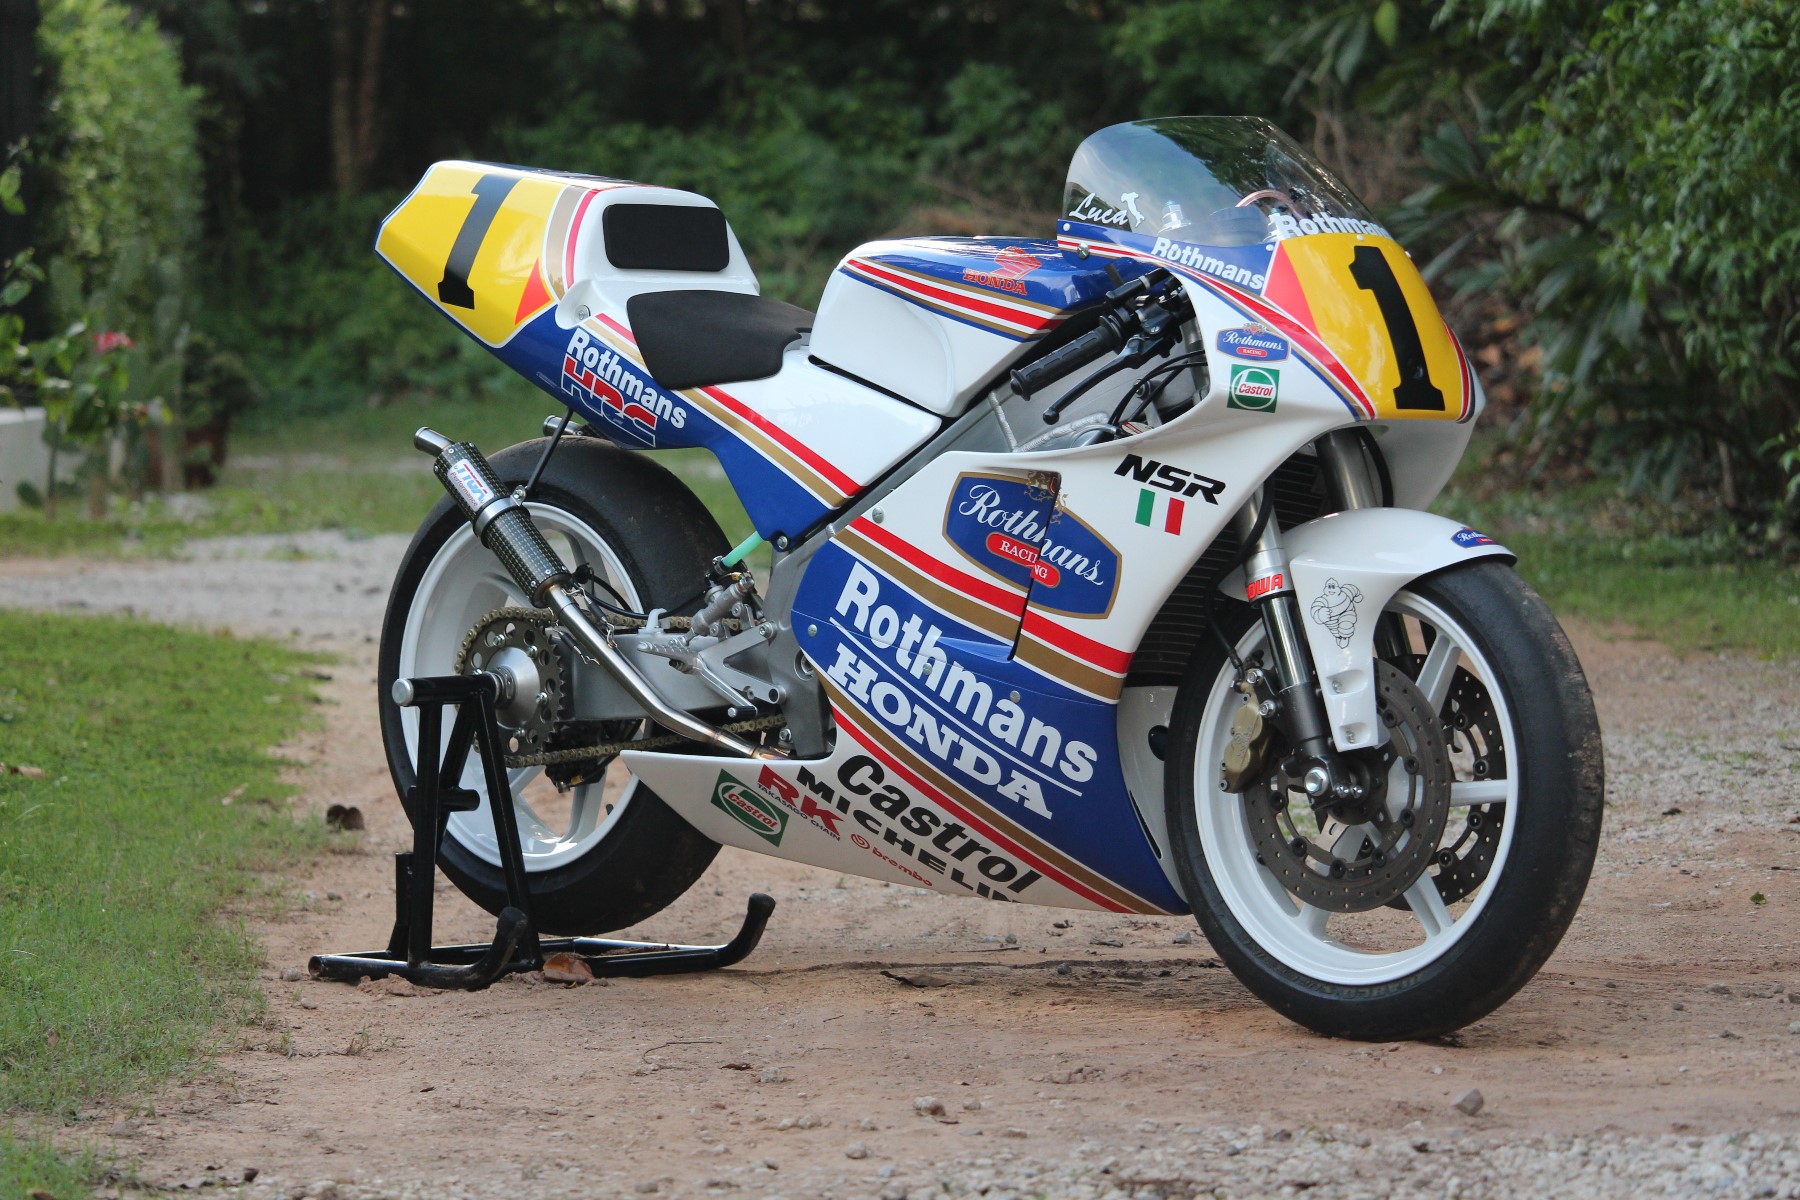
So in conclusion, we chose Rothmans because it is a beautiful livery, 1992 NSR250 because it is beautiful bike, and Luca Cadalora for his determination and talent in giving Honda and the NSR250 two World Championship titles; now that is really beautiful!
More on the practical aspects of the paintwork, maybe of interest to anyone trying to do a similar project. First thing to do is to collect as much data as you can from whatever sources. On the Internet, there are lots of photos and as well as the actual bikes, we sometimes use 1/12 scale models etc. to see the decals though you do need to be wary of any mistakes in application etc. That said, when reproducing a race bike such as this one, you will notice detail difference with subsponsor logo positions, sizes and even changing from race to race. At some point you have to stop worrying too much and just do a representation. An example wit this project is that the Motegi museum bike has much larger Rothmans crests on the sides than most of the action shots so in this case, even the official Honda museum bike is not 100%. Talking of museums, if you can, get to see the actual race bikes for matching the exact colours and dimensions it is really helpful. For example, A Repsol race bike has a very different orange to any production Repsol replica. Now when doing this particular project, we had a couple of other lucky breaks. One was in the form of Max Biaggi's actual seat cowling from the following year. We could then use this to give to the painter for colour matching and some of the decals.
The other lucky break was a friend had the actual fairings from Max's bike and although he didn't part with them, he was kind enough to send us some splash molds so we could make a master and from that a proper mold. The splash molds still had the step of the stickers and it was possible to use a technique similar to church brass rubbings to make out the size and positioning of each of the main subsponsors which we could then measure for when we reproduced ours. It was only in places on the lowers so the rest we had to use photos.
In any case, like I say, it was the following year's model and the bodywork shape and livery differs slightly. As a side note, we plan to do offer Biaggi 1993 bodywork in case anyone is interested.
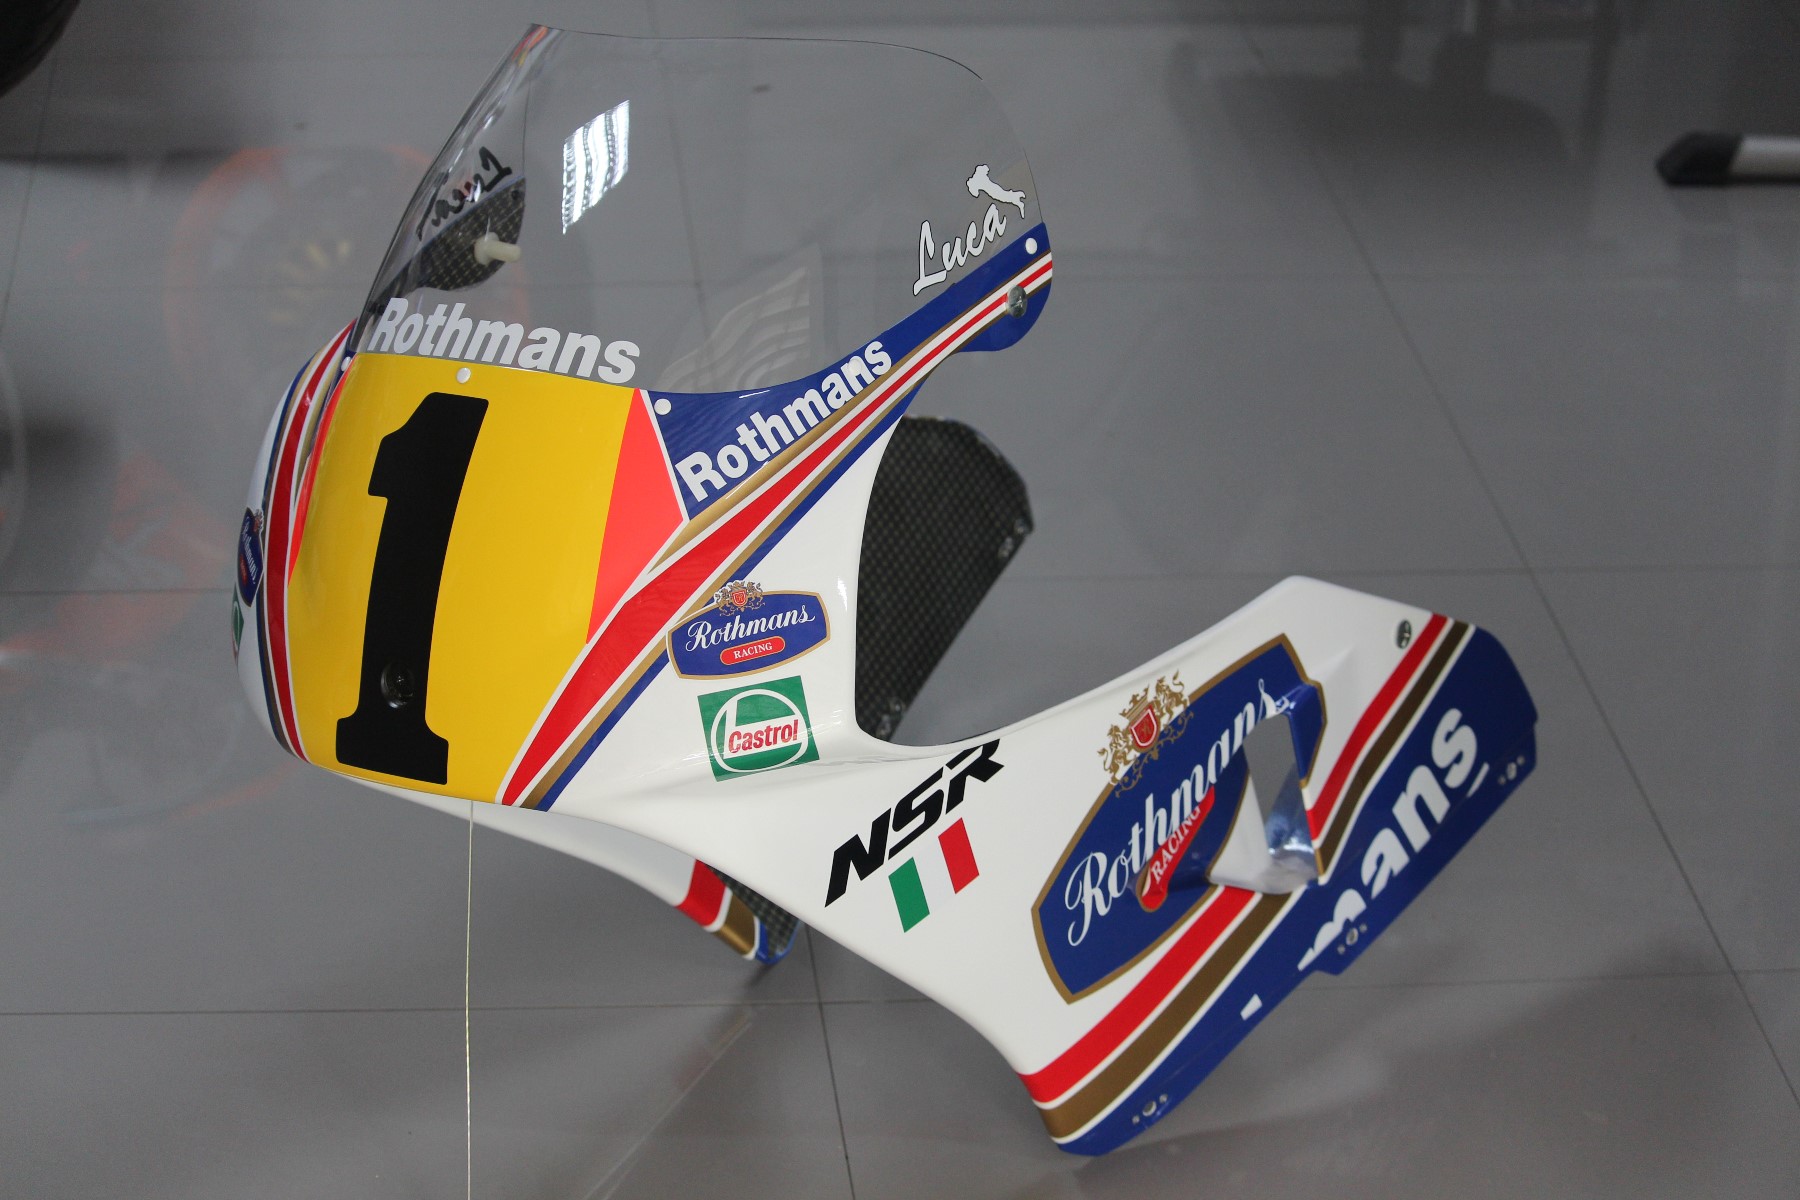
Having done some research you need to check the size and position of graphics and lettering with the fairings on the actual bike. We had some old vinyl decals to use for doing the mock up, but you can also print on regular paper and then cut out and stuck in place. They have to look reasonable so if you take a photo or squint you can imagine it with the actual decal in place. The idea at this stage is to tweak until you get the best result. The main stripes are best applied first. Our painter, K Pong, uses thin masking tape to mark out where he puts the stripes and then the lettering is added once he has achieved a good result for the stripes. If all goes well, you can then proceed to paintwork. With any new paint scheme, especially the first set we only clear the paintwork with the stripes and the fuel tank leaving the lettering to apply last over the clearcoat. We do it this way because the paint needs clear to protect it while we are still playing around with the position of the decals but on the other hand, if we apply the decals and then want to make any last minute changes, it is much harder to remove and replace the decals. As well as that, we prefer to have the lettering not clearcoated because this is more faithful to a race bike and the way it would be done in World GP at that time. Of course, the down side is that the corners of the decals can lift, especially if you wash the bike regularly so it is not for everyone and not for every bike. As it turned out, with this project, we made a bit of an error on the main stripes too which were clearcoated. Comparing the actual bike with ours revealed that they were too narrow, especially the red, and varied somewhat from the original in position. This was a pretty major issue but K Pong is used to us now and our picky ways and expects to have to do any TYGA bespoke paint job at least twice. He took it in his stride and had a second attempt at painting the stripes while at the same time ordering the correct size vinyl graphics. We were very happy with the final result and I think you will agree, it really makes the bike look special.
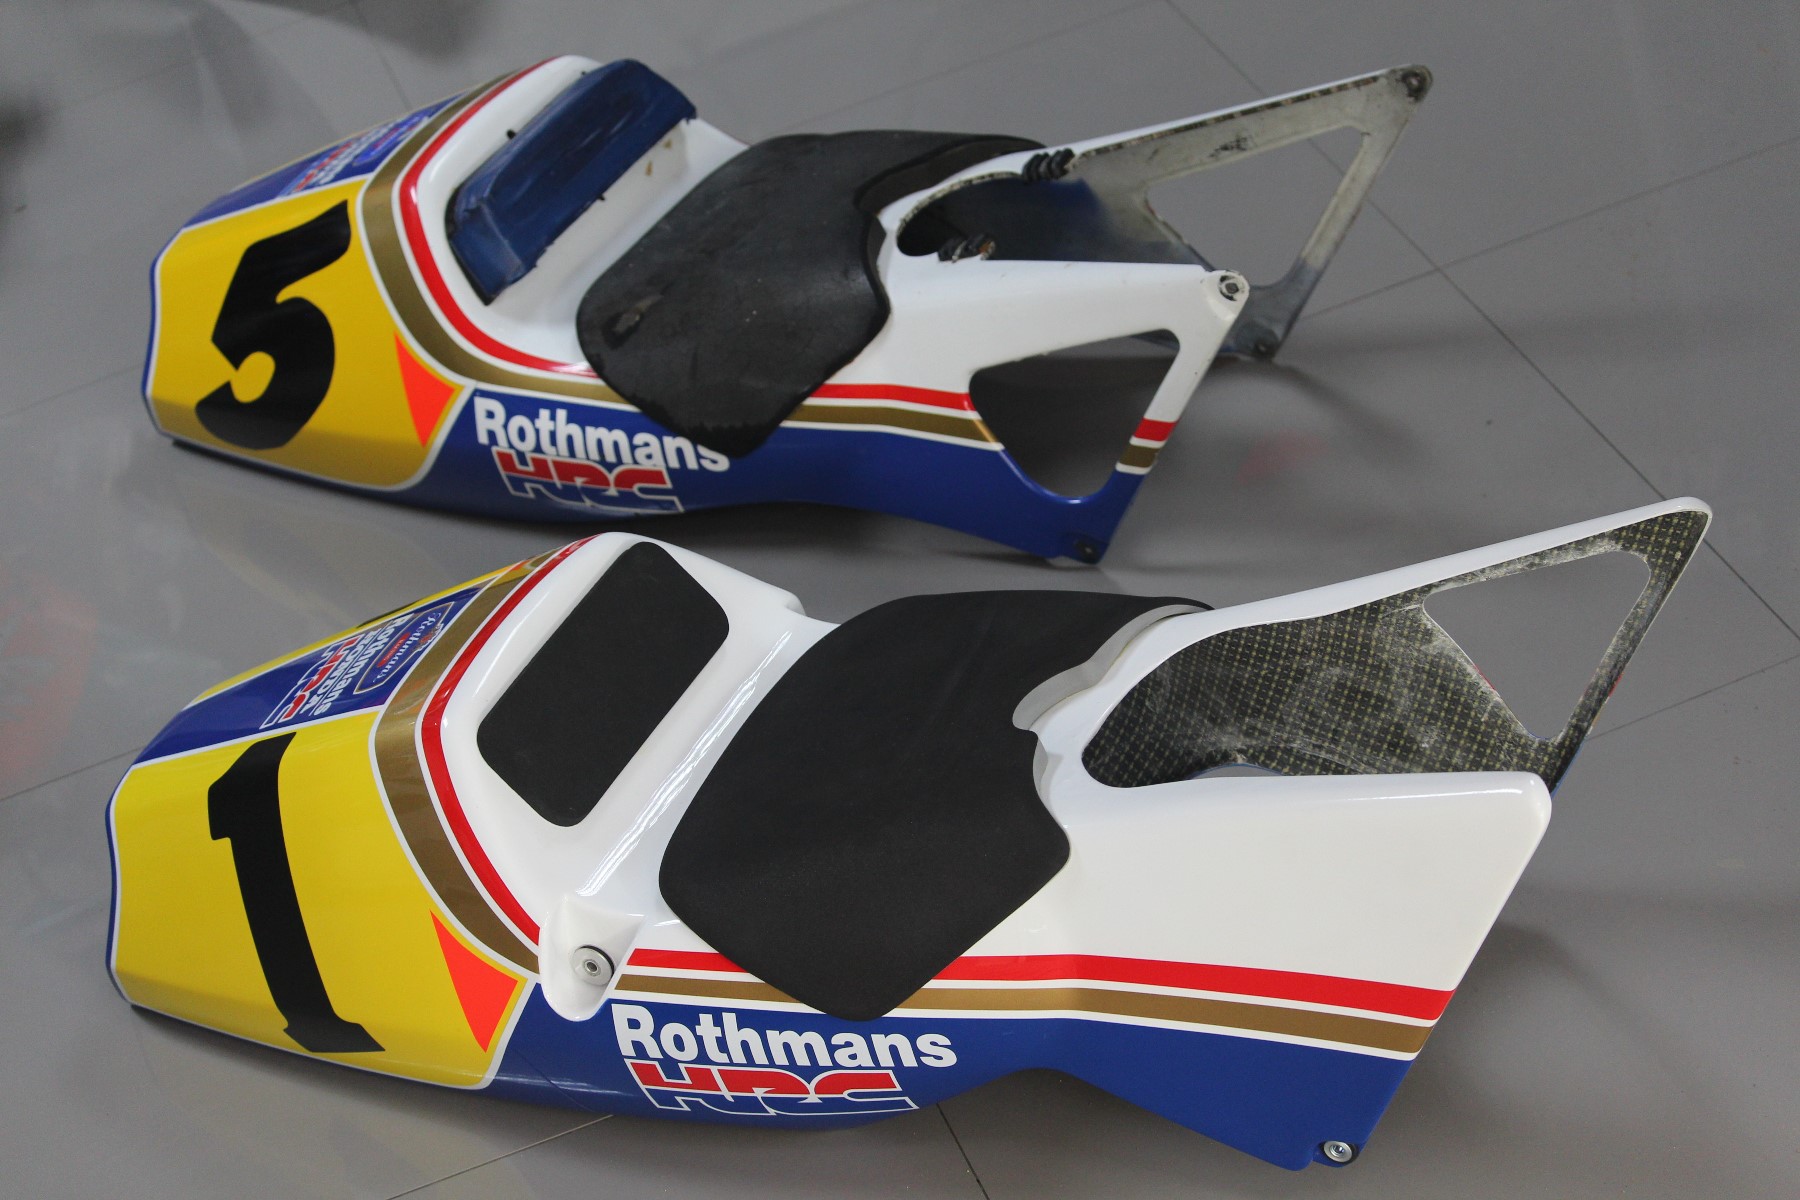
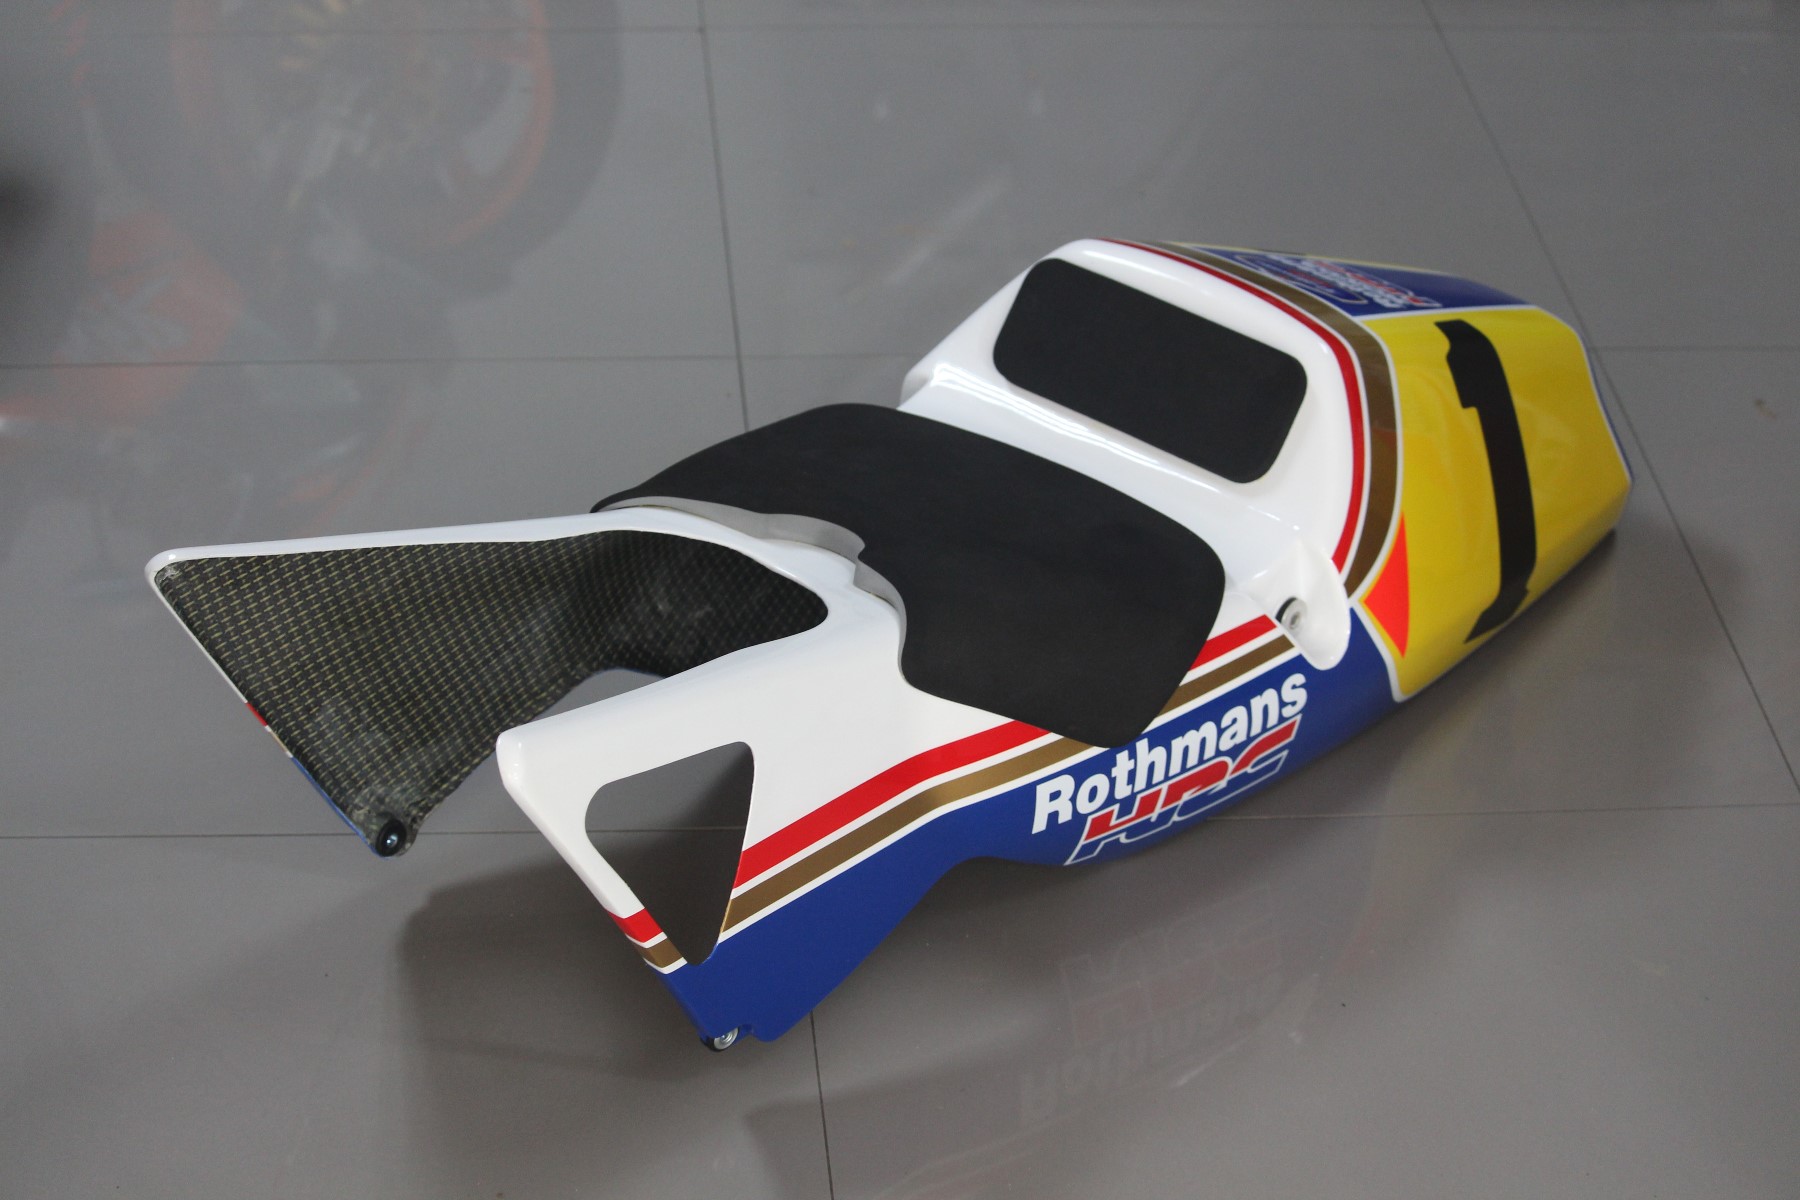
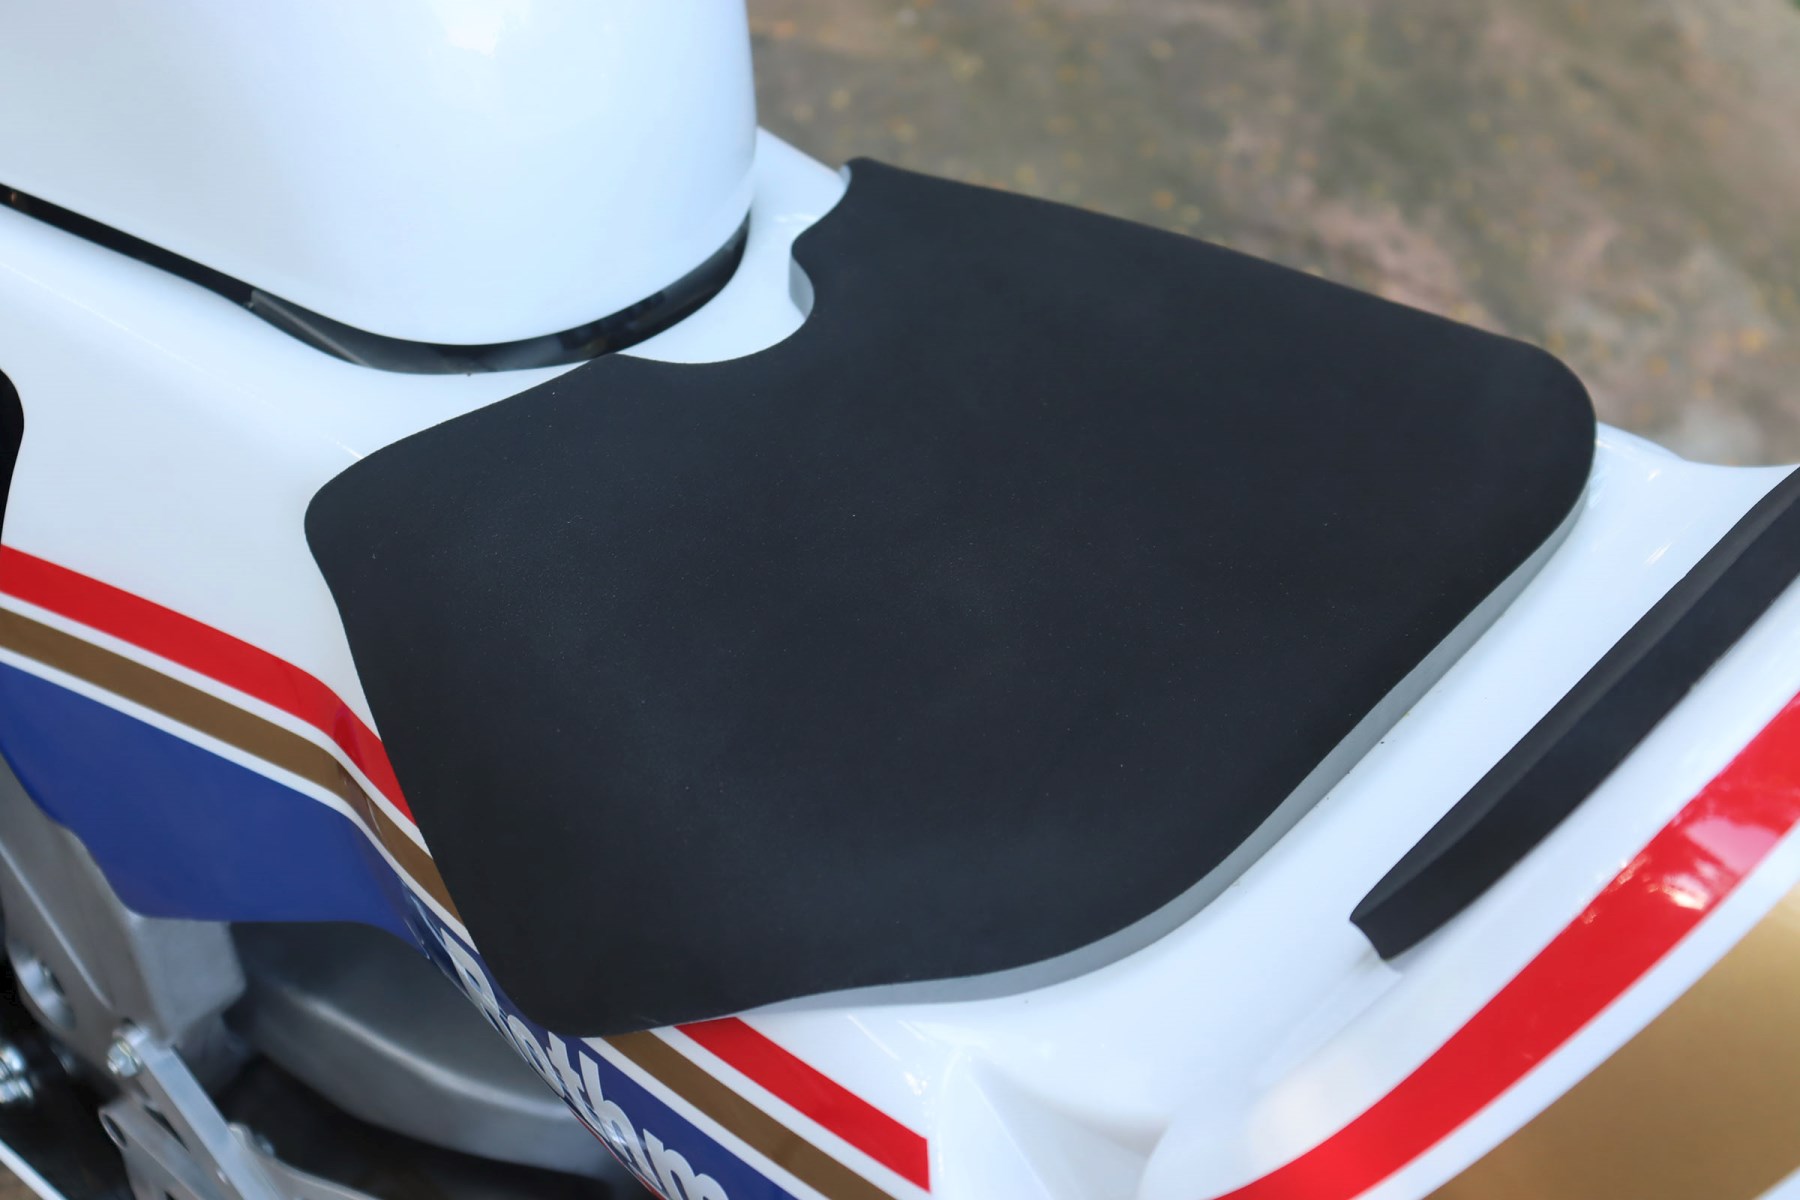
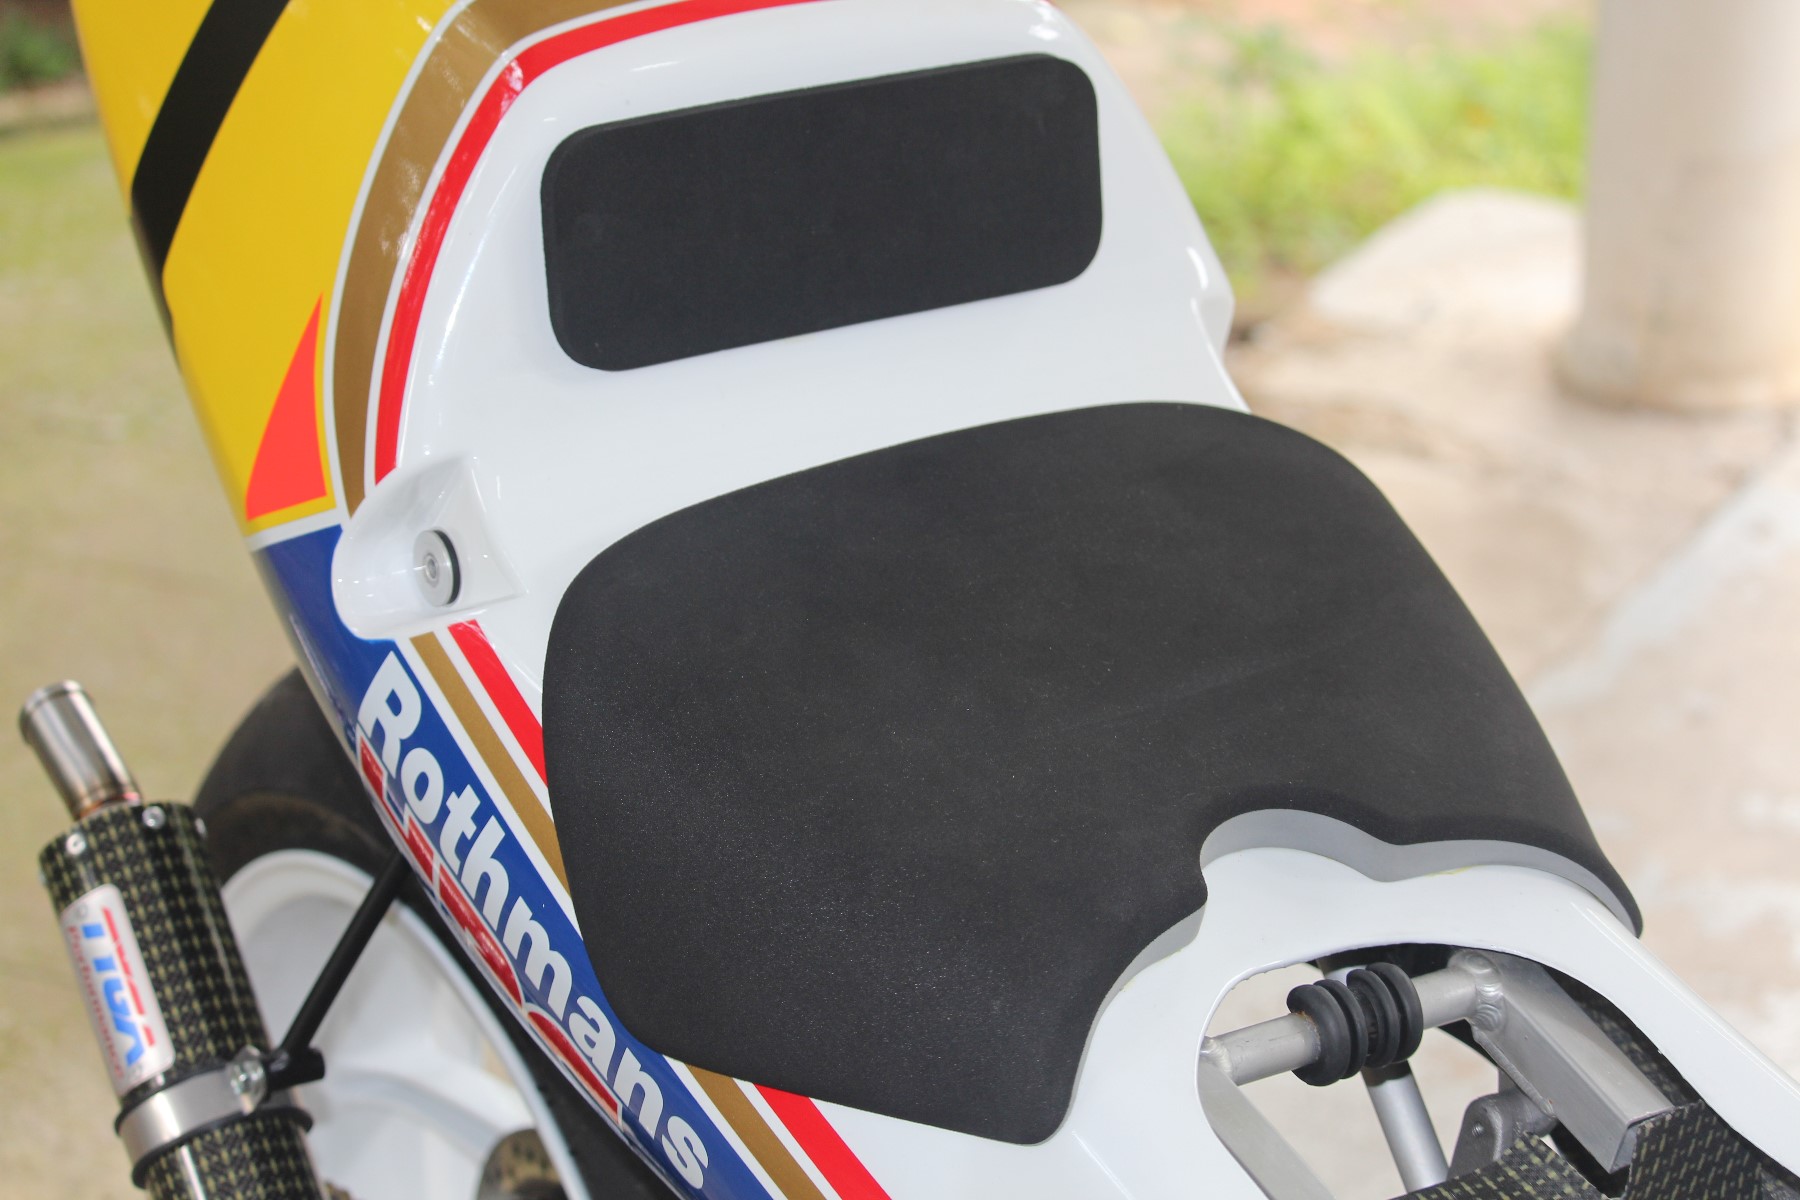
While we were doing the decals, there were numerous other jobs to do such as install the seat pad which was a BPSP-0014 which one of our lads had carefully cut and smoothed the edges to be similar to the one on the Biaggi seat cowling.
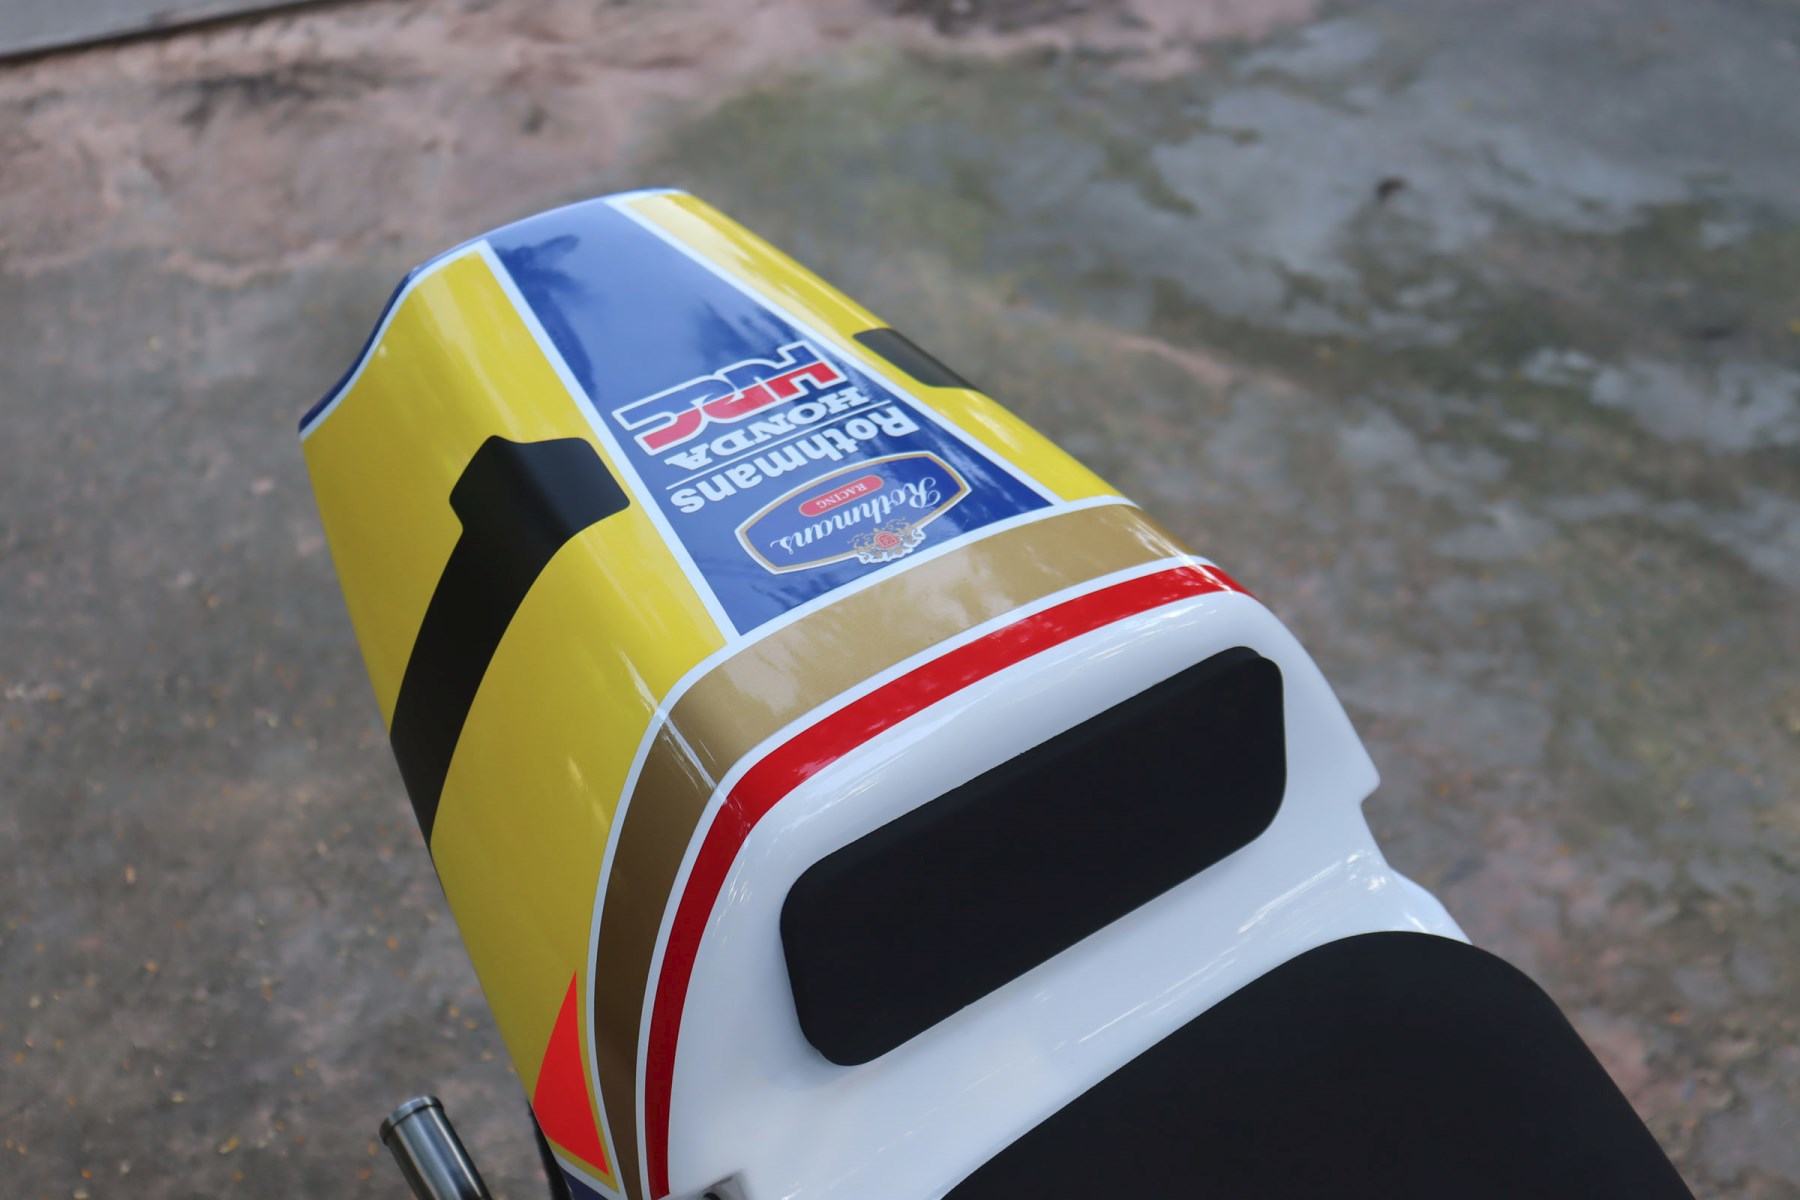
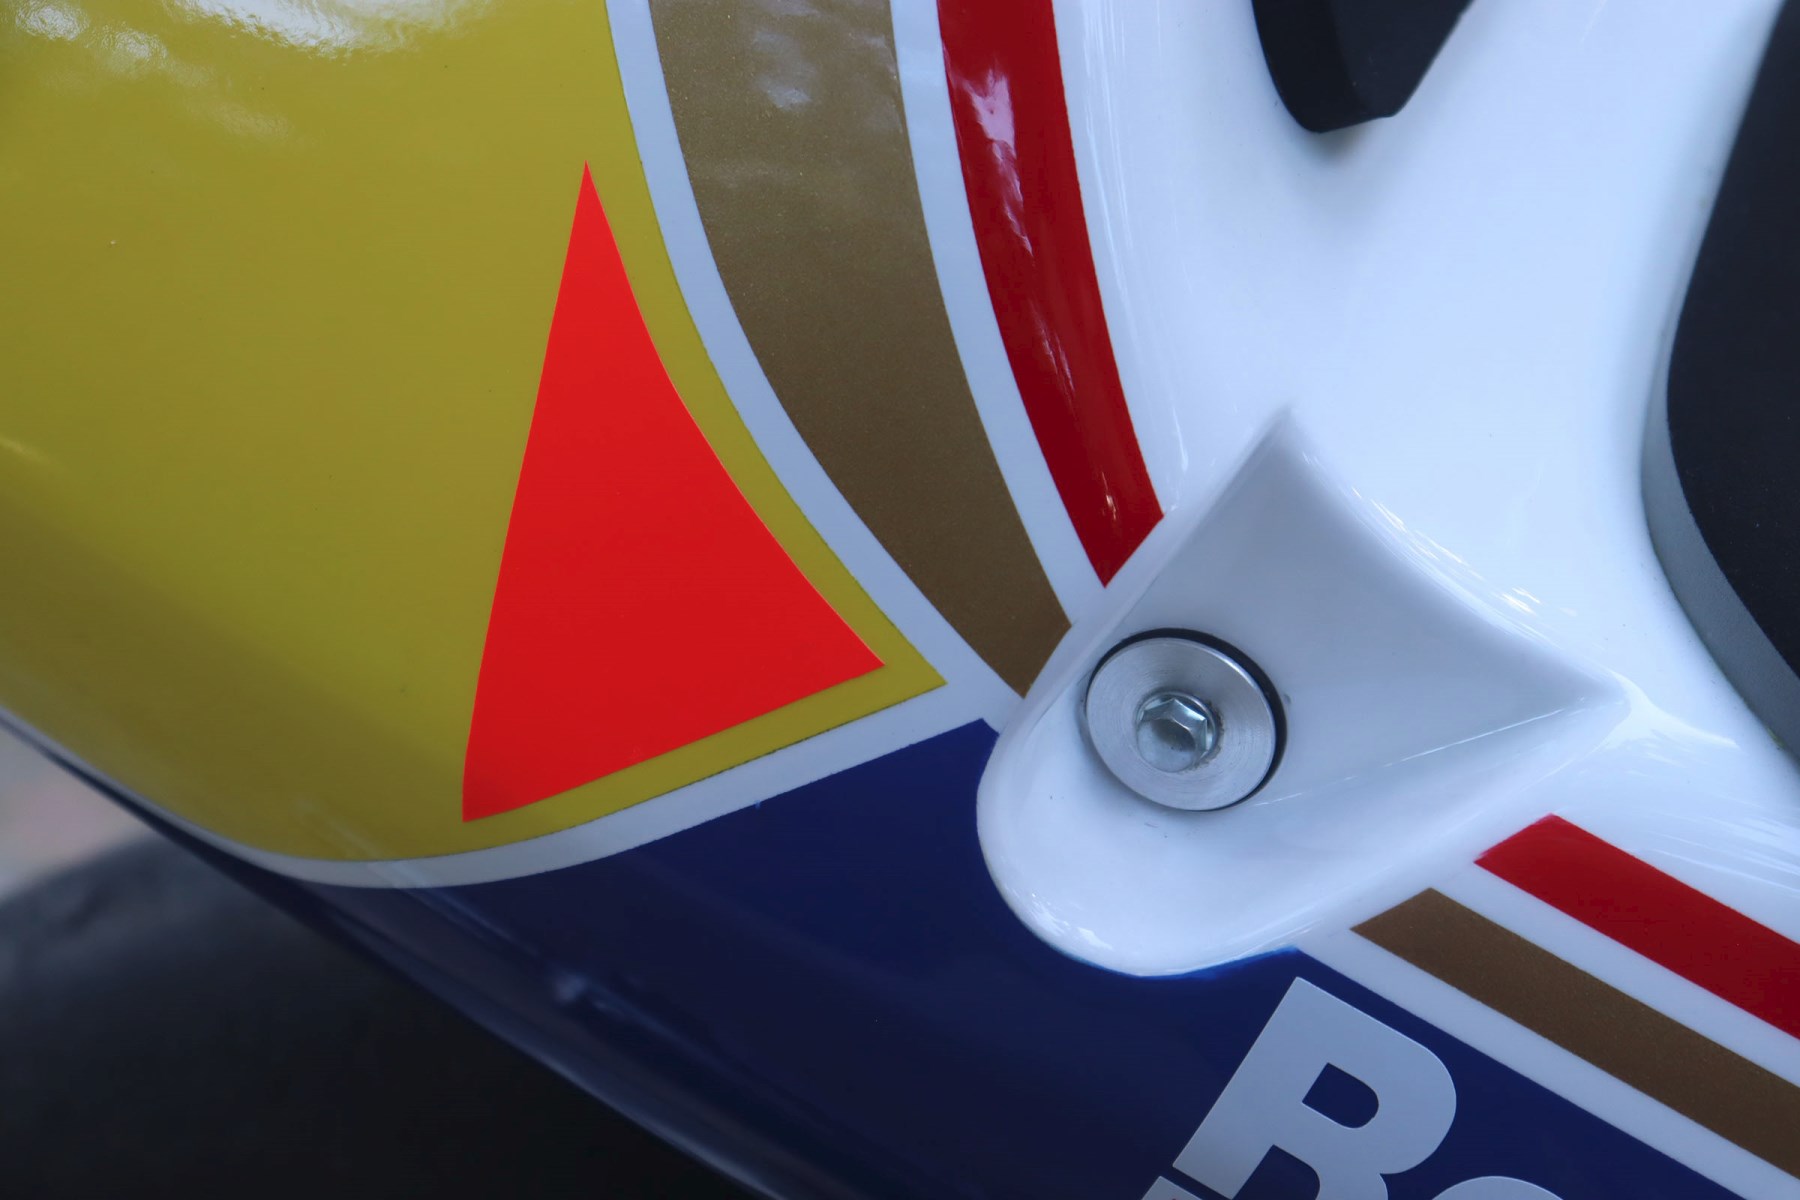
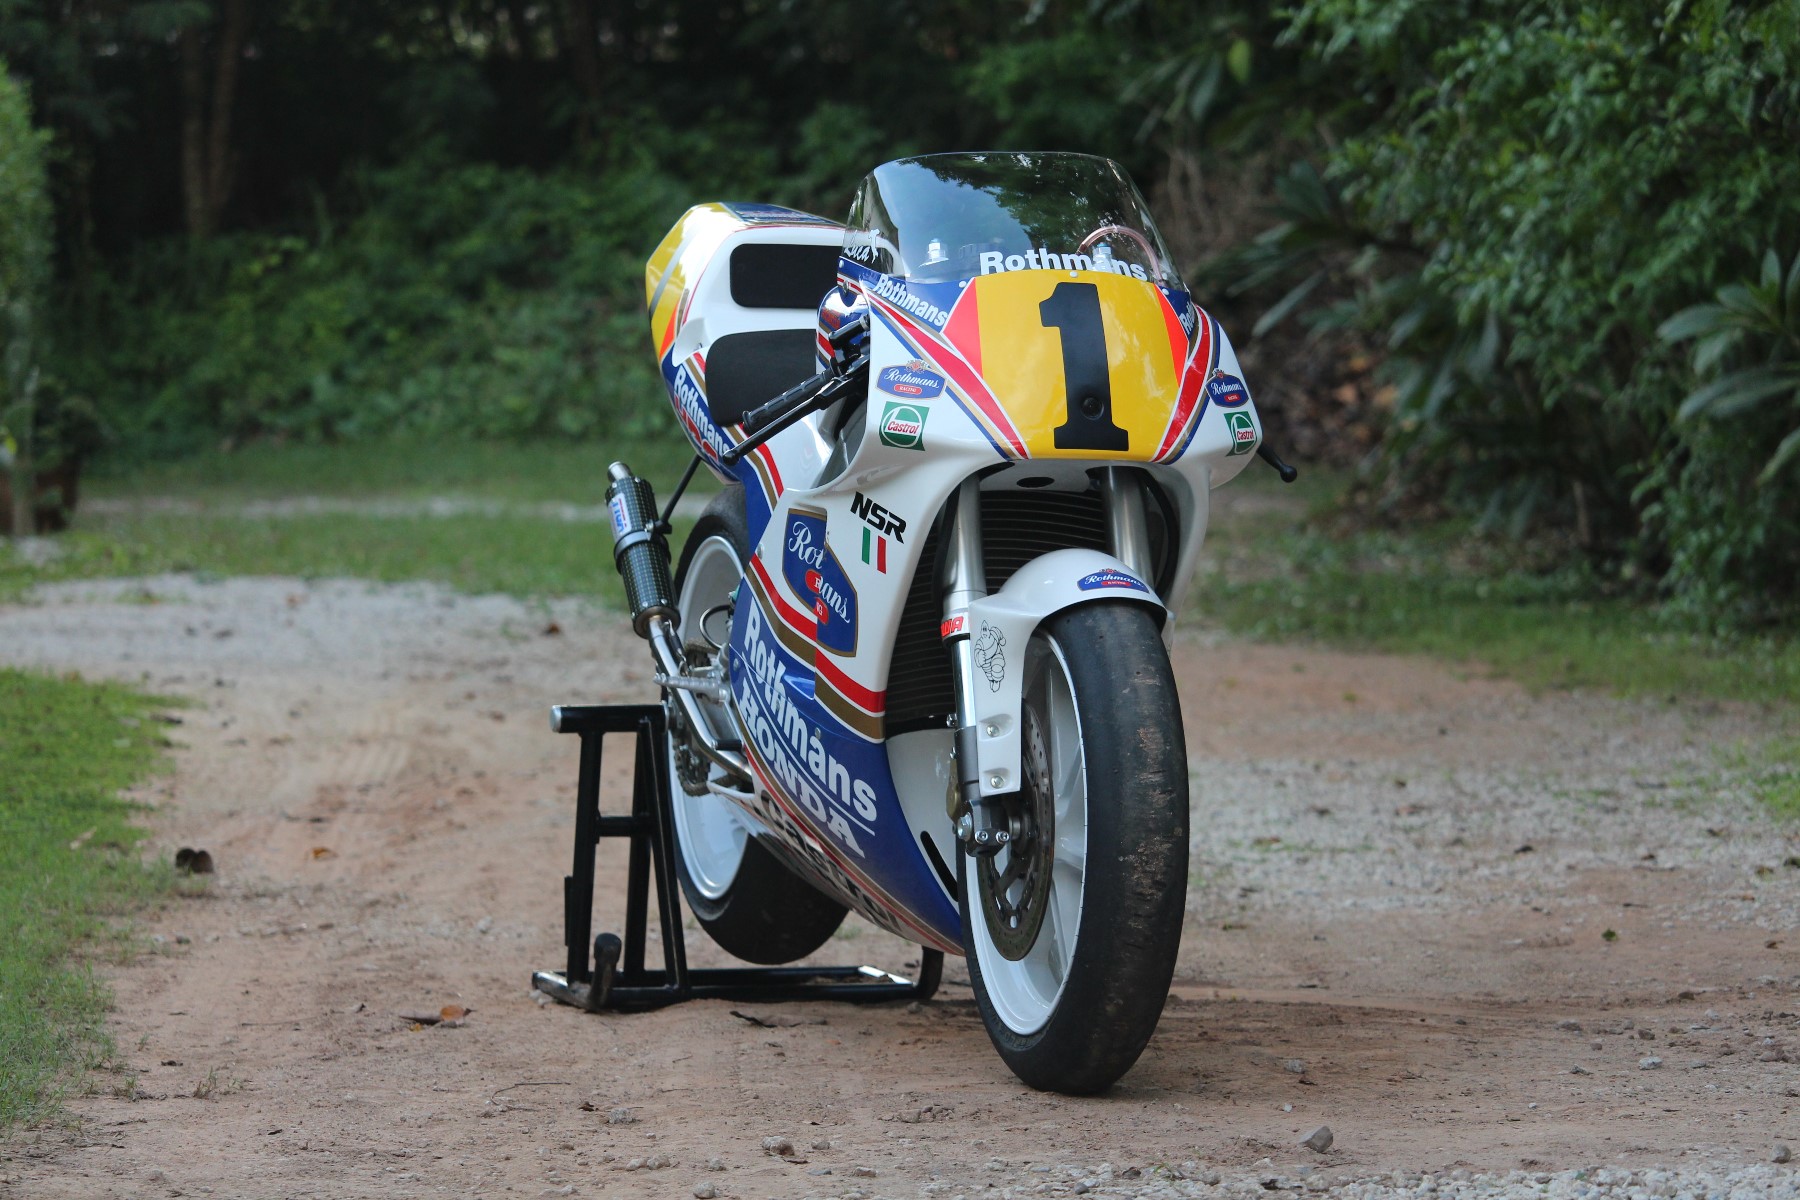
We also installed a TYGA bum stop and some heat reflective tape to the inside of the belly pan. Using the heat gun, Matt carefully stretched the 'number 1' on the front of the upper cowling so it went in the bolt hole recess. He then carefully trimmed the vinyl and painted the rest of the recess flat black so that it looked like the one in the museum.
With an eye for detail, Matt also took the trouble to paint the heads of the HRC style screen fasteners white so they matched the factory bike. Small details like this make all the difference.
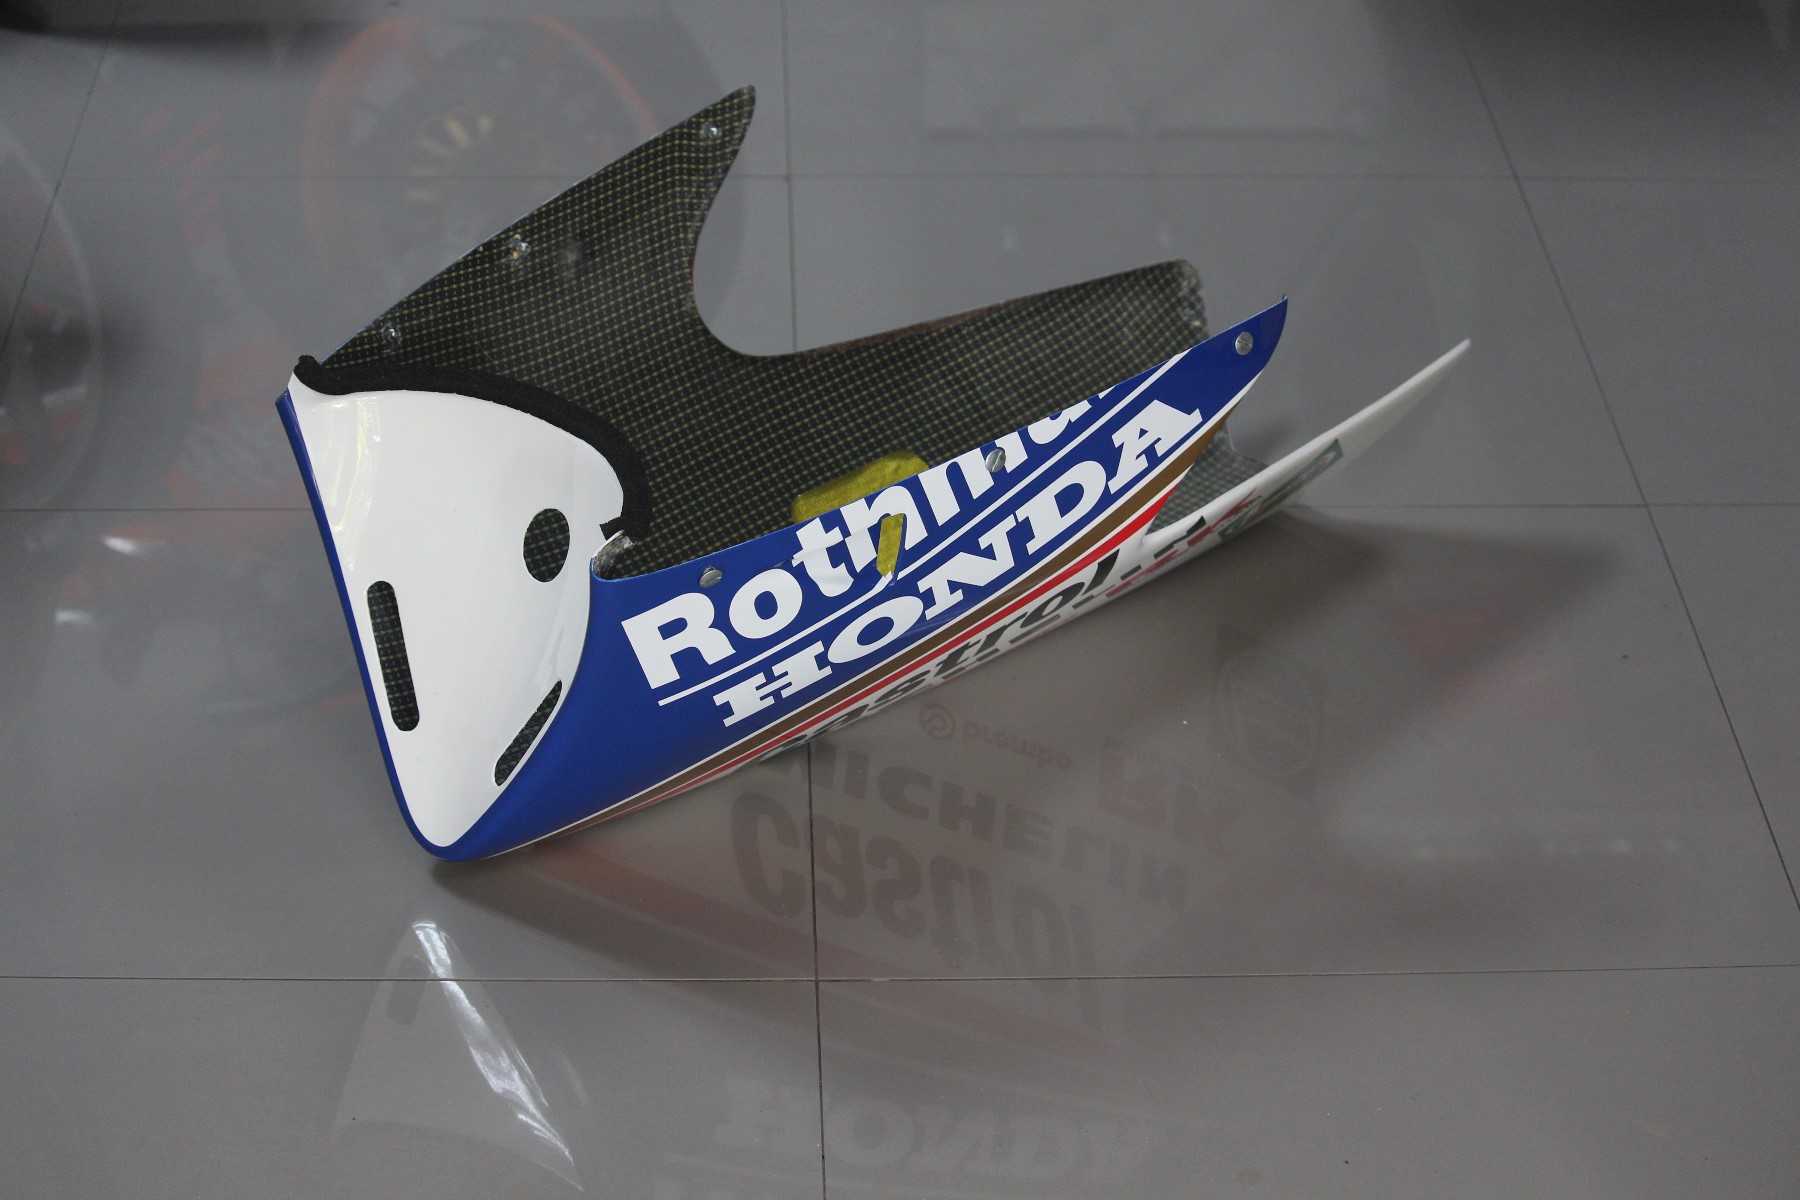
He also 3D printed a couple of hose clips to hold the rad overflow tube in place on the inside of the upper cowling. You will also notice that the inside of the fairing is finished in the 'special' carbon/Kevlar weave.
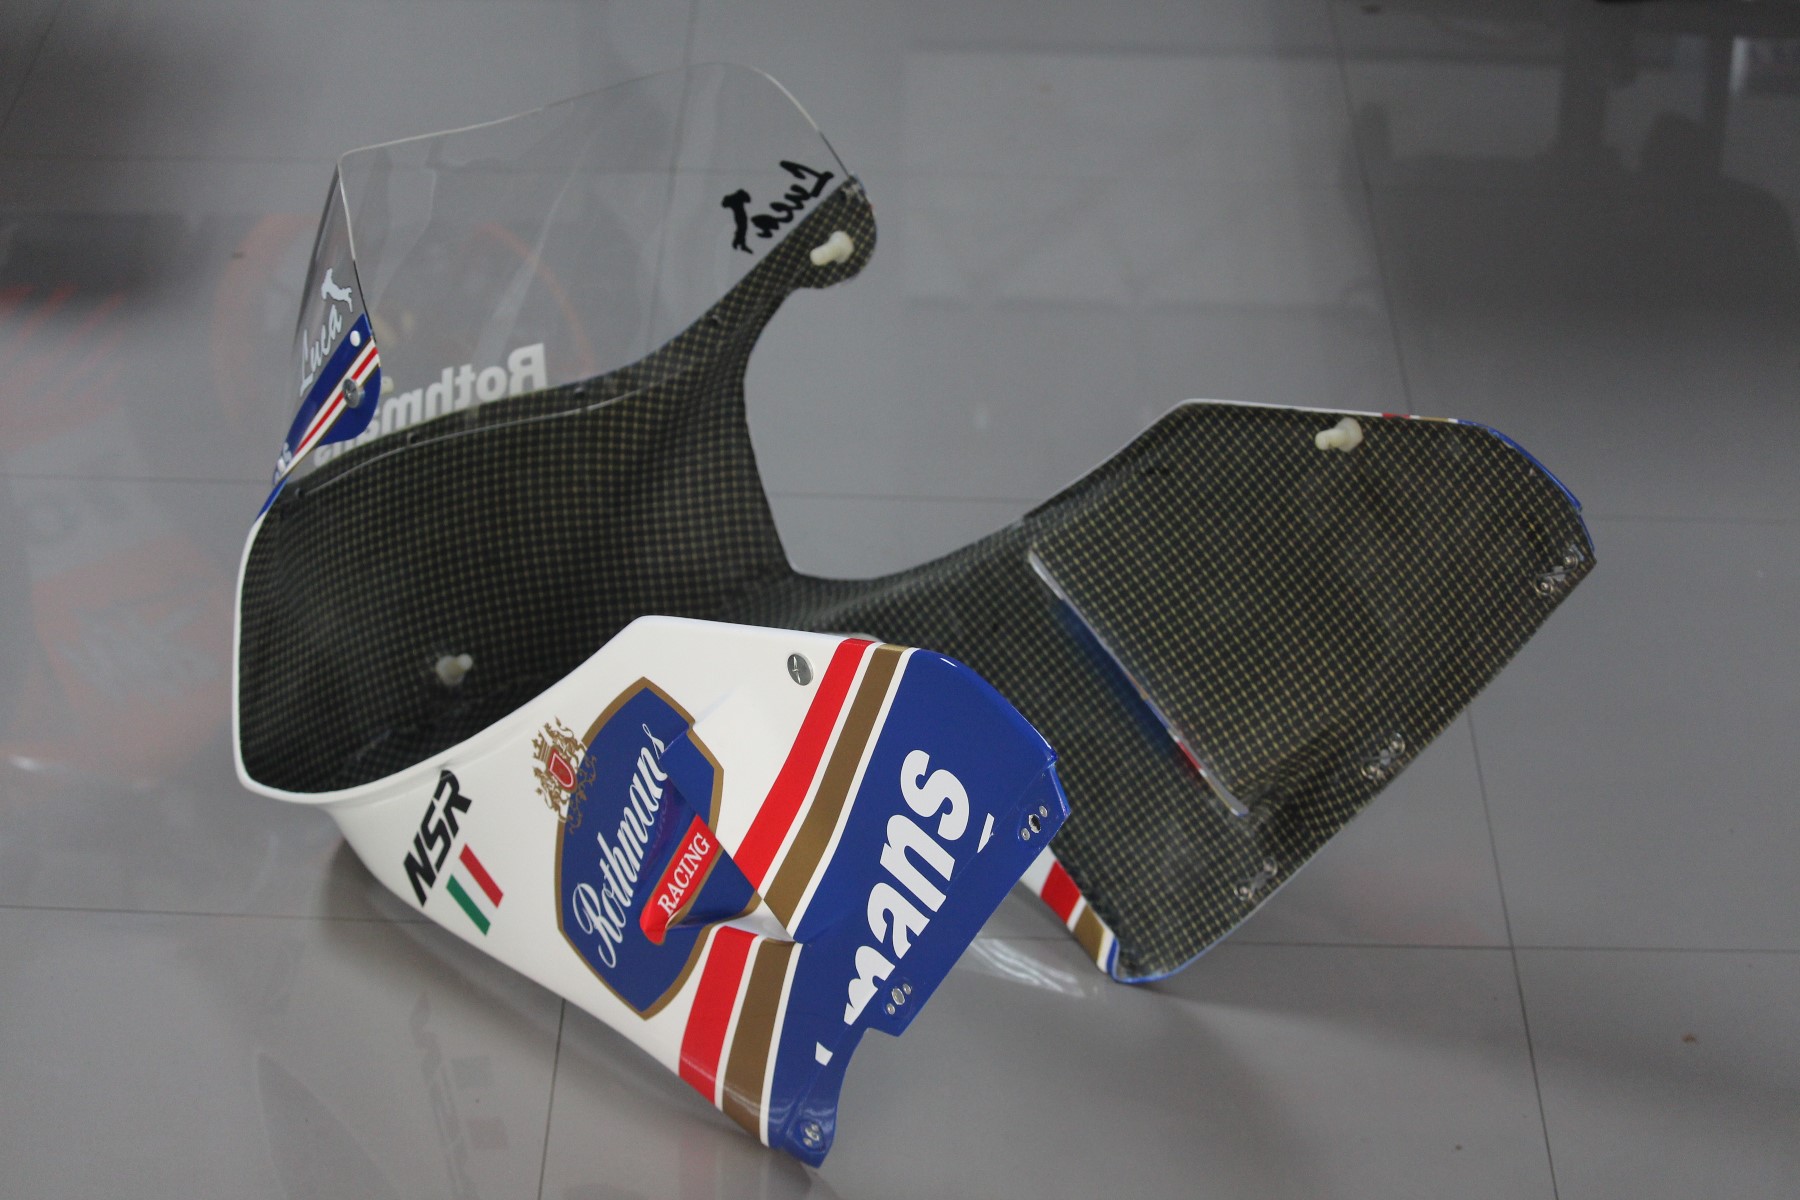
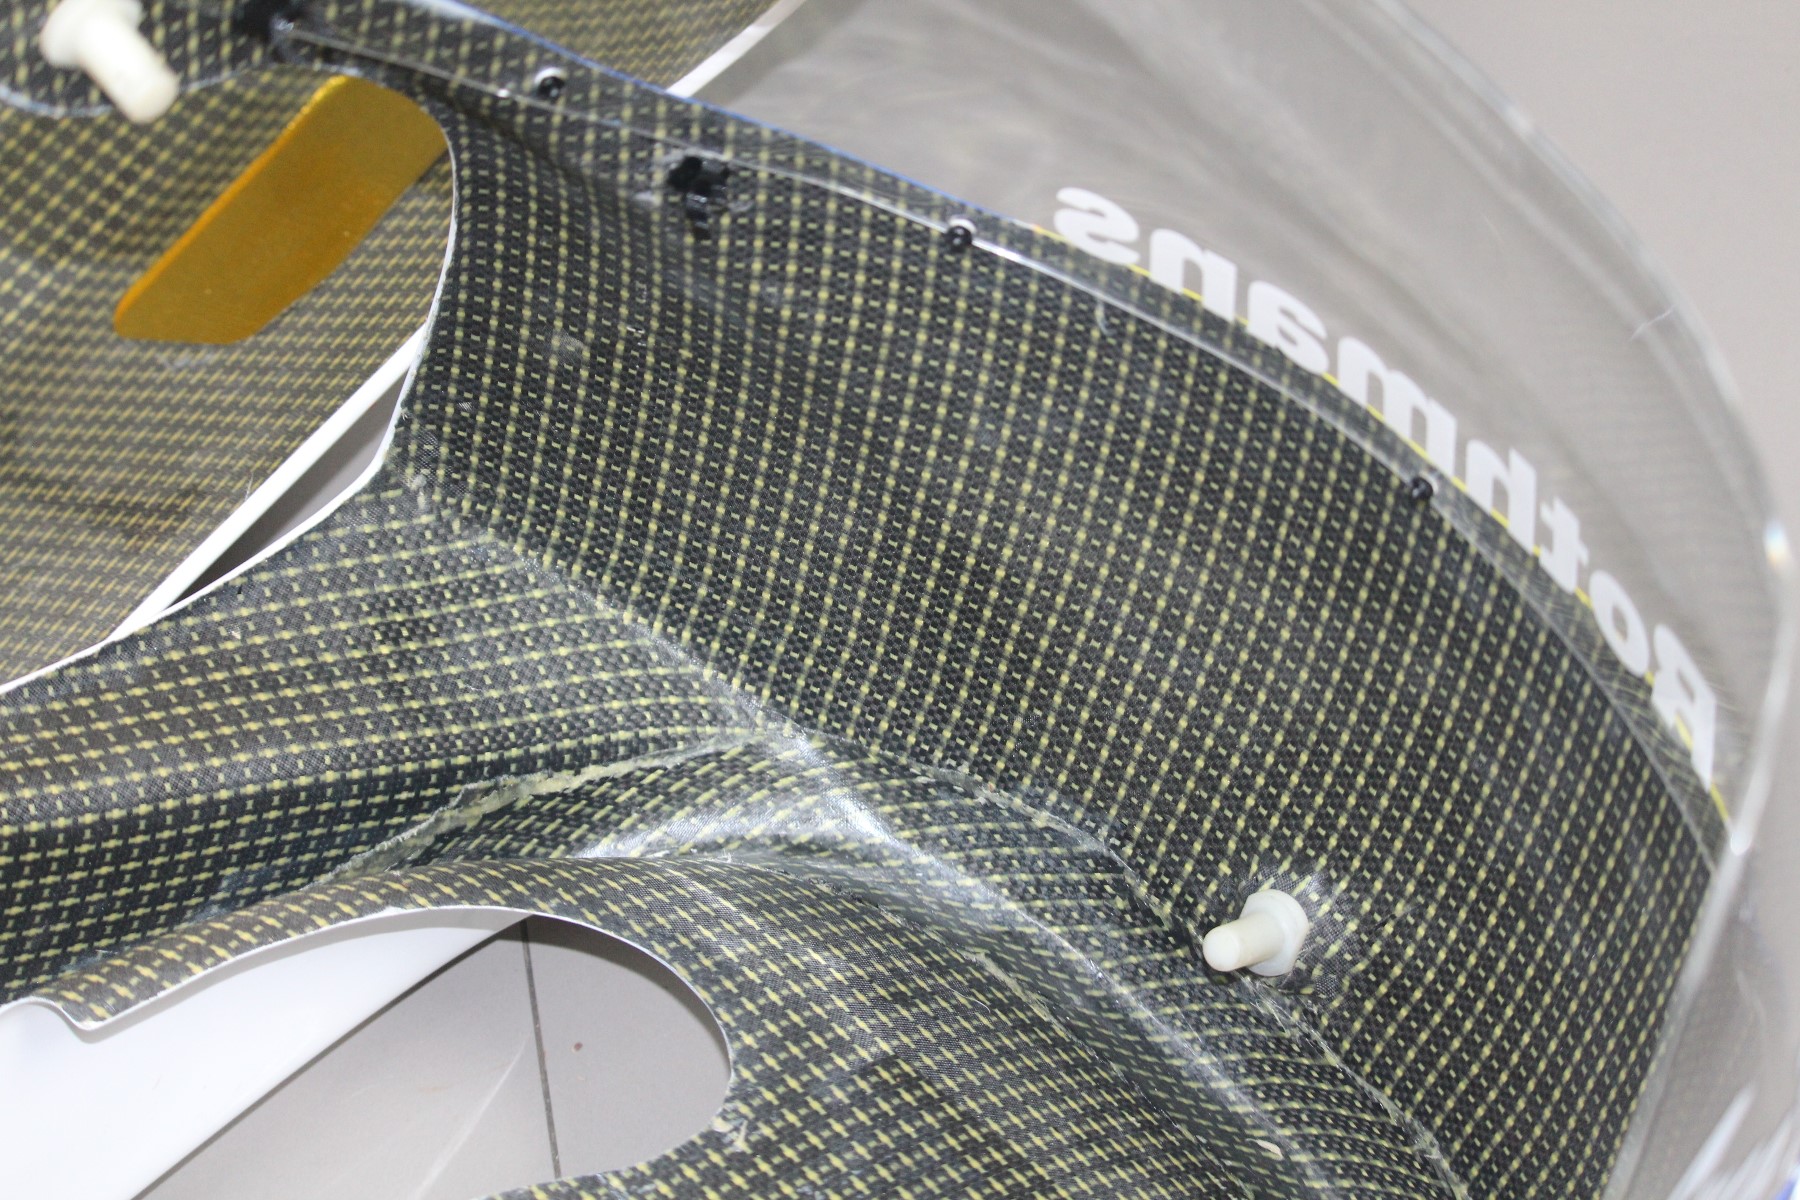
Apart from the fuel tank, and front fender, the rest of the panels are glass fiber on the outside. We decided against having carbon on the outside since these panels were to be painted and they are plenty light and strong enough due to the epoxy resin and well executed layup.
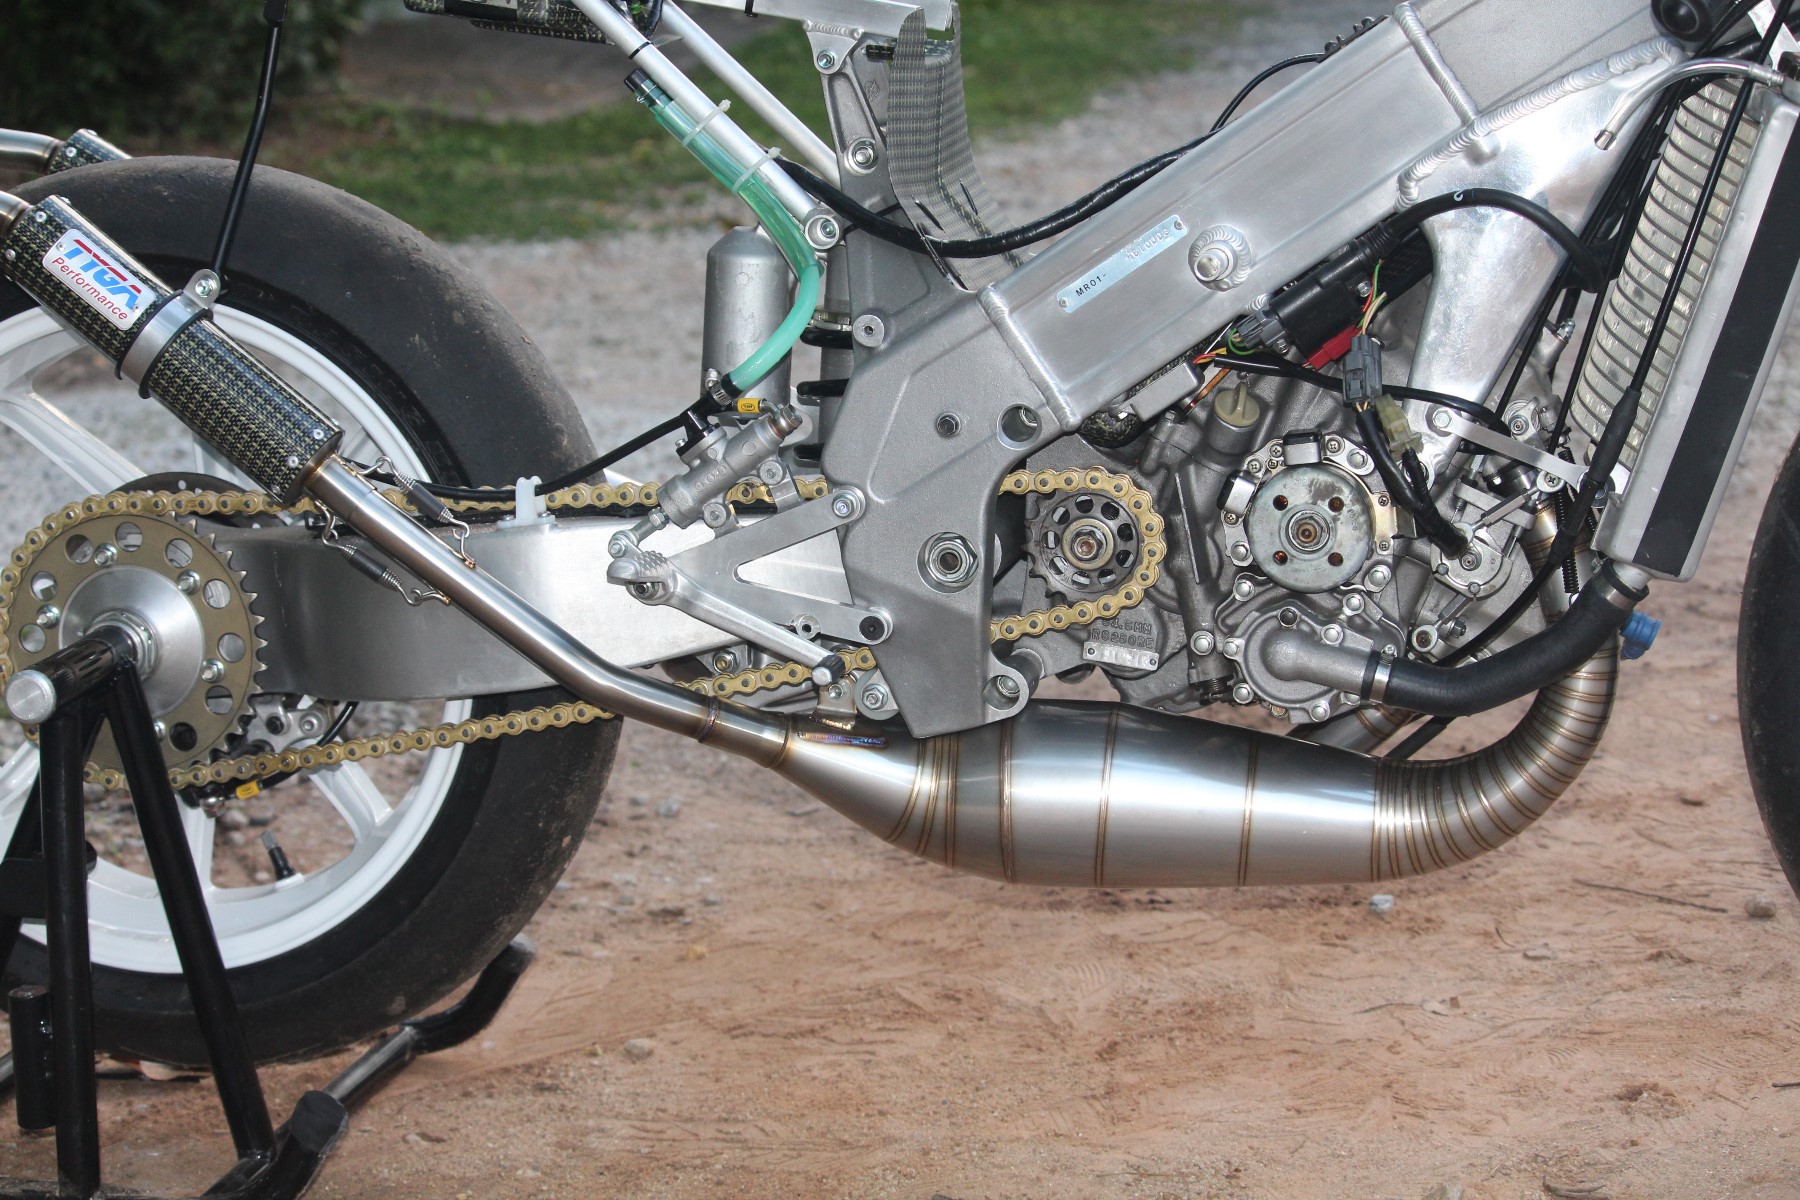
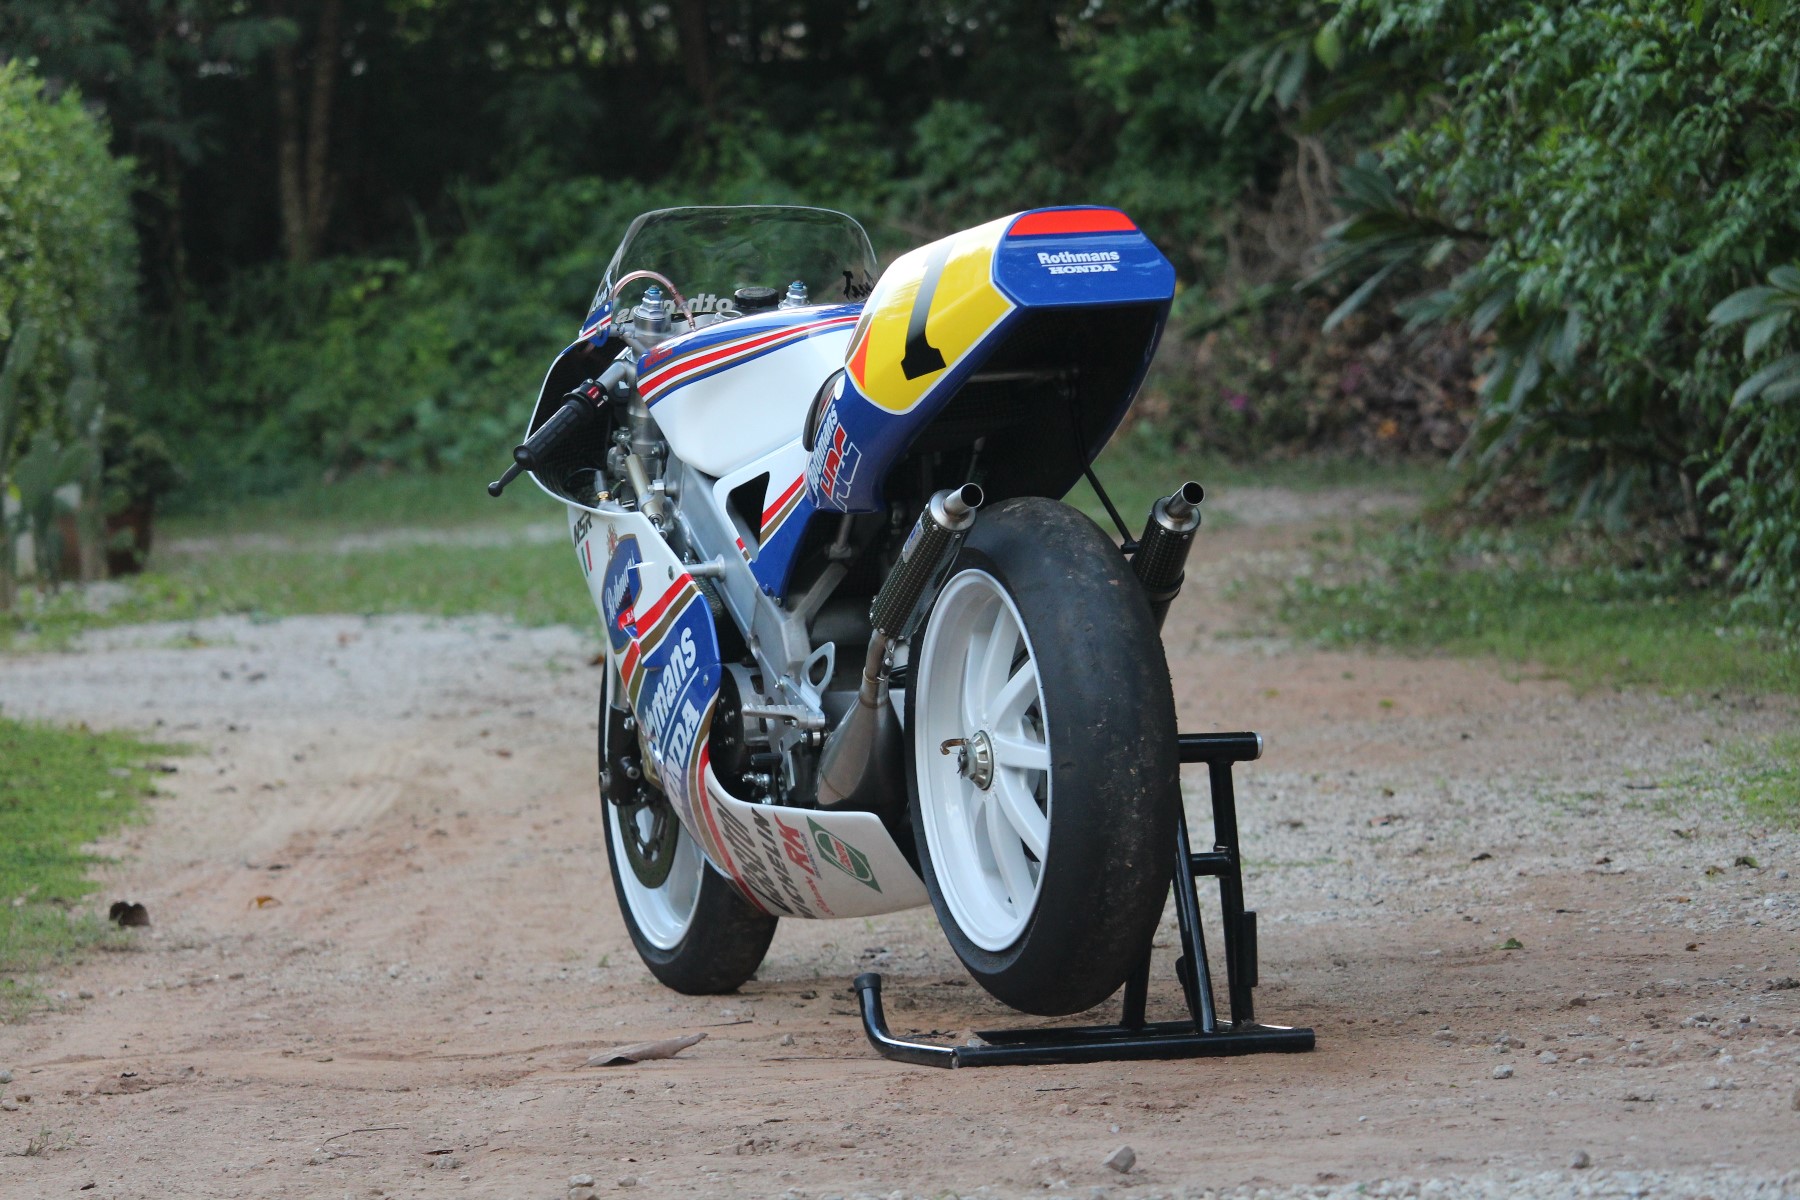
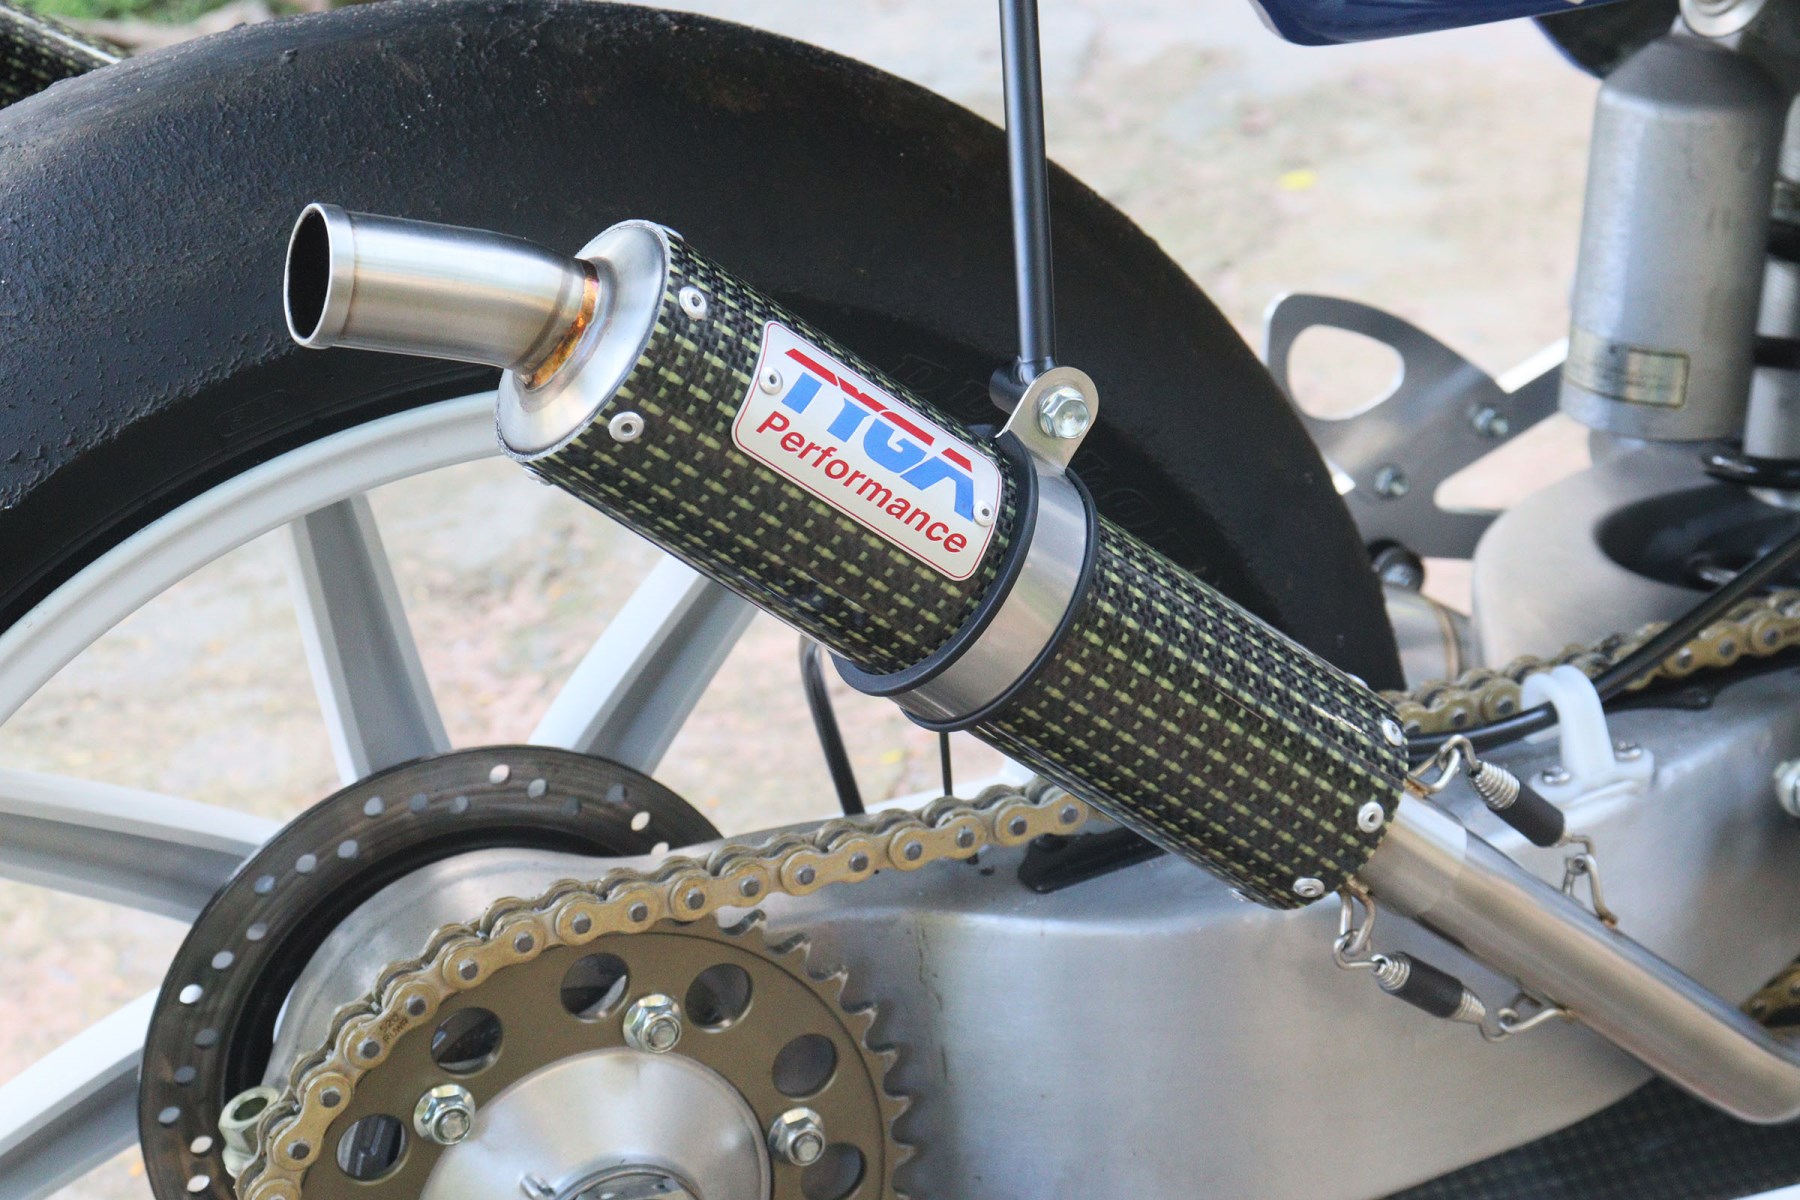
It is not immediately obvious but the right side chamber is a redesign of our usual NX5 type. The critical dimensions remain the same but we moved the final cone inboard and put a longer exit tube so the silencer now sits above the swing arm instead of next to it. This does necessitate a supporting clamp and stay to the subframe, but being a 1993 model it has the lug already welded on ready to install. Matt came up with a suitable design which both matched the TYGA exhaust and the factory NSR concept. We will be offering the exhaust and the stay for anyone interested.
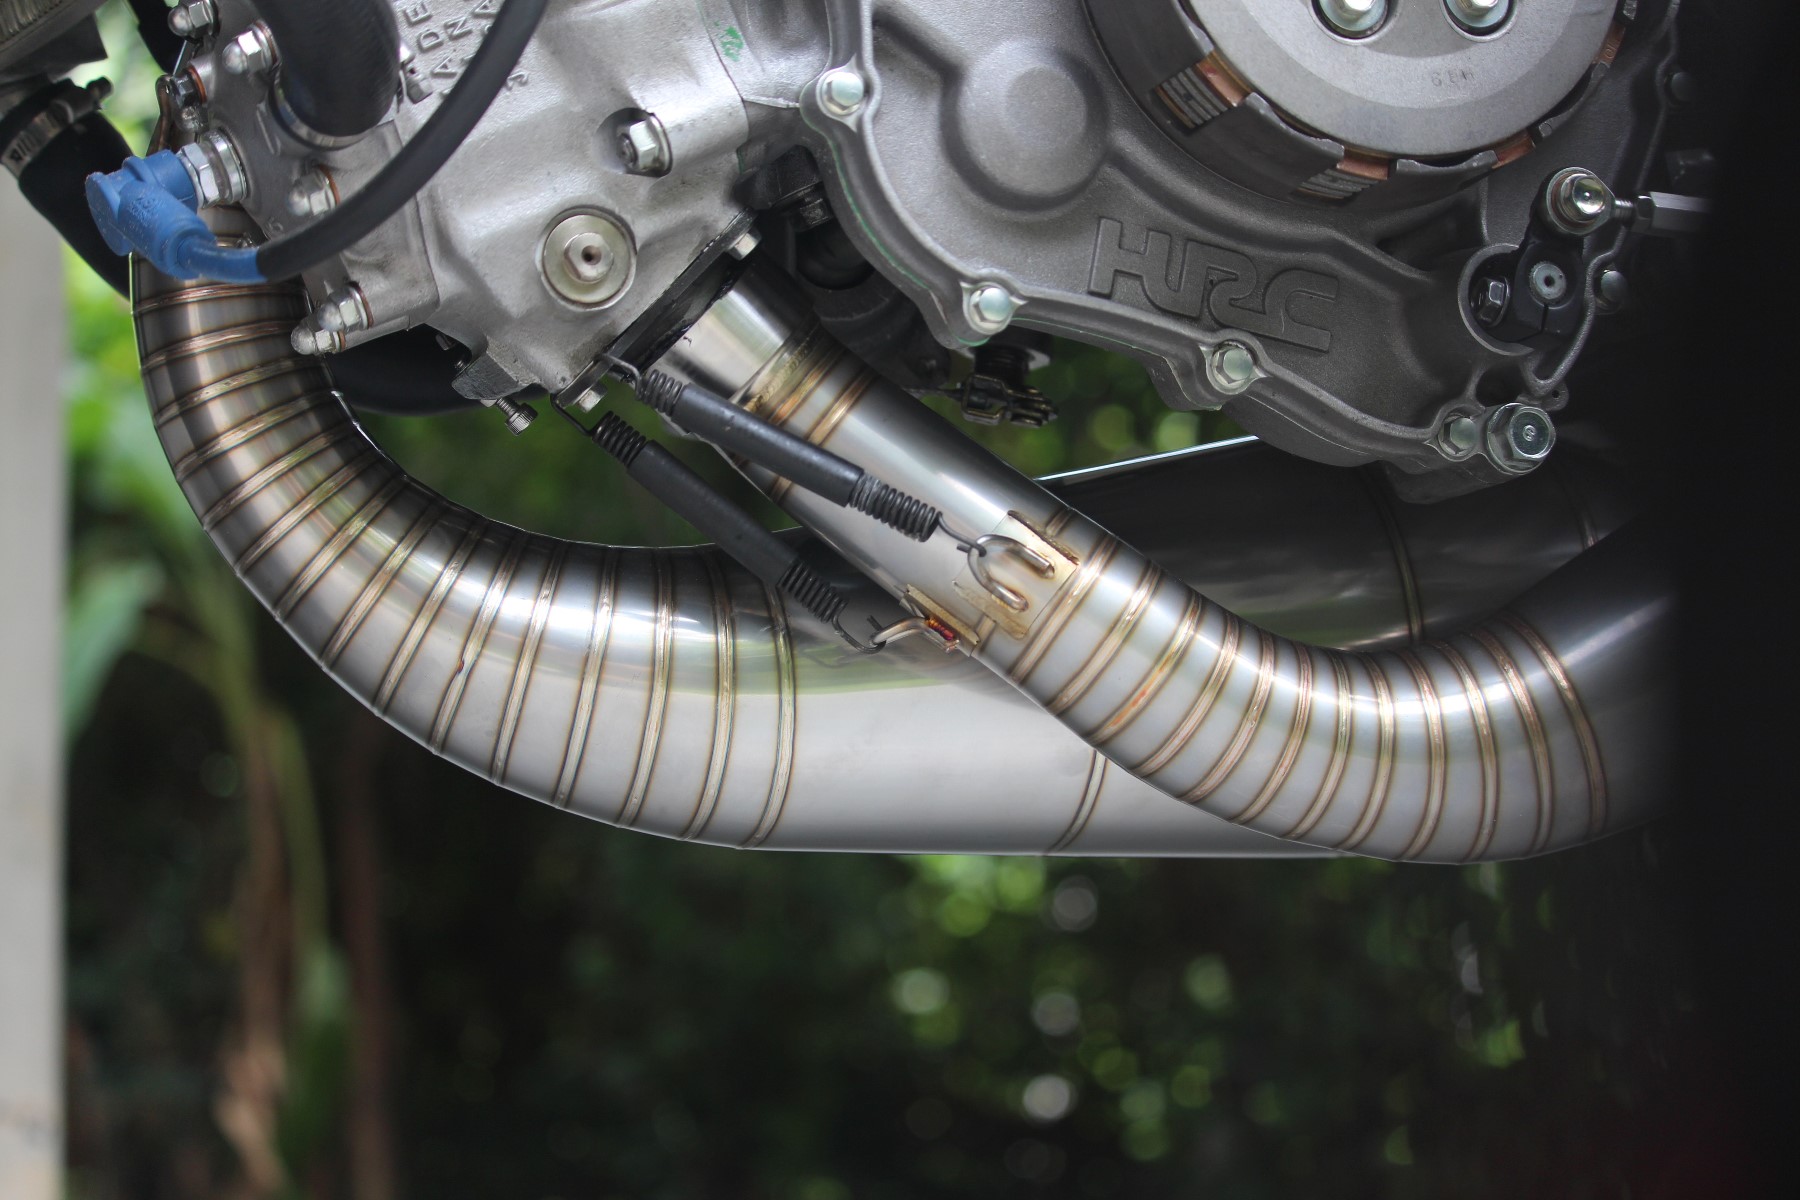

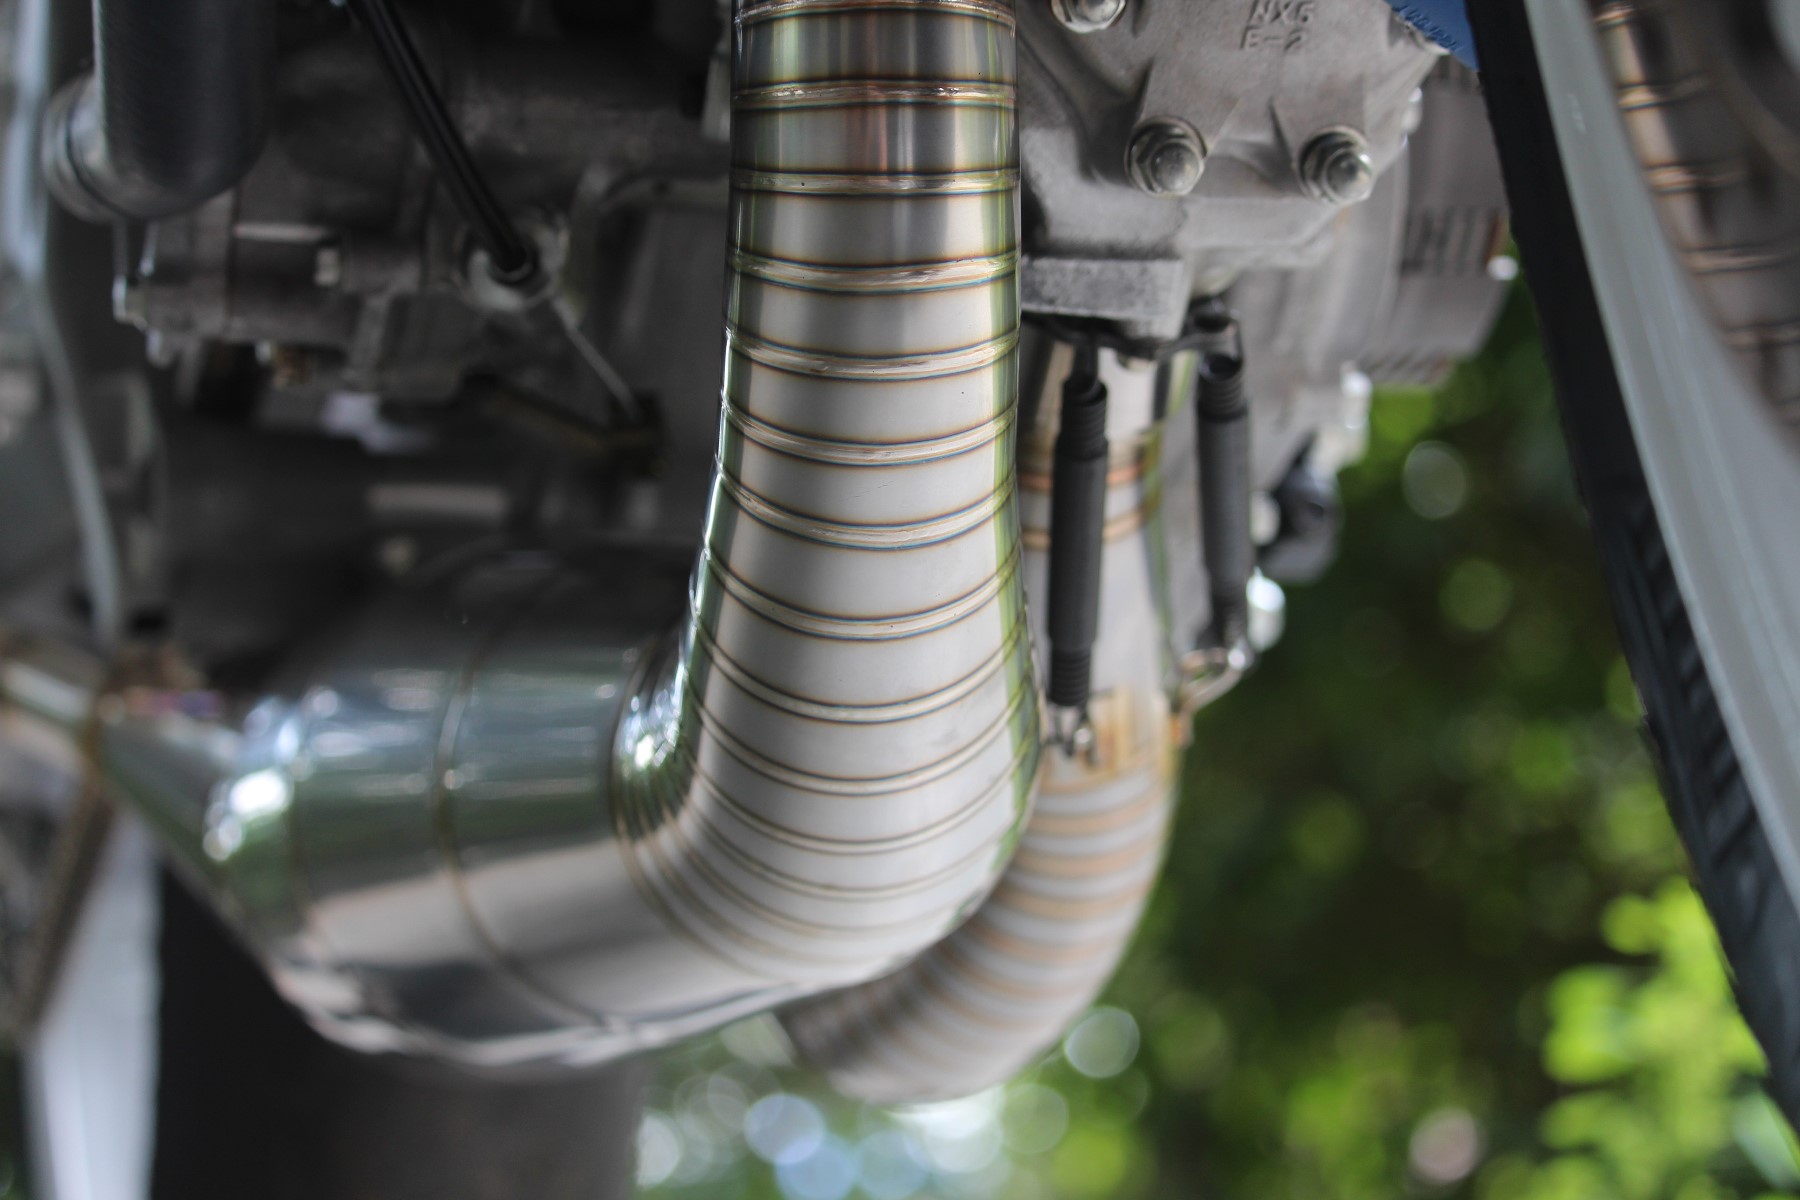
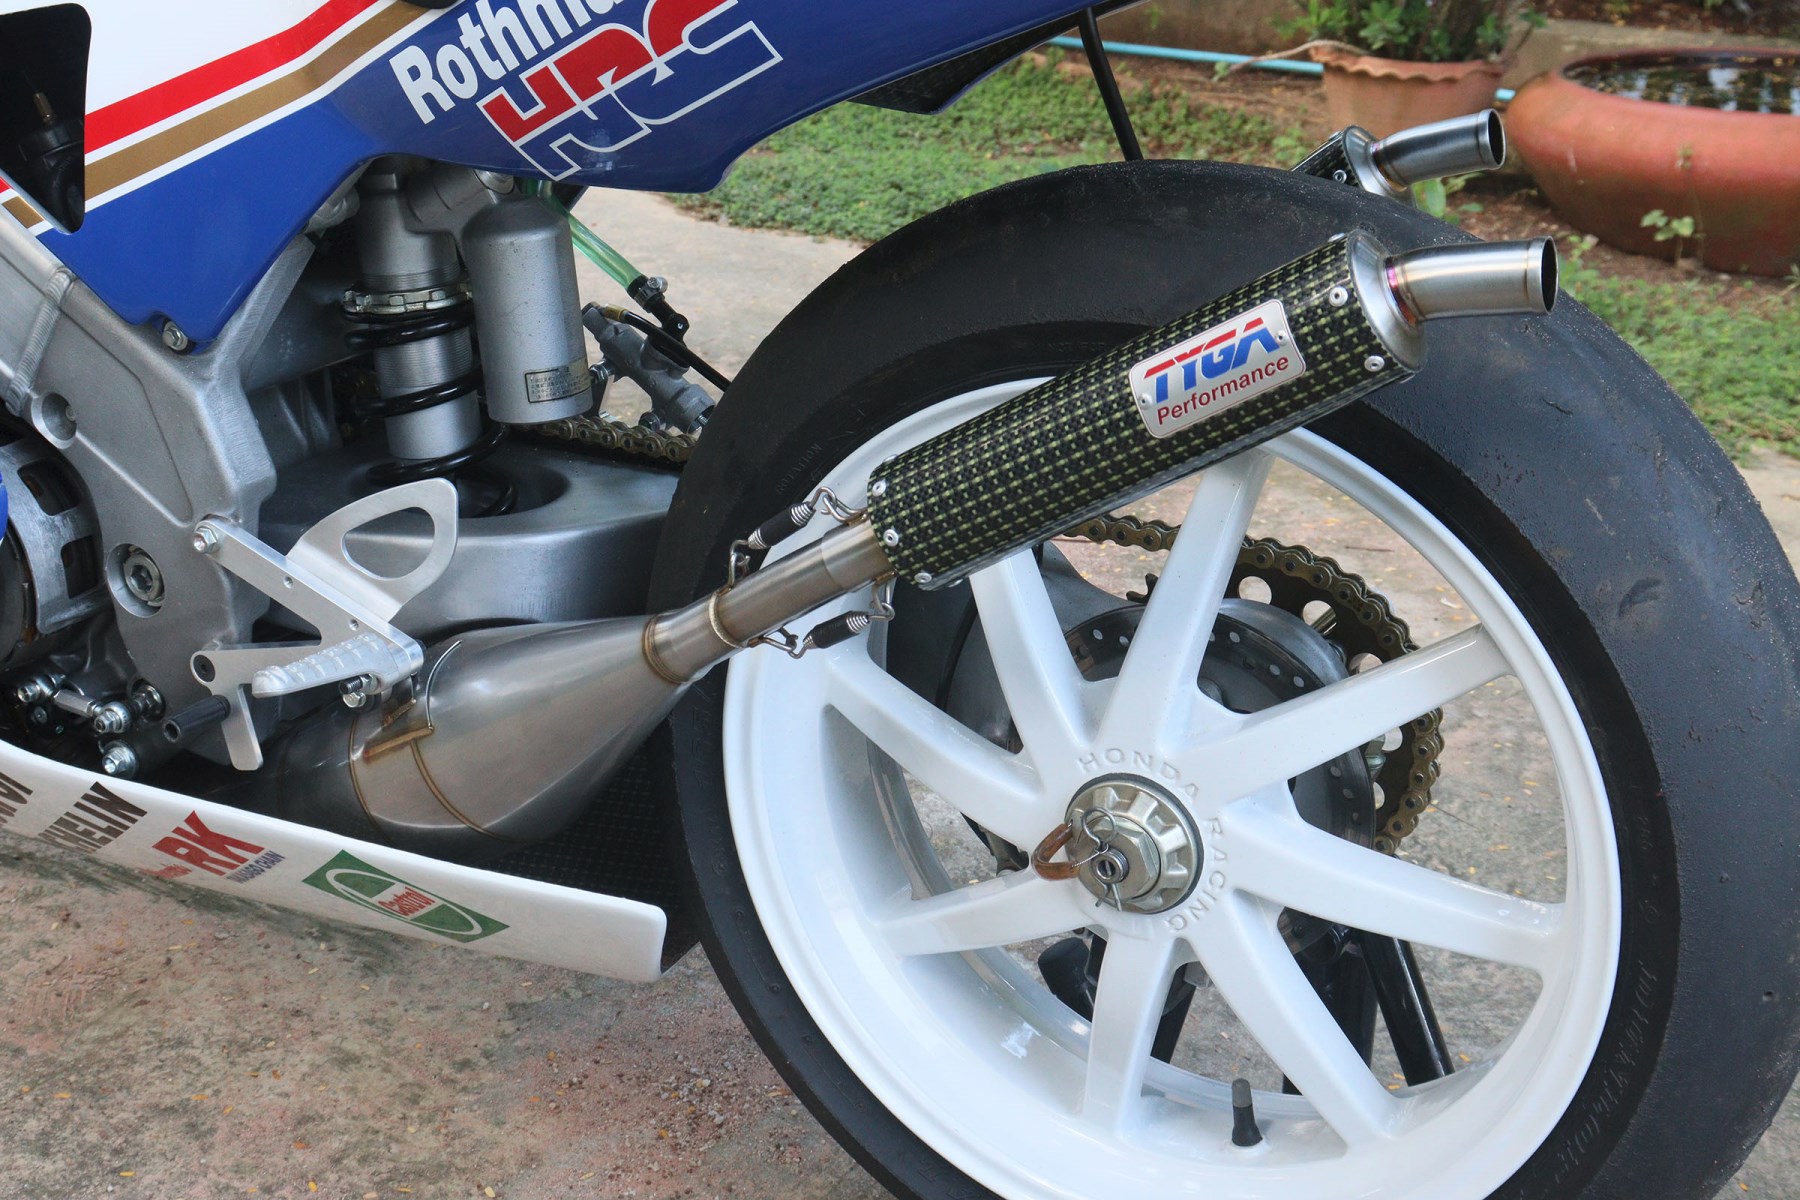
The result of this new set up allows for more clearance with the lower cowling which is still very tight but with the help of reflective tape and some rubber blocks to space the lowers from the chamber, we can avoid damage to the beautiful paint and fairing. (unlike the actual NSR factory bike BTW!)
At the moment, it is riding on ancient rubber from some other RS250 that we took off another project bike. We have some lovely Bridgestone slicks coming all the way from the USA which we ordered through our friends Stewart and Heather at Rising Sun Motorcycles. These should arrive in a month or so and we will do a few laps of the circuit as soon as we can. After that, we can definitely say this bike has once again become alive. I can't wait!


Set, Exhaust Chamber, Stainless Steel, NX5 RS250R
Set, Exhaust Chamber, Stainless Steel, NX5 RS250R It is no secret that we love our two strokes here…
- Model
- EXCS-0039
- Quantity
- 3

Silencer, GP-T, Carbon/Kevlar, Two Stroke, Spring Mounted, Assy.
Silencer, GP-T, Carbon/Kevlar, Two Stroke, Spring Mounted, Assy. To complement our NX5 exhaust chambers, we wanted a silencer design…
- Model
- EXSL-0069
- Quantity
- 100+
")
Fuel Tank, Carbon, RS250R NX5 (Early Type)
Fuel Tank, Carbon, RS250R NX5 (Early Type) Top quality reproduction of the early non ram air version NX5 fuel…
- Model
- BPCG-0003
- Quantity
- 1
")
Kit, Fairing Set, GRP, Honda NX5 1993 RS250R (Early Model Style)
Kit, Fairing Set (GRP), Honda NX5 RS250R (1993 Style) Complete Bodywork kit which consists of the following products: Upper Cowling…
- Model
- BPFS-0180
- Quantity
- 2

Cover, Kevlar, ECU, NX5 RS250R
Cover, Kevlar, ECU, NX5 RS250R Kevlar replacement part for Honda/HRC part number: 20260-NX5-000…
- Model
- BPCC-0129
- Quantity
- 1

Guide, Rear Brake Hose, NX5, Black
Guide, Rear Brake Hose, NX5, Black Reproduction of the no longer available Honda OEM 43150-NX5-000 Rear Brake Hose…
- Model
- BPSY-0387
- Quantity
- 9

Stay, Radiator, RS250 NX5
Stay, Radiator, RS250 NX5 Reproduction of Honda OEM part: 19110-NX5-700…
- Model
- TYLY-0323
- Quantity
- 9

Stone guard, Kevlar, NX5 RS250R
Stone guard, Kevlar, NX5 RS250R Kevlar replacement part for Honda /HRC part number: 50819-NX5-700 used in model years…
- Model
- BPKC-0029
- Quantity
- 2

Seat Pad, NSR500V and NL5 RC45
Seat Pad, NSR500V and NL5 RC45 This seat pad is a reproduction of the long discontinued HRC part …
- Model
- BPSP-0014
- Quantity
- 5

Front Fender, Carbon, Honda RS250, Stock Shape
Front Fender, Carbon, Honda RS250, Stock Shape Same shape as original 1992 NF5/NX5 RS250 Compatible Parts: …
- Model
- BPCF-0006
- Quantity
- 3
")
Seat Bum Stop, HRC RS125/R250 (Reproduction)
Seat Bum Stop, HRC RS125/R250 (Reproduction) Reproduction of HRC partnumber: 77221-NF5-760 Used on RS125 NX4 and RS250 NF5, NX5 …
- Model
- BPSP-0011
- Quantity
- 40

Fork Cap Kit, NX5 RS250R
Fork Cap Kit, NX5 RS250R After 20 years or so of racing and hard use, many NX5 RS250Rs have…
- Model
- TPER-0056
- Quantity
- 71

Handlebar Set, Silver, NX5
Handlebar Set, Silver, NX5 Design based on the genuine HRC bar clamps as used on the NX5. Made…
- Model
- TYLY-0159
- Quantity
- 16

HRC Brake Reservoir Kit
HRC Brake Reservoir Kit Comprising of HRC GP bike parts, hose 43503-NF4-000, bung 17370-419-700, clamp 43541-ND5-750, clip 95002-02120 as…
- Model
- BPAC-0001
- Quantity
- 22

Heat Reflective Sheet, 300mm. x 300mm.
Heat Reflective Sheet, 300mm. x 300mm. This heat reflective sheet is self adhesive and can be used for…
- Model
- STIC-0012
- Quantity
- 25

TYGA Radiator Overflow Bottle Kit, Assy.
TYGA Radiator Overflow Bottle Kit, Assy. Comprising clear pp plastic bottle, overflow tube and cable ties, this useful lightweight…
- Model
- BPAC-1002
- Quantity
- 100+

Filler Cap and Seal Set, Flush Fitting, HRC Type
Filler Cap and Seal Set, Flush Fitting, HRC Type TYGA version (reproduction) of HRC part…
- Model
- TYLY-0180
- Quantity
- 14
 NX5 RS250")
Sprocket, Rear 37T, #520, Stock, Aluminium, (Gold) NX5 RS250
Sprocket, Rear 37T, #520, Stock, Aluminium, (Gold) NX5 RS250 Upgrade your bike with TYGA Sprockets.
Designed and machined in…
- Model
- TYSR-0116-37T
- Quantity
- 100+

Chain Slider, RS250, NX5
Chain Slider, RS250, NX5 Replaces Honda/HRC part number 52170-NX5-000, fits top and bottom, for complete swingarm please order 2…
- Model
- TYLY-0140
- Quantity
- 8
