


Honda RS250R NX5 Ukawa Replica
Honda RS250R NX5 1993 Factory NSR250 Ukawa replica
February 2019
Text and photos by Paul Pearmain and Matt Patterson, © TYGA-Performance

They say to be successful in business that you have to follow your passion. I am not sure how literally you are allowed to take this advice but for us at TYGA, we love HRC two strokes and so we decided to make a range of products for the NX5 RS250. It’s not like there are hundreds of them out there but hopefully, enough owners will be inspired by builds such as this one and order enough parts to recoup the investment costs. Talking of which, we all know there is a financial and time cost to any new product but did you know there is motorcycle deterioration cost too? Let me explain. When it comes to making new products, it helps to have a motorcycle at hand to act as a jig or for static and dynamic testing. If we are making nice clean CNC machined parts or fabricating exhausts, not much to worry about, but when it comes to composites it is a different matter! Knowing this, whenever possible, we will find a wreck of a bike which is of little value, do what we have to do to get the parts made and then when development has been completed, we can either retain it as a jig for future projects, or reward it by either restoration or modification to become one of our project bikes.

Unfortunately, when developing parts for the NX5 , we didn’t have a bitsa bike to sacrifice and we had to lend our fiber guys a complete and running bike to do ‘their thing’. We imagined it would only be needed for a few weeks so what could possibly go wrong? It was our fault, I’ll admit. As time went on, we got more ambitious about the products we wanted to develop and before we knew it we had 4 different bodywork sets in process as well as air boxes and other bits and pieces. This involved clay modelling, cutting, grinding, filling, sanding etc. Parts had to be removed and replaced, Parts got scraped, bolts got misplaced. Everything got covered in dust, rust and splashes of resin. Repeat over and over for a year and you can see in these photos what we ended up with! We’ve been in a similar situation before with the Aprilia 250 so I wasn’t overly worried but it was sad to see the deterioration of one of HRC’s greatest. In the end the brakes were locked on, the tyres flat and the crippled racer wouldn’t even roll across the factory floor. Not to worry, look on the bright side, the worse the condition, the easier it is to show the difference between the before and after photos!
Below is the for sale clip as how it looked when we bought it


Our concept for this bike was straight forward enough, we didn’t want anything too radical or ambitious. We have already done the street NX5, all we intended to do was to restore this racer to more or less stock condition, showcase a few TYGA products and give it a race replica paint job.

Basically do what any owner might want to do if they had just purchased a well-used or badly stored example and hopefully inspire some others to take the plunge and get themselves an NX5 or similar. We wanted to achieve this on an affordable budget and in a time frame in measured in weeks and not months or years as can often be the case. Whether the bike is to your tastes or ‘affordable’ is up to the reader to decide but there is no disputing that the time taken to do the project start to finish was reasonable. Having only starting the disassembly on December 8th and today being February 11th , 2019, by my calculation means it only took two months start to finish and that was without rushing things. That is the beauty of these GP bikes, there is not a lot to them so not that much to restore. The down side is that not everything is available new or even used so the important thing is to re-use as much as you can and only replace if you can source, or are lucky enough to have, parts at hand. To make this downside less of an issue TYGA Performance will be adding more products so having and using an account with us or our distributors will definitely make the restoration easier and more rewarding!

The first job was to strip the bike down. As it is a racer, most of it comes apart very quickly and easily and in a couple of hours, where once there was a bike, now there were various exotic and expensive HRC components spread across the workshop floor.


Only the swing arm assembly, engine and brake components hadn’t been fully stripped which I conveniently left to Matt to do later (as always-Matt). The parts were grouped according to the next step in the restoration; there was a tray for zinc plating, a box of aluminium parts to be cleaned up, another box of parts not to be re-used for this project - to be carefully stored for another project, another one for painting and of course Matt’s ‘to do’ pile! Various notes were taken of any issues or non-stock parts found along the way so we could sort them out well ahead of the reassembly and things wouldn’t get held up. By and large, there were no disasters and having owned the bike for a while previously, we had no great surprises or shocks. Like mentioned above, there were some parts we weren’t going to use. The wheels were not original and did not fit in with our project plans. The pipes we wanted to replace with TYGA ones, the foot controls it came with were period but aftermarket, so hopefully we would find replacements. The Nissin master cylinder was in reasonable condition but this was one area where we diverged from the stock NX5 and we splashed out on a classic Brembo radial which was in keeping with the period and a good brake to boot. (I'm no fan of arm pump, so good to see the standard master cylinder go-Matt). The chain was very rusty so it was best to replace that. Pretty much all the other major parts would be salvaged and recycled to save money and also to show that most things can be brought up to reasonable condition with a bit of effort and imagination. There was a great temptation to go titanium and unobtainium with this project but we resisted.


The next thing after disassembly was to start the cleaning up job. The swing arm was disassembled and the main aluminium components all needed a serious refinishing. This involves various chemicals, abrasives and lots of elbow grease! One of our guys, K Ree, is an expert in such matters but he was too busy making production parts to join in so instead I gave it my best effort. I’ll admit the frame is not perfect and you can see some fingerprints in some of the photos but it is definitely a vast improvement from the furry mess we started with. The swing arm was about average and only took about 3 attempts to get it to where it is now. Not bad for an NX5 which doesn’t have an anodized frame or swing arm so they can get quite pitted and black and I’ve spent literally days cleaning them up on other projects. Luckily, this swing arm had not deteriorated too far. The rear shock was disassembled and cleaned up at the same time. The spring didn’t need repainting and the steel parts were put in the pile for zincing. The front forks needed cleaning and it might have been a good idea to have changed the fork tops but at the time they didn’t look so bad. It is only now that everything else looks so nice and new that you notice the dinged up flats on the fork tops. So word of warning there to any restorers, don’t cut corners and buy our NX5 fork tops!

I did however spray paint the lowers on the forks and that made a huge difference to their appearance. We changed oil and called them done.


Going through the box of aluminium parts, the triples, handle bars, meter stay and subframe, along with the suspension linkages got the scotchbrite treatment. We decided to change the rear sprocket and fit a nice fresh TYGA one.


We had a pair of new genuine HRC upper fairing stays saved for just such a project but we made our new side stays to replace the worn wobbly ones on the bike. The foot controls took some time to sort out and are still not exactly how we want them. We already make an NX5 step kit but it is a bit modern for this project and our plan is to make some basic hangers in the future a bit like we do for the NF5. For now though, we made do with some restored hangers that were supplied with the bike along with some fresh aftermarket pegs and brake lever. I bid on some pegs on Yahoo auctions but was not so lucky and I haven’t seen a brake lever yet so that is something for the future. Anyway, we found a bent and scraped gear shifter and Matt had his boys weld and dress it up so that it looks like new. Apart from the funny looking brake lever, the foot controls are now acceptable and we can tick them off the list.


Knowing the project would not take too long to complete meant I had to get an order in for new parts as soon as possible. I went through the parts book and tried to order pretty much every nut and bolt. My thinking was if the zinc ones come back and they look crap or if some of them go missing (not uncommon) then I’ll have new ones for a backup. Luckily, most of the bolts are still available because many are generic Honda and many are shared with the NX4. Some parts though are discontinued and I knew better than to try to order too many major components. Hoses, clips, clutch lever and surprisingly a rev counter are still available. (more on the latter later…)
Also, with the completion date in mind the bodywork was on my mind. The bike as we got it back from the fibershop had no fairing. That was ok because we intended to install our soon-to-be-launched 1993 style NX5 bodywork, (the development of which had been one of the reasons the bike had got all messed up in the first place!) A word about this choice. Personally, I like this early style bodywork because it is almost the same shape as that used in the 1992 world championship. That said, there are some subtle differences between the NSR250 and the RS250 bodywork. For one, the NSR has inspection covers in the sides of the fairings and the NX5 has a cut out for the steering damper. For our version of the fairing, we filled in the cut out to make it smooth and like the factory racer but we didn’t bother with the inspection covers. The front fenders are quite different but apart from these differences, the bikes’ silhouettes look remarkably similar. For those anorak types out there, other visual differences to look out for are the rear wheel hub, the rear and front suspension units and a bigger indent on the top of the fuel tank on the NSR compared to the NX5. So although not identical, considering you can’t own a factory NSR250, this is the next best thing! Anyway, for now, we gathered up the fuel tank and the various panels. Before sending them off to paint, we assembled the upper and lower, making sure the HRC quarter turn fasteners fitted and the panel alignment was good. We obviously couldn’t check for all important pipe clearance at this stage because that would have to wait for reassembly with our TYGA exhausts etc so no drilling of the side fairing stays for now until we had everything else perfectly mounted. We had some genuine NX5 wheels in storage so we removed the tyres on them and sent them off to paint at the same time as the bodywork and tank.


Time was marching on and before we knew it was Christmas. So off I went to Laos to see waterfalls and temples and ride a bike along the Ho Chi Minh trail. Good old Matt is not like me (or most people for that matter) and he prefers to spend Christmas pulling the NX5 engine apart and rebuilding it. My friends and family were sending me messages about travels or gifts received or given, not Matt! His messages mainly consisted of ring gaps and piston clearances. Sooner him than me. Anyway, to cut a long story short, the engine was in desperate need of a service but nothing untoward was found. Matt had the pleasurable job of cleaning all the pox off the cases and cylinders (always good fun-Matt) before rebuilding. It turned out that only the top end and clutch needed replacing, with everything else within spec. Luckily he has squirrelled away enough spares to keep an NX5 going for quite a few more seasons so it was no problem him finding the required parts to bring the motor back up to spec. By the time I was back in the Land of the Smiles, the motor was all fresh with its shiny bolts sitting on the bench covered in a rag and ready to be installed. He also did a few other technical jobs during the break. He took the carbs apart and changed the needles (someone had seen fit to fit some ancient MX needles for some reason-Matt). He rebuilt the calipers, the rear master cylinder and strung HEL brake lines on the front. Brake pads were good so he kept the old ones. We had bought a new rear brake piston but the original was within spec and Matt didn’t see any need to change it. So that means Matt’s pile of ‘to do’ has now been done. I’d better crack on then!

Matt- The problem with the brakes, both front and rear, was that the seals were pretty jammed up with crud after years of sitting around. Popping out the pistons on the front Brembo calipers wasn't a big job, but the rear caliper piston was locked solid and wouldn't move. As I'm one not to be defeated, I knocked up a fitting to connect my hydro-pressure pump up to the caliper, and with a few pumps it finally gave in and I could remove the piston. Once the seal grooves had been relieved of the nastiness things were looking a little better. The front calipers were good to go, but the rear needed a bit of honing to get it usable again, and once the seals and pistons were cleaned up, they all went back together nicely and work like they should. Rear master cylinder obviously needed cleaning and honing, but that seems to be "de rigueur" with the Nissin rear master.

This is the rewarding part. Having spent a few Saturdays scrubbing away and cleaning components now was time for the assembly. Forget your 1/12 scale model race bikes, this is 1/1! The real thing. Enthusiasm soon came crashing down when it was discovered that the freshly greased up suspension bushes gave the rear wheel about another 10 mm up and down movement, so it was out with the spherical bearings (good old Mr HRC had a laugh when he fitted them and there is no easy way to get them out). In with the new and hey presto that problem was solved. The rest went mostly smoothly. One hiccup was the rear wheel which, for some unfathomable reason, sits slightly wider off the mounting face than do all other HRC wheels. Interestingly, during our research we found 3 different types of NX5 HRC rear wheels. Some have ‘Honda Racing’ on them but even between two of these they had different mounting face when measured to the rim. Strange. It is just a couple of mm but had us worried. At the time, the hub was not properly installed as we were waiting on some parts to come back from the zinc shop. The wheel sat a lot further off the swing arm than it should. Anyway, with the swing arm hub properly installed once the parts had been installed the difference was reduced to just 2mm which I suppose is acceptable. One thing that was annoying was the handlebar tube clamps cracked when the pinch bolts were tightened up. I’d normally blame myself but this is the fourth set that have done this on our NX5s. One set cracked while Shane was riding at the circuit a few years ago, both bars in the same session. Shane is a big lad so we thought it was an isolated case of using a lot of force but now it is has become a pattern. At least in this case the cracks were spotted in time and have been replaced . Our plan is to urgently get TYGA handle bar clamps made to the original design but just slightly stronger (I'm working on it....-Matt). Anyone still riding using original NX5 handlebar clamps beware. Check for cracks before riding next time!


We now had a load of niggly jobs to work through. The wiring harness was a little unravelled from age so I took an hour or so to take off the old insulation tape and replace. It makes a big difference to the final bike to have tidy wiring. We installed a carbon/Kevlar TYGA CDI holder and we had a prototype set of air tray and ducting to match the CDI holder. The HRC steering damper was leaking like a sieve. These are not supposed to be serviceable but you know Matt and he had it apart and the seal replaced in no time. It is now as good as new!

On the brake front, we had some other changes from stock apart from the previously mentioned front master cylinder. We have been playing around with 3D printed parts and have printed out a front brake fluid reservoir holder. The idea came from while at the Honda Collection Hall in Motegi and the factory bikes there. The RS foam holder never looks tidy and nearly always ends up going baggy or the reservoir sits at an angle. With the 3D printed one, it hold it like a cup holder and is neat and tidy. We also made a rear brake reservoir holder too. This goes on the rear brake reservoir tube and clips it to lower swing arm strut. It looks better than cable ties HRC recommends and is reusable.

The rev counter as I mentioned earlier, we splashed out and ordered a new one (NX4 part number) because the one on the bike was horribly dented. In the meantime, we were able to knock out the worst of the dent in the front near the glass and fill and paint this area to a reasonable standard. There was still a huge dent in the back which I cunningly disguised with a foam strip wrapped round the body behind the usual rubber ring it has on it to locate the gauge to the instrument panel. You don’t really notice the foam unless you are very conversant in things HRC. Of course you can still see the dent but it is not glaringly obvious as it was before. So anyway, this was supposed to be plan B but when Plan A showed up in the form of new gauge, I was surprised and disappointed to see it has a new much higher rev ceiling and nothing like the original in appearance. I’m sure it will work fine but not what I envisioned or wanted. I assumed I had made a mistake when ordering it but on inspection I saw it even has ‘NX4’ printed on the back. Hmm no RS125 I know revved to 14,000. Oh well, one for another project and thank goodness for plan B. The dented one looks lovely now that we have no choice.


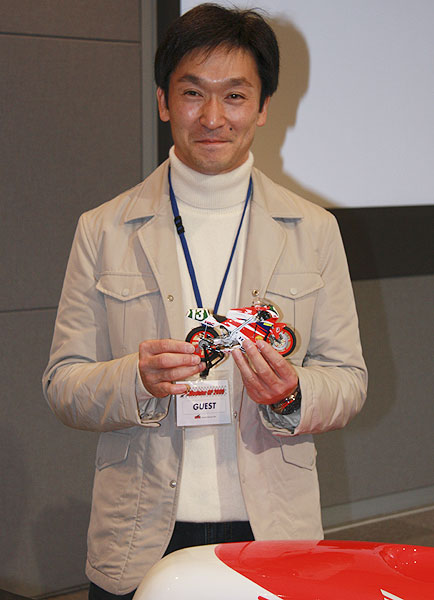
Once we had the chassis together and the engine installed we fitted the exhaust system and invited K Pong to come over for the first fitting of the bodywork. Before I continue, now would be a good time to say something about the paintwork. The obvious choice was a Cadalora replica. Some people such as Andy Grant (NSR World) say this is the ultimate NSR250 and he may well be right. In 1992, Cadalora was World champion and the Rothmans is undoubtedly a classic but it has been done before on the NX5 by Ritchie Grantham and others, not to mention we have done a few Rothmans projects ourselves already and have another earmarked for the future so we decided on something else. It wasn’t easy to choose, and in the end, after much browsing, the Internet came to our help. In 1993 Tohru Ukawa was riding a factory NSR250 in the All Japan Championship and it looks like he got one of Cadalora’s 1992 ‘hand me downs’. If anyone knows what the story is there, I’d be interested to know, but anyway, it must have been a good bike because he went on to win the championship in 1993 and again in 1994. There’s not a lot on the Internet about Ukawa’s 1993 bike and only a few photos of it. I could have taken some photos myself when I was at Motegi but missed the opportunity because I was too busy taking pictures of Cadalora’s bike instead as it turned out! Anyway, it seems to be the case that there are a lot more photos on google and Pinterest of the 1/12 scale model than the real thing which is somewhat ironic but luckily these photos are very clear and enough for what we needed.


As mentioned above, paint was done by our faithful K Pong who does all the paintwork for our project bikes as well as the various panels we offer for sale. He came over with said RS panels and tank all prepped in white and ready to do the line work. By the time he was done with his masking tape I was confused by all the zig zag lines but fingers crossed I thought I understood when he explained which part was red and which was blue etc. It really is a crazy scheme and makes no sense at all when you look at each line individually. A few days later the panels and tank came back again but this time all painted and clearcoated. It nearly makes sense now and the lines on the different panels matched really well.


Next were the graphics which hadn’t been applied yet. Decals were mostly supplied by K Pong but some Pieter made for us too to help spread the workload. It took a couple of attempts to get all the sizes, colours and designs how we wanted them and being perfectionists there a couple of tweaks we’d give them next time around but that said, these were race fairings back in the day and not works of art. Looking at photos, there is some variation between different panels form one race to another so it is just an interpretation of what Ukawa might have used. Not exactly the same as for one particular race. A few other things to mention about the decals. On the rear part of the seat cowling is a Flamingo and this is in remembrance of the 250cc racer Nobuyuki Wakai who was tragically killed in a pit lane collision with a spectator on May 1st 1993. The Flamingo was Wakai san’s emblem and some riders for the rest of that season applied this decal as a tribute to him


The other decal of note is the extra one on the belly pan. When applying the belly pan stickers, I accidentally on purpose didn’t quite reach the rear part of the fairing and there was a big gap so the only thing to do was to apply a TYGA logo! Also in case you are wondering, we did not clearcoat over the lettering, it makes for a more raw race bike finish and it is a lot easier to replace the stickers if you feel the urge to improve them and try again! Anyway, I think it is fair to say that the livery is one of the best we have seen and very faithfully reproduces the original. The only regret is that I can’t seem to get the colour correctly show in the photos. The red/orange is fluorescent and as such it means that it changes shade with the light. In bright sun (not good idea if you don’t want it to fade) it tends to look a bit paler and orange, but in the twilight it positively glows red. One thing is for sure, it definitely stands out!


Ukawa Replica - Riding Impression
Pretty much as soon as the final bodywork bolt had been tightened up a few days ago, Paul had thrown on his helmet and taken the rather lovely Ukawa Replica NX5 around the block and declared it "ready to rock". So with Tuesday being an all motorcycle day at Bira International Circuit, and a national holiday to boot, it seemed fitting that we should throw caution to the wind, load the van up with bikes and get ourselves to the track.
I won't bore you with the details of the first half of the day, such as a full wrench check and rebuilding RSW forks, so let's get to the action.

The Ukawa replica fired into life without any trouble at all, and as always, TYGA announced their arrival at the circuit by filling the pit lane with stinky blue smoke. Everyone loves the smell of a two stroke on the choke don't they? Of course they do :-)


Now, I haven't ridden a 'stock bodywork' NX5 for a long time. And while they don't exactly give you oodles of room to move around, they just feel right.
Anyway, 55 degrees on the temp gauge, so let's get this underway shall we?
First lap was rather steady. Check brakes and general feeling of the bike. Yep, all feels good so time to get on with it.
I have to say here that the suspension has not really been setup properly. Just sort of thrown together following the HRC setup manual spec, and to be perfectly honest it's totally different to my usual track NX5 which wears NXA forks at the sharp end, and an Ohlins at the rear. Not to say it's bad, but if we had more time and the necessity I would have certainly fiddled enthusiastically with the rear ride height and preload. It was very good, but definitely room for improvement.

Having said that, we're not here to break lap records, we're supposed to be having fun. And fun we were having.
It's shocking how quickly a 250cc GP bike accelerates. And the sound when it's doing so just fuels one's adrenaline. I just love the sound and feel of a highly tuned stroker clicking through the gears.
I'm a little track rusty, so it took a couple of laps to get into the groove, but once there the bike did everything that was asked of it. Stroking the front Brembo lever has it standing on its nose in a very disciplined manner, ease off the anchors and drop it into the turn.......too easy......crack open the throttle a tad, feel for grip and then wind up to full volume and tap dance your way to the next braking zone.
Young Sam (Paul's Nephew) was having fun running from corner to corner with the camera, and with such an accurate weapon between my legs, I couldn't help but aim it at him a couple of times just to see the fear on his face. Probably not the safest thing to do but quite amusing.
So as mentioned, the chassis needs some attention for a serious track attack, and the tyres fitted were basically some well worn oldies off of my track NX5, but the engine (albeit totally stock) is a gem.
Could've dropped the mains a size or two for maximum mojo, but in the interests of reliability and longevity we left it as it was. Hooking gears at 12,500rpm, with the pipes wailing in your ears is just bliss. If all you've ever ridden are modern day boilers (which are of course incredibly good), well, you're just letting the best things in life pass you by.
Oh, so mustn't forget that we had one small issue. The right hand foot peg came a tad loose. My foot slipped off the peg and I was a touch worried it had blown some oil or something, but not a major problem. Into the pits and two minutes later we were back out at full noise.
I'd put in enough fuel for a dozen laps and was getting close to that number, and seeing as I'd managed to keep it shiny side up (and had other bikes to ride) it seemed fitting to call it a day.

One of the biggest things when riding this Ukawa Replica is that you're fully aware that it looks fantastic. You just wish that there were shop windows along the side of the track so that you could look at yourself in them.
So was it a successful project? The answer? A big fat YES! In my opinion it's by far the best replica that we've done, and the bonus is that the HRC heart of this beast is still well and truly alive and kicking.
Next?.........


Set, Exhaust Chamber, Stainless Steel, NX5 RS250R
Set, Exhaust Chamber, Stainless Steel, NX5 RS250RIt is no secret that we love our two strokes here at…
- Model
- EXCS-0039
- Quantity
- 3

Silencer, GP-T, Carbon/Kevlar, Two Stroke, Spring Mounted, Assy.
Silencer, GP-T, Carbon/Kevlar, Two Stroke, Spring Mounted, Assy. To complement our NX5 exhaust chambers, we wanted a silencer design…
- Model
- EXSL-0069
- Quantity
- 100+
")
Kit, Fairing Set, GRP, Honda NX5 1993 RS250R (Early Model Style)
Kit, Fairing Set (GRP), Honda NX5 RS250R (1993 Style) Complete Bodywork kit which consists of the following products: Upper Cowling…
- Model
- BPFS-0180
- Quantity
- 1

Cover, Kevlar, ECU, NX5 RS250R
Cover, Kevlar, ECU, NX5 RS250R Kevlar replacement part for Honda/HRC part number: 20260-NX5-000…
- Model
- BPCC-0129
- Quantity
- 2

HRC Brake Reservoir Kit
HRC Brake Reservoir Kit Comprising of HRC GP bike parts, hose 43503-NF4-000, bung 17370-419-700, clamp 43541-ND5-750, clip 95002-02120 as…
- Model
- BPAC-0001
- Quantity
- 18

TYGA Radiator Overflow Bottle Kit, Assy.
TYGA Radiator Overflow Bottle Kit, Assy.Comprising clear pp plastic bottle, overflow tube and cable ties, this useful lightweight product…
- Model
- BPAC-1002
- Quantity
- 100+
 NX5 RS250")
Sprocket, Rear 37T, #520, Stock, Aluminium, (Gold) NX5 RS250
Sprocket, Rear 37T, #520, Stock, Aluminium, (Gold) NX5 RS250Upgrade your bike with TYGA Sprockets.
Designed and machined in house…
- Model
- TYSR-0116-37T
- Quantity
- 100+

Paintwork, Ukawa
Paintwork, Ukawa Painted to order, allow 2-3 months for paintwork to be completed.…
- Model
- TYPA-0023
- Quantity
- 2
- 1 x SCRE-0097 - Screen Tint, CBR929, Kit.
- 3 x TMER-0170 - TYGA Bike Dust Cover, Black/Red, Force V4 VFR400R
- 1 x 96001-06028-07 - Bolt, Flange SH 6x28
- 1 x EXOR-0039 - O-Ring Viton, ID 45mm, THK 2mm
- 1 x TMER-0082 - TYGA Bike Dust Cover, Blue/Black, Suzuki RGV (street)
- 1 x 17950-KW6-840 - Cable, Choke, NSR150SP
- 1 x BPFF-0006 - Front Fender, GRP, Honda RS250, Stock Shape
- 1 x 90102-GT4-000 - Bodywork mounting bolt, NSR150SP
- 1 x 98049-59716 - Spark Plug ER9EH, NC30/35
- 1 x STAA-0037 - Step Kit (Street), (Adjustable), KTM RC390 (2022-2024)
- 1 x BPCG-0001 - Fuel Tank, Carbon, NSR250, MC28
- 2 x BPCC-7407 - Heel Guard, Pair, Carbon, Aprilia RS-125 (2007-2012)
- 2 x EXCS-0035 - Set, Exhaust Chamber, Stainless Steel, KRR150ZX
- 2 x TYLY-0098 - Bracket, Front Brake, 84 mm Brembo Conversion, Silver, MSX125 Grom
- 1 x KOYO-6302-2RS - Bearing, Koyo 6302-2RS
- 2 x BPFS-0014 - Kit, Fairing set, Race, NC35 RC211V
- 2 x TMER-0097 - TYGA Bike Dust Cover, Red/Black, Cagiva
- 2 x TYLY-1114 - Tank Filler Cap, Keyless, Racing Type, Kawasaki, Type 5
- 2 x BPCC-9002 - Heel/Brake Guard, Tyga, Right, Carbon
- 1 x TYTO-0004A - Carbon/Carbon Workshop Tray, Small (300x200x1.2mm)
- 2 x BPCC-9010R - Heel Guard, Right Only, Carbon
- 2 x TPER-0024 - Wheel, Front. Aluminium Spacer kit NSR250 MC21/28 & VFR400R NC30
- 3 x BPFS-0076 - Kit, Complete Body Set, Street, NC23 T9
- 1 x SCRE-0148 - Screen Light Tint, Double Bubble, NSR150SP, Kit.
- 2 x TPER-0001 - Hi Flo reeds, MC21/MC28, Assy.
- 1 x 59740-07D00 - Reservoir, Brake, Front
- 1 x BPAC-1001 - TYGA Brake Reservoir Kit
- 4 x 70-525-61040 - Brake Lever, CNC, NSR250/NC29/NC30/NC35
- 2 x TYTO-0011BSET - Kevlar/Kevlar Workshop Tray, Large (360x240x1.2mm) Set of 10 pcs
- 2 x 08F81-KYJ-720B - Engine Oil Filler Cap, Red, CBR250
- 1 x TYLY-0248 - Subframe, Aluminium, RGV250 VJ21, Assy
- 2 x SCRE-0108 - Screen Tint, Kawasaki ZXR750/92, Kit.
- 1 x 91102-KV3-771 - Bearing, Piston, MC28
- 1 x EXMN-0300 - Collar, Manifold, Stainless, NSR250
- 2 x TYTS-0001 - Tool Set, Shaft Holder, 5~22mm
- 1 x BPFT-9046 - Seat Cowling ,GRP, Stock Shape, Street, Set, RGV250 VJ23
- 1 x BPSY-0326 - Stay, Tail Light, NC30
- 1 x SCRE-0098 - Screen Tint, CBR954, Kit.
- 1 x KSWB-0801 - Spiral Wrapping Band, Pink *
- 2 x BPFS-0195 - Kit, Fairing Set, GRP, (Street) MC21, MC28, NSR250V
- 2 x BPCC-7242 - Airbox Cover, Carbon, Pair, Monkey 125
- 2 x EXCS-0005A - Set, Exhaust Chamber, Side By Side Type, Stainless Steel, NSR250 MC21
- 2 x TYSR-0114-45T - Sprocket, Rear 45T, #520, Stock, Aluminium, (Gold), KTM Duke/RC 125/200/250/390
- 2 x BPCC-7052 - Inner Cowling, Carbon, Stock Shape, TZR250 3MA
- 1 x TYLY-0234 - Stay, Carbon, (Pair) Exhaust, NSR500V Style
- 1 x KOYO-6205-2RS - Bearing, Koyo 6205-2RS
- 1 x BPFS-0034 - Kit, Seat Set, Street, GRP, NC30, RC211V
- 2 x TYLY-0022 - Upper stay, RGV250 VJ22, Stock Type
- 2 x TYLY-1043 - Sprocket Holder, CNC, Silver, MC21
- 1 x TYLY-0027 - Top Triple Clamp Nut (M24x1)
- 2 x BPCF-0006 - Front Fender, Carbon, Honda RS250, Stock Shape
- 2 x BPFS-0131 - Kit, Seat Set, Carbon, Street, MC21 GP-T
- 2 x BPCC-0027 - Carbon Covers, Set, Instrument Surrounds
- 5 x STAA-0003 - Racing Step Kit, NC30/35
- 2 x AS-001 - Air Box Seal Kit, 4 pcs, Honda CBR250RR MC22 / VFR400 NC35
- 2 x TYTO-0023 - Clutch Holding Tool
- 1 x TYLY-0095 - Handlebar Clamp, Monkey 125, MSX125 Grom, Silver
- 1 x BPCX-0031 - Air Ducts, Carbon, Set, MC28
- 1 x BPAC-0001 - HRC Brake Reservoir Kit
- 1 x BPFG-0007 - Fuel Tank, GRP, VFR750R RC30, Unpainted
- 1 x TYLY-0020 - Upper Stay, NC35 RC211V Style Type, Assy.
- 2 x TYLY-0038 - Fork Caps, Blue/Red, Full adjustment.
- 2 x BPCH-7228USED - Splash Guard, Carbon, MSX125SF Grom, USED
- 1 x BPFS-0198 - Kit, Seat Set, GRP, (Race), MC21, MC28, NSR250V
- 3 x BPLT-0023 - Turn Signals, Pair, LED, Universal
- 1 x BPFS-0021 - Kit, Seat Set, Street, NC29 RC211V
- 1 x 90133-KPP-T00 - Bolt, Bodywork Mounting, collared, M6, CBR
- 1 x BPCC-0038 - Inner Cowling, Carbon, Stock Shape, RVF400, NC35
- 2 x TYLY-1221 - Tank Filler Cap, Keyless, Racing Type, Honda, Type 3
- 3 x BPAC-0005 - Mini brake reservoir, Carbon
- 1 x STHB-0015 - Bush, 8mm x 20mm x 15mm
- 1 x BPFS-0037 - Kit, GP Seat Set, Race, GRP, VJ22 RGV250
- 1 x BPCF-9010 - Front Fender, Carbon, Sports Universal
- 2 x TYLY-0001 - Upper Stay, MC18/MC21/MC28, GP Type, Assy.
- 1 x BPLT-0031 - Slim Style LED turn signal lamp Pair, Rear
- 2 x BPCC-7548 - Engine Cover, Right, Carbon, GROM (5 speed engine)
- 2 x 99101-MEG-1300 - Main Jet, KEIHIN, (99101), #130
- 2 x BPCF-7121 - Front Fender, Carbon, Suzuki Hayabusa 2008-2012
- 1 x BPCC-0008 - Fairing In Fill Pieces, Carbon, Pair, NC35
- 1 x BPFX-9125 - Passenger Seat Cover, GRP, MC22, Assy.
- 2 x 64105-KV3-505 - Rubber Molding, Fuel Tank.
- 1 x 61100-K94-TOOZA - Front Fender Comp, FR 61100-K94-T00ZA
- 3 x TWDS-0009Black - Tyre Warmers, Tyre Warmers, Moto3/GP125, Black
- 1 x TYLY-0146 - Ignition Switch Holder, CNC Silver, Suzuki RGV250 VJ22
- 3 x TYLY-0009 - Rear Stand Bobbins, Silver, M8, Assy.
- 2 x TMER-0169 - TYGA Bike Dust Cover, Red/Black, Force V4 VFR400R
- 1 x BPCC-6002 - License Plate Frame, Carbon, USA Spec
- 1 x TYTO-0010 - Front Fork Overhaul Kit, MSX125 Grom
- 1 x STAA-0024 - Step Kit (Street), (Adjustable), KTM RC200/250/390 (2014-2021)
- 2 x EXSL-9005 - Silencer, Aluminium Premium, Two Stroke, Assy.
- 1 x 53166-KW7-900 - Grip, L Handlebar
- 1 x TMER-0148 - TYGA Bike Dust Cover, Red/Black, YPVS
- 1 x TYLY-0111 - Tank Filler Cap, Keyless, Racing Type, Yamaha/Ducati
- 1 x LEVB-7001 - Brake Lever CNC, TYGA, Adjustable, Flip-Up Type MSX125 Grom, Monkey125, CBR125/150/25
- 1 x EXCS-0024 - Set, Exhaust Chamber, Stainless Steel, NSR150SP
- 1 x BPCF-7131 - Front Fender, (Carbon), KTM RC125, RC200, RC250, RC390
- 1 x BPSY-0045 - Stay, Lower
- 1 x BPCC-7035 - Heel Guard, Carbon, Pair, Honda JC22 NSR125
- 1 x BPCC-9112 - Swing Arm Cover, Pair, Carbon, 1998-2006 Aprilia RS-250
- 1 x SCRE-0056 - Screen Clear, Stock Shape, CBR250RR MC22, Kit.
- 1 x CKA-Honda-MC19 - Carb Service Kit A, 16 pieces, Honda CBR250R MC14, MC17 & MC19
- 1 x LEVB-7039 - Brake Lever CNC, TYGA, Adjustable, Flip-Up Type, KRR150ZX
- 1 x BPFF-9002 - Front Fender, GRP, NC29/30, 2006 RC211V style
- 1 x BPCX-9008 - Air Duct, Carbon, RC211V Style, Assy.
- 1 x SCRE-0117 - Screen Dark Tint, CBR400RR NC23, Kit.
- 1 x SCRE-0016 - Screen Clear, NSR250 MC21, Kit.
- 1 x 6005-001-00 - Front Brake Light, Switch, Honda Type
- 1 x BPAC-0002 - HRC Radiator Overflow Bottle Kit, Assy.
- 3 x TELC-0012 - Wiring Boot, 14-40
- 1 x TYLY-0317 - Meter Stay, RC36-2, RC30 Style
- 1 x TYLY-0124 - Upper Fairing Stay, Pair,NF5 RS250R
- 1 x 0900-991-90004 - Fuel Hose, (Dia. 8 x 13/1m.)
- 1 x BPFS-0029 - Kit, Seat Set, Street (with Carbon), NC35, RC211V
- 1 x BPCC-7417 - Frame In-Fill Panels, Pair, Carbon, NC30
- 1 x SCRE-0040 - Screen Double Bubble dark tint, NC30, Kit.
- 1 x BPCC-7039 - Rear Shock Guard, Carbon, KRR150ZX
- 1 x BPCX-9009 - Airbox, Carbon, NC30/35
- 1 x TYLY-0089 - Bracket, Rear Brake, 84 mm Brembo Conversion, Silver, MC28/NC35
- 1 x 99101-PH9-1280 - Main Jet, KEIHIN, (99101), #128
- 1 x TWHL-0015 - Forged Aluminium Racing wheel set, 5 spoke, PVM, Front 3.50 x 17, Rear 5.50 x 17, Satin Black
- 1 x BPFU-0005 - Upper Cowling, Street, GRP, NSR250 GP250, Assy.
- 1 x BPCC-0129 - Cover, Kevlar, ECU, NX5 RS250R
$33,692.25US